Isn’t the web an amazing place for inspiration? One of the blogs I follow is Lovely Crafty Home. Rachael shares tons of great ideas on how she makes her home truly beautiful. It was her Ultimate Brown Paper Bag Flooring Guide that inspired me to create this awesome floor in my woman cave.

Now at the bottom of Lovely Crafty Home’s flooring guide, Rachael tells us that her technique won’t work on concrete floors. However, she says others have had success using polyurethane only, no elmer’s glue. The downside is you won’t be able to dye your papered floor. I wonder….RIT dye worked for me the last time. Would it work in a polyurethane only method? Read on (hint…..it does).
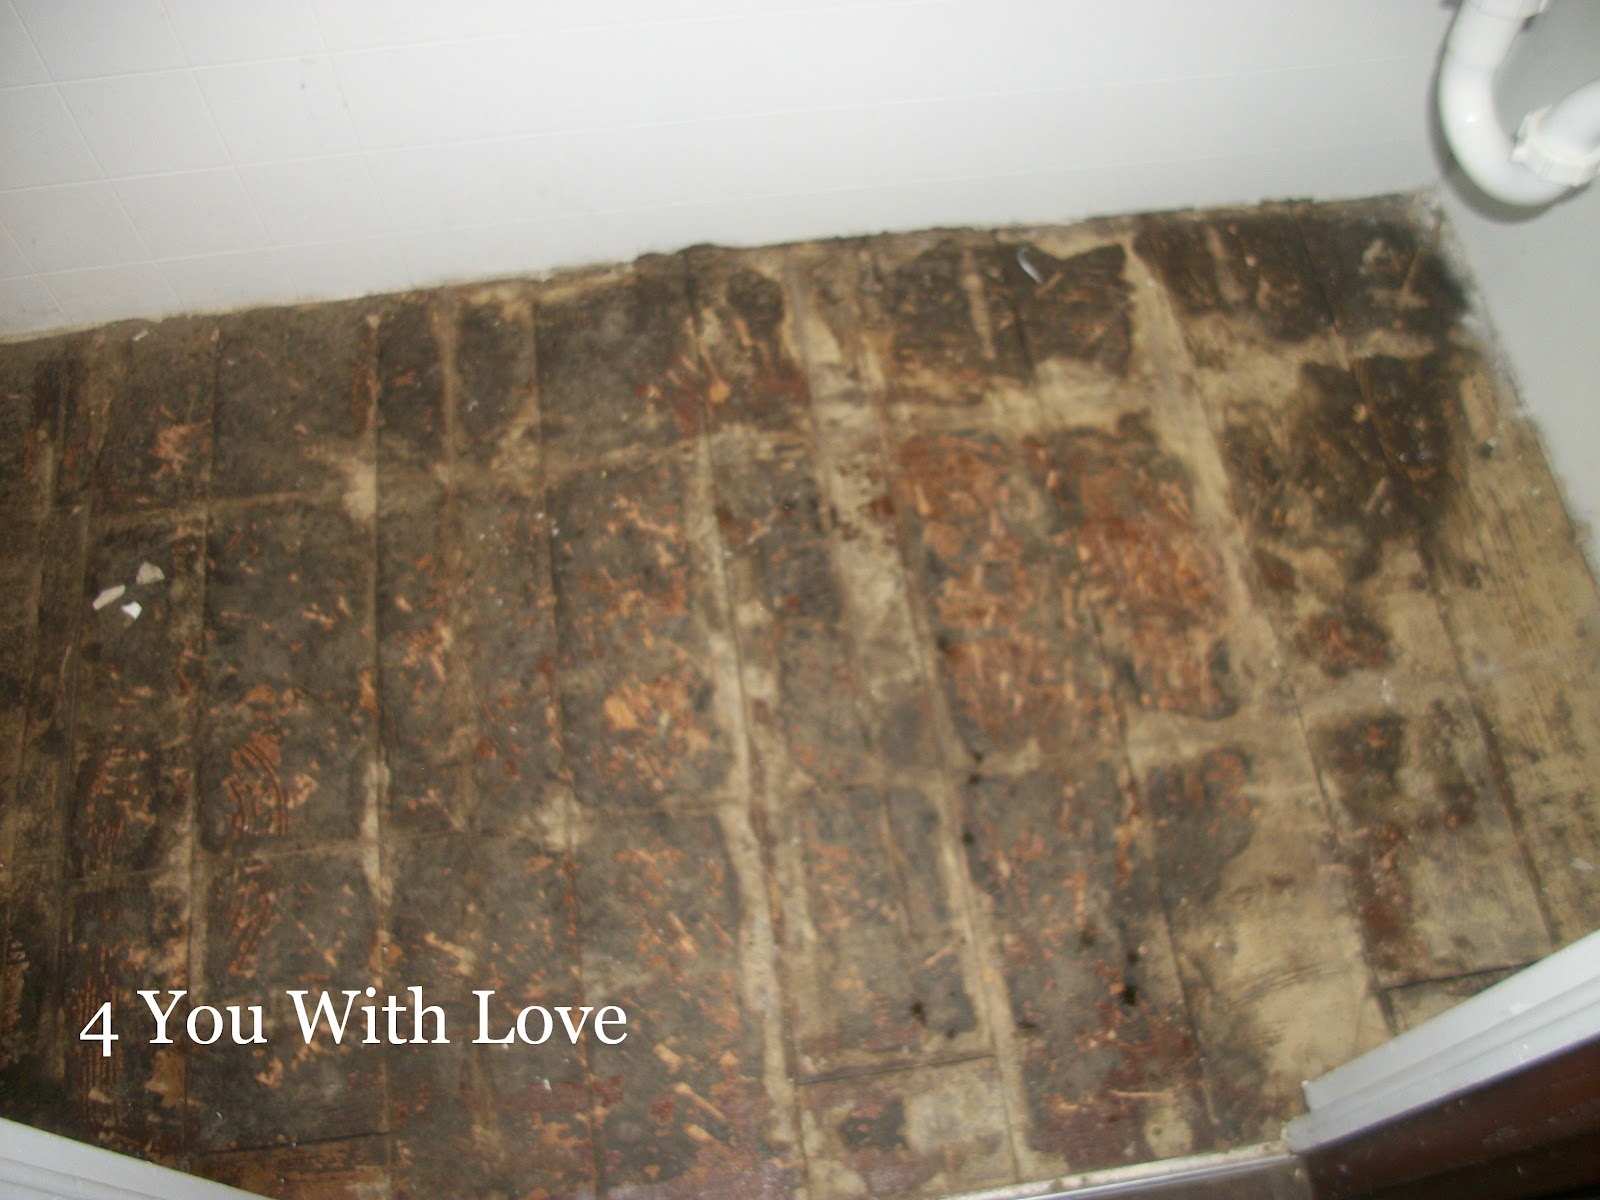
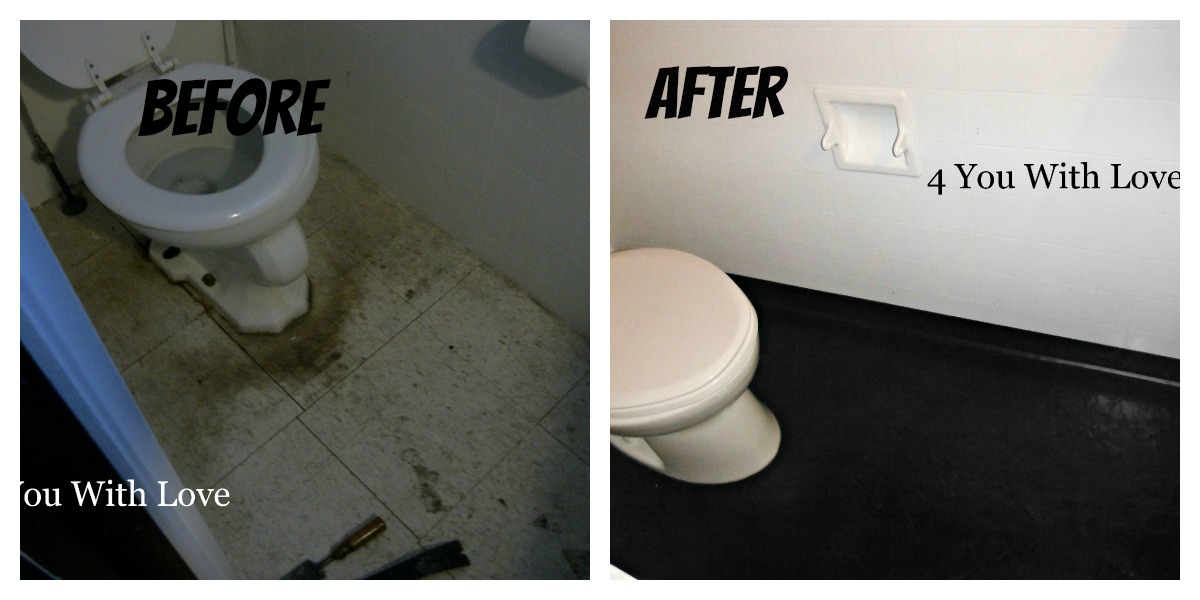
I’m doing my bathroom remodel (down stairs half bath) and the floor is HIDEOUS! Take a look!

So the first thing I have to do is remove the old tile. I always hate this step but at least the flooring is old enough that the tile comes up fairly easily.

Here’s what’s below the tile. Old pine flooring. U.G.L.Y.! We definitely need to be getting this covered up again.
You need to make sure that all your boards are securely fastened down. If you have boards that move you run the risk of them cracking your new flooring if you skip this step so don’t!
Next, you need to brush on a barrier product to make sure that any gaps in your floor while also providing a water barrier (since this is in the bathroom). We used Redgard. You can find it here.

Once your floor is sealed (and dry) it’s time to apply some floor leveler. I have found that even though houses are built with flat floors, as houses settle they may not be flat anymore. We used a concrete leveler that is inexpensive and fairly easy to work with. You can get it here.
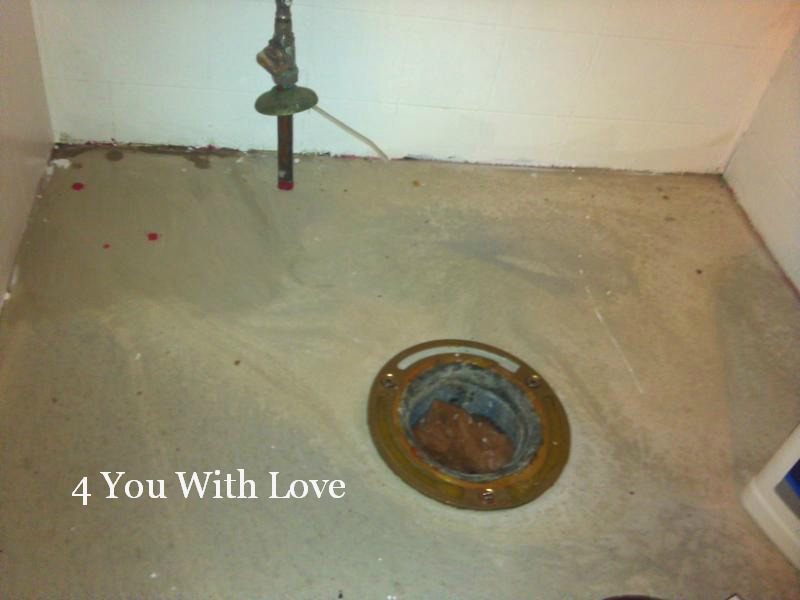
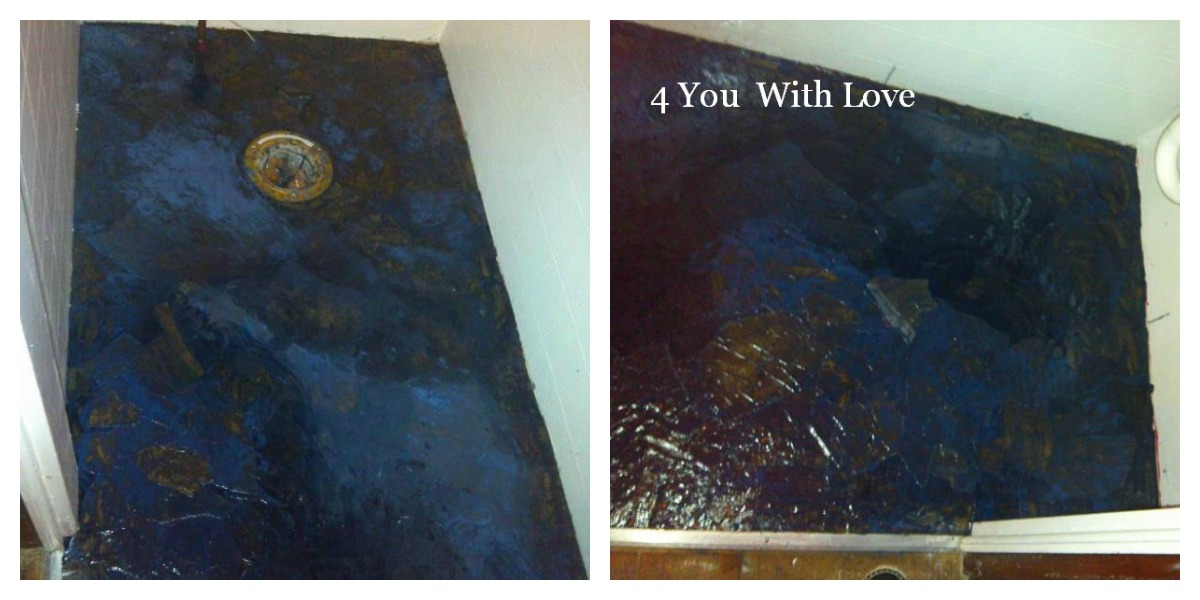
So, we’ve now gone from an UGLY tile floor to an UGLY pine floor to an “eh” concrete floor. Time to make it beautiful. This time I used powdered black RIT dye. I added the entire contents of the dye box and added 1/2 cup HOT water: mix THOROUGHLY! (note: I would recommend you use the liquid dye as I did in my previous floor).
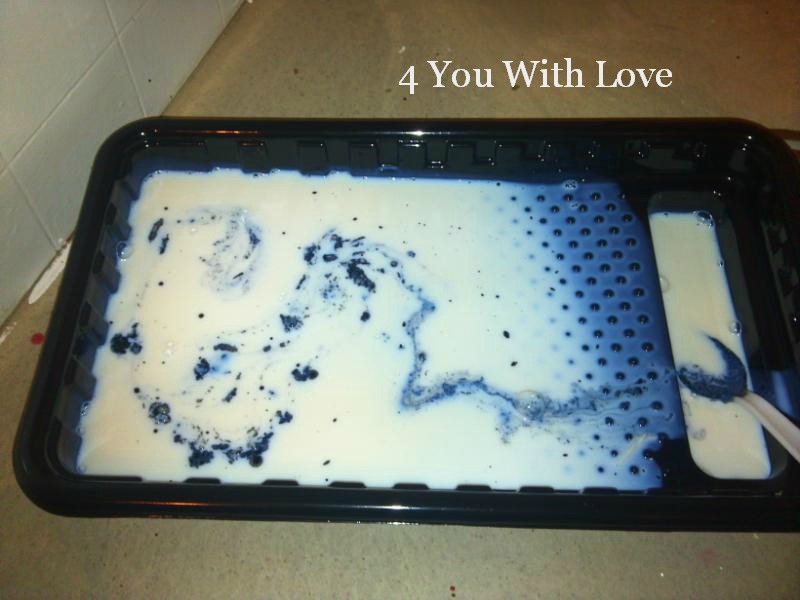
Now add your crumpled paper (see notes at the end of the post) to the polyurethane mixture and allow the paper to become soaked with polyurethane. It won’t take too long. The paper will feel different when totally wet, a bit more flexible.
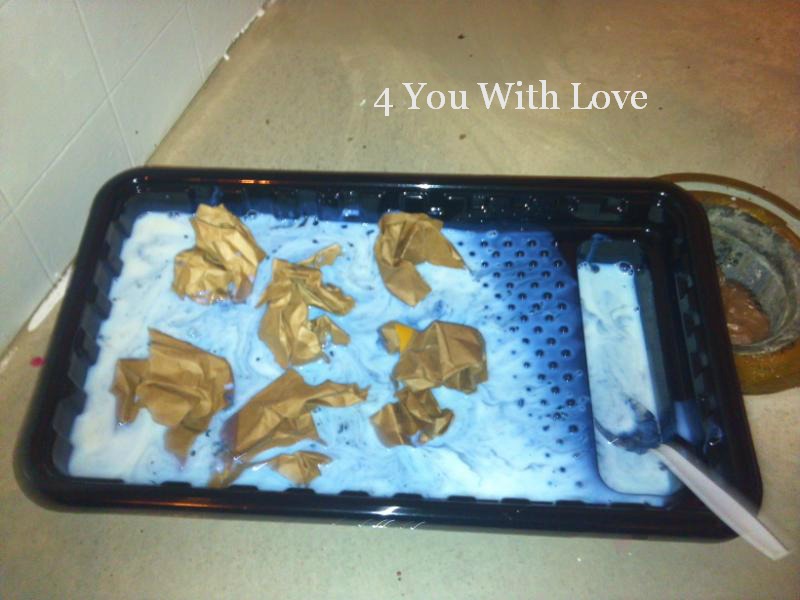
Starting in one corner, begin covering your floor with your paper pieces. Make sure they are flat with no bent sides and no air bubbles underneath. You really need this layer to adhere to your floor.

Continue working until your entire floor is covered. Here are two pictures of the floor after the first layer of paper.
- Note, these steps are for adding a cement leveler in a bathroom. If you already have a cement floor, you may be able to skip some of my preliminary steps.
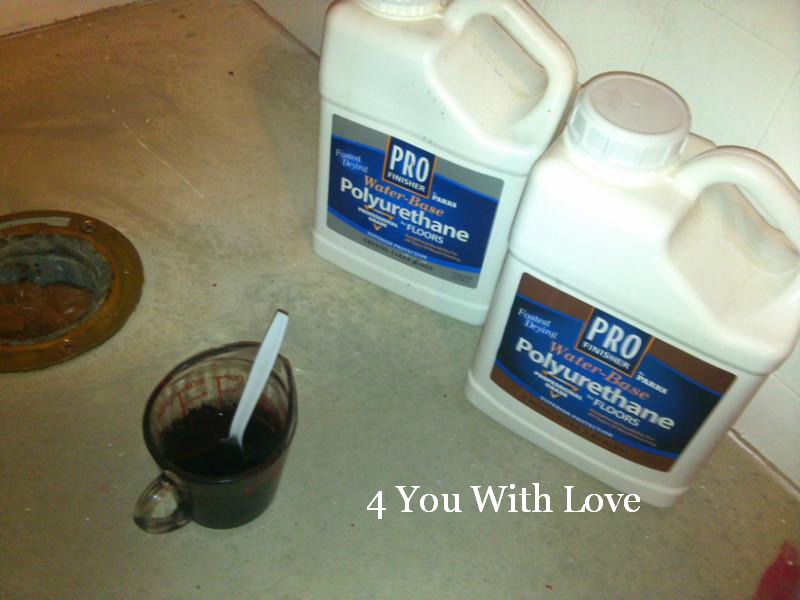
- Use a water based polyurethane if you are mixing RIT dye (oil based will NOT work)
- When adding RIT dye to your polyurethane, do not add too much. If you do, your polyurethane will thicken up and achieve an almost gel like texture.
- I would tear/crumple up my grocery bags the night before while watching TV. Place pieces with straight edges in one bag (these make great edge pieces) and place the other pieces in a second bag.
- You can use the printed side of your paper grocery bags. However, when you dye your polyurethane, you will find that it is difficult to determine which side of the paper has the printing since the dye will have really soaked into your paper. Do NOT use the parts of the bag where it is two layers thick (glued together).
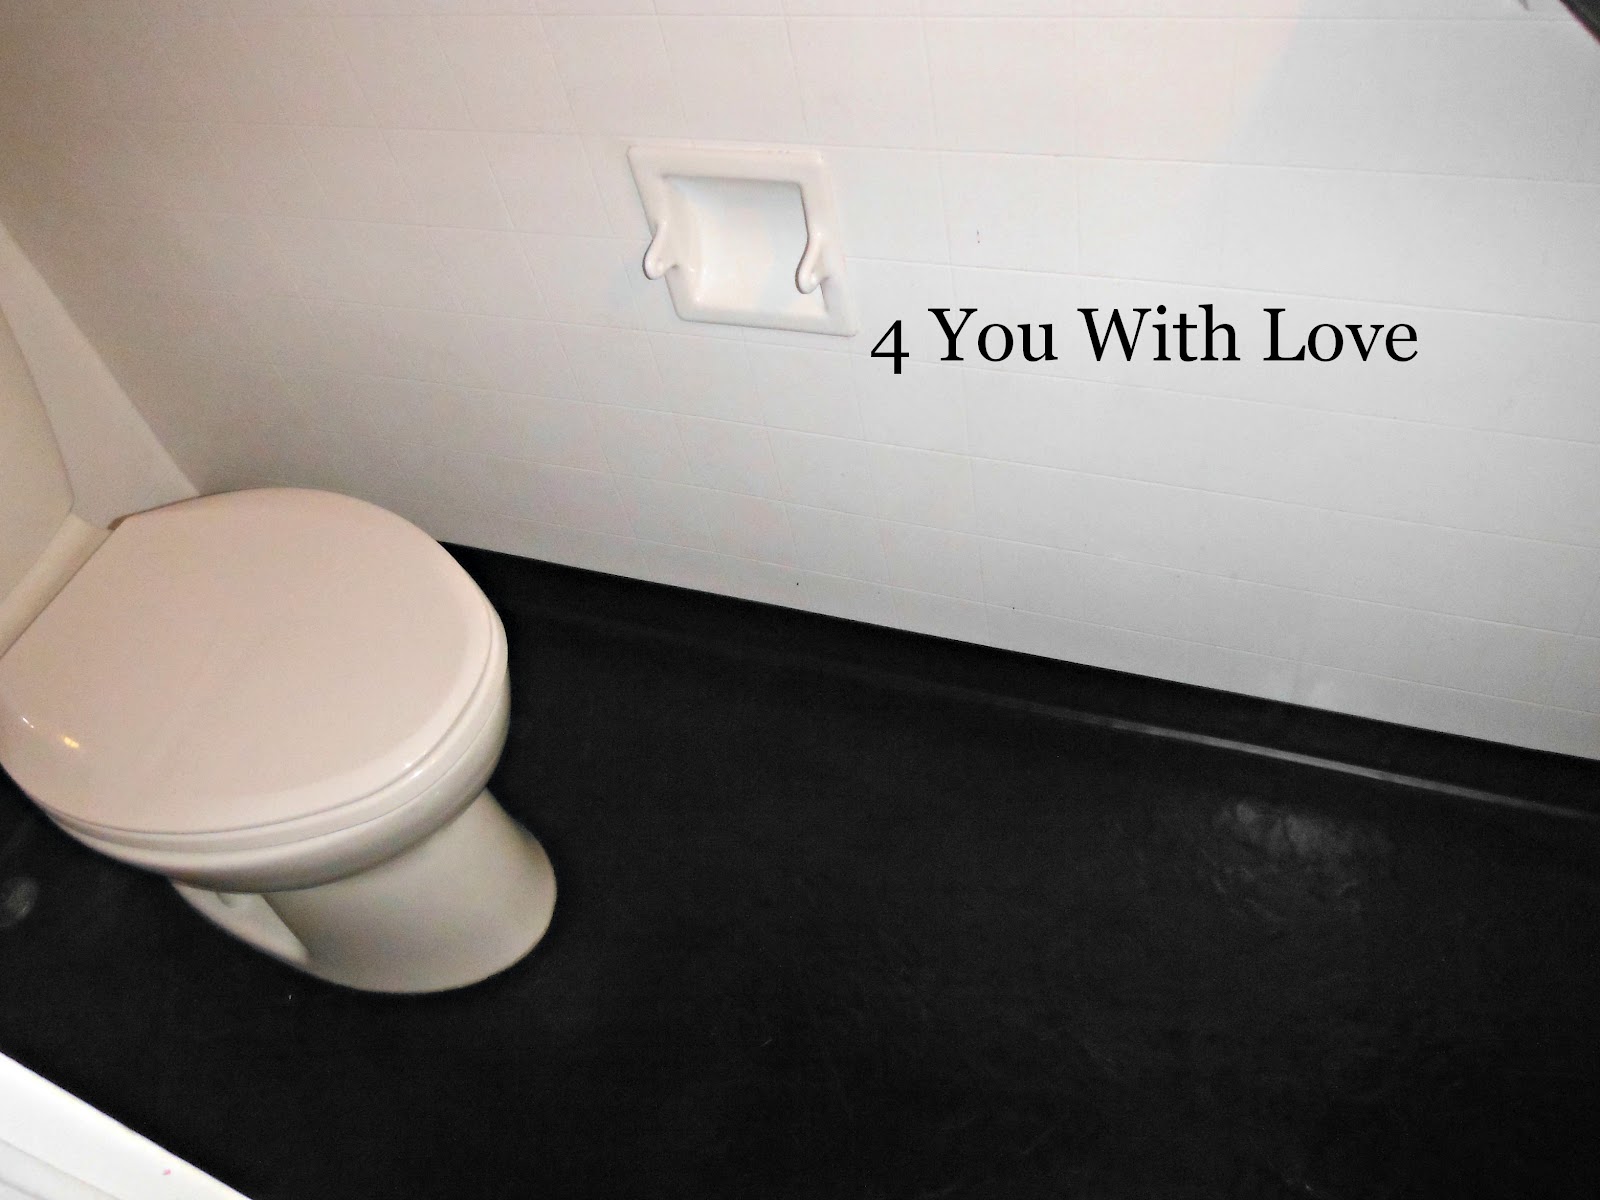
It’s been almost a year and the floor has worn perfectly. It hasn’t faded or lifted away from the concrete.
I need to do this!
OMG that floor looks AMAZING! I would have never thought to use dyed paper bags!
I have a huge bag of torn bags that I did after I read your post on the other floor. I have just been too chicken to do my bathroom. I wasn’t sure if it would stick! Thanks for this post. I think I will finally do it this weekend since it’s a long weekend.
Your floor looks AMAZING!!
AMAZING. What an incredible transformation. The difference is unbelievable. Really well done!
I had NO idea you could do that1 It looks great! Do you think it would work outdoors on a concrete patio?
It might. You should probably find some sort of outdoor polyurethane. then I would try it on a sample, say a concrete block. Also, FYI, you came up as a no-reply blogger so I couldn’t respond via e-mail. Have a great day!
That’s unbelievable Marilyn. It’s a real credit to you. I wouldn’t have had the patience. Well done. It looks lovely!
Anne xx
Wow, this is amazing!!! You are a woman of many talents! it looks so good!!!
OMG this is taking DIY to a whole different level – what a fabulous job ( and tutorial ) absolutely loving it.
Your newest follower – would love to have you drop by for a visit and follow back when you can
Hugs,
Suzan
Great job!! I love that you are using paper bags to cover your floor. Thanks for sharing at Take it on Tuesday!!
You did a great job ((although i love old pine too)))) Absolutely gorgeous. Thank you for linking it up at our linky party at http://www.fineCraftGuild.com
Hi,
Nice work done here by you. I am very much interested and got very informative knowledge from here .
Thanks a lot.
Polyurethane
I have tried this technique but brushed te glue mixture on the front and back of my pieces of brown paper. Now I am faced with alot of wrinkles and after let it dry overnight I began applying poly with the wrinkles set in because I had seen on another site that they would eventually smooth out. It has been several days and I still have some big wrinkles. Luckily I only did a small area. Should I start over? What would be your suggestion? I am applying this over vinyl. Should I use poly instead of glue? HELP!
First, Luann, I hope you receive this message because you came up as a no reply blogger on my e-mail so I could not respond directly. A couple of tips from my experience. I usually start off doing a technique with a sample board so that I can experiment before I begin my big projects (I have learned this the HARD way!). Anyway, I did not experience many wrinkles but that may have been because I soaked my scrunched paper balls in the poly (with this project) and a glue/rit dye mixture in a previous project (http://4you-withlove.blogspot.com/2012/02/paper-grocery-bags-elmers-glue-rit-dye.html). The paper was not falling apart but very pliable when I soaked it resulting it to lay very flat. Good luck with your poject! I hope you can work it out!
This looks amazing!
Wow this is nice! I like your post. But you should have provided us pictures or even videos on how to do such Polystick and all those stuff! But thanks though!
Polystick
Finally, an issue that I am passionate about. I have looked for information of this caliber for the last several hours. Your site is greatly appreciated.
http://azcarpetandtileinstallation.com/
I linked over from Lovely crafty Home. Love your floor. I don’t have any floors that need refinishing but, I’ve got a desk top in my craft room and office that will be getting this makeover! I’m now following your site- great job!!!!
Greetings! Very useful adviсe in this partіculaг post!
It’s the little changes that make the greatest changes. Many thanks for sharing!
my webpage; galaxys3.Fr
Feel free to surf my page :
I think the things you covered through the post are quiet impressive, good job and great efforts. I found it very interesting and enjoyed reading all of it…keep it up, lovely job..
Granite Calgary
This is awesome Marilyn, looks great. So many people, including myself would never have thought to do this!
Such a simple way to remodel your bathroom floor, ideas like this are always welcome, i never thought that it would be damn easy to make your bathroom floor nice and clean.
I have concrete floors and really love this look. Can you tell me if you did multiple layers with your poly-RIT soaked paper. Or is one layer enough? Also, how many coats of poly do you recommend? Thanks you! From Julie
It is nice to see that this can be accomplished using concrete floors. Concrete floors are just so versatile, durable, and inexpensive. Now it can also be stylish! Especially for high traffic areas I would always choose concrete over any other floor type. Your bathroom looks amazing and durable now! Thanks for sharing!
Fantastic blog! I don’t think I’ve seen all the bags of this subject the way you’ve pointed them out. I love seeing websites that realize the value of providing a quality information. Thanks for sharing this!
Paper Bags
While I’m not crazy about dark colors in small spaces the quality of instructions and step by step pictures are wonderful! I’ve been looking for something this detailed for weeks now. Most people post about covering wood floors so your post on covering concrete is very welcome.
I’ll be referencing you on my site Crafty Swaps when I write a post about this treatment. Thanks and enjoy the new floors!
I love your floor. I did mine somewhat different, but here are the things I think I learned. Use a leveler like she did on her bathroom. Two dilute your glue! If using the new improved from the hardware store in smaller containers, use a little more water so it’s about the consistency she recommends, 1/2 and half or thin cream and when you’re almost out, get more! Don’t try to do one more piece this will lift. 3 use varathane for floors with a floor applicator.
Has anyone done this on concrete floors. I want to do it in the kitchen of an older concrete block home.
It is just concrete, NO WOOD. Right now it has vinyl peel & press tile but I have a hard time with it being damaged since this is a rental house.
Please help.
Has anyone done this on concrete floors. I want to do it in the kitchen of an older concrete block home.
It is just concrete, NO WOOD. Right now it has vinyl peel & press tile but I have a hard time with it being damaged since this is a rental house.
Please help.
Brilliant idea. The natural beauty of home is good quality flooring and you mention this in your post. Superb sharing.