I wrote this post as part of a paid campaign with Plaid Crafts, Michaels and Blueprint Social. The opinions in this post are my own.
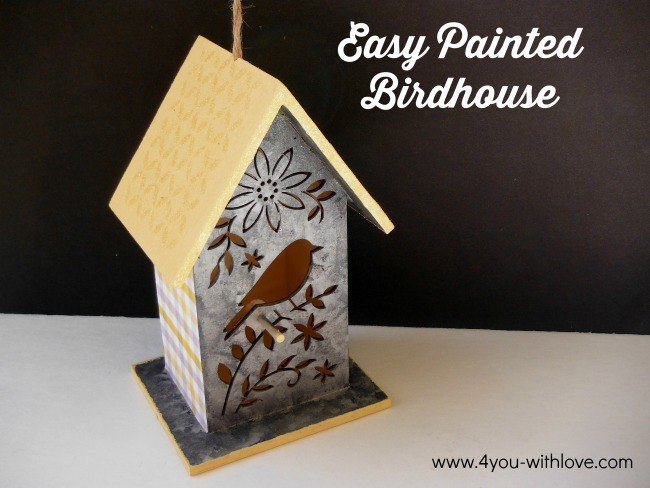
Well, January has definitely hit here in Ohio. This week is going to be filled with snow and frigid temperatures. Brrrrrr! The weather definitely has me dreaming about the return of spring. To lift my spirits, I decided to craft. Yup, crafting makes everything better. Here’s what I whipped up the other day: a super easy painted birdhouse with Michaels Spring Wood Surfaces!
I know spring is returning when the birds return and I hear their lovely song in the morning. So, in my “ugh, it’s cold” mood, I was super stoked when I received a package of Plaid Craft crafting goodies and they included this Spring Wood Surface wooden birdhouse along with paints and other supplies. I looked through the box and then looked in my craft supply stash and these are the supplies I used.

Supplies (that are all available at Michael’s Craft Stores):
- Spring Wood Surface Wooden Birdhouse
- Folk Art Paints in these colors: Steel Gray, Metallic Silver Sterling, Licorice, and Sunflower
- Martha Stewart yellow glitter
- Mod Podge matte (you can use sparkle Mod Podge if you’d like a bit more bling on your birdhouse)
- Plaid Mod Podge Stencil
- Optional Coordinating grey/white plaid scrap book paper
- Foam pouncers, foam brush & small paint brush
Okay, are you ready to start crafting with me? First, paint the body and the underside of your spring wood surface birdhouse roof with the gray paint.
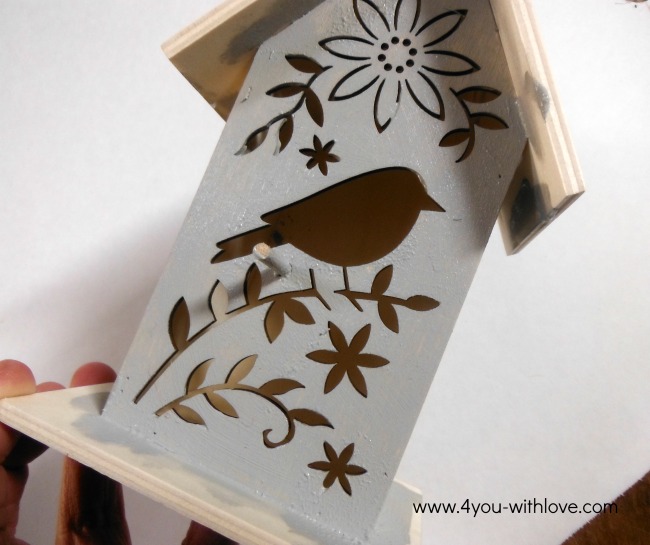
In a small disposable cup, add a bit of black, silver & gray paint (do not mix). Then dip your pouncer into the paint and then dab it onto your birdhouse. You are going for a mottled effect so just keep adding paint until you get the look you like.
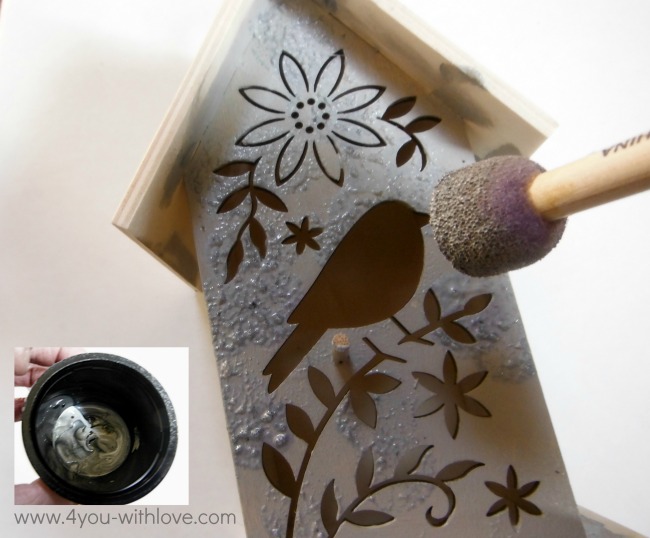
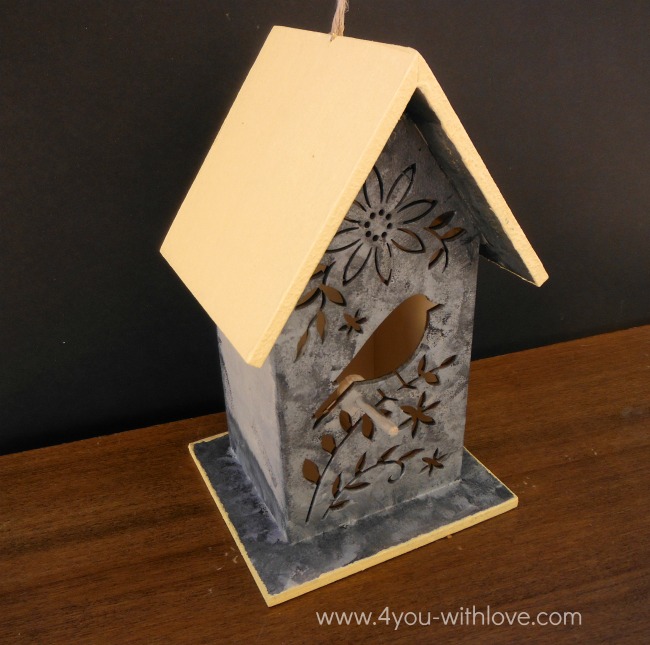
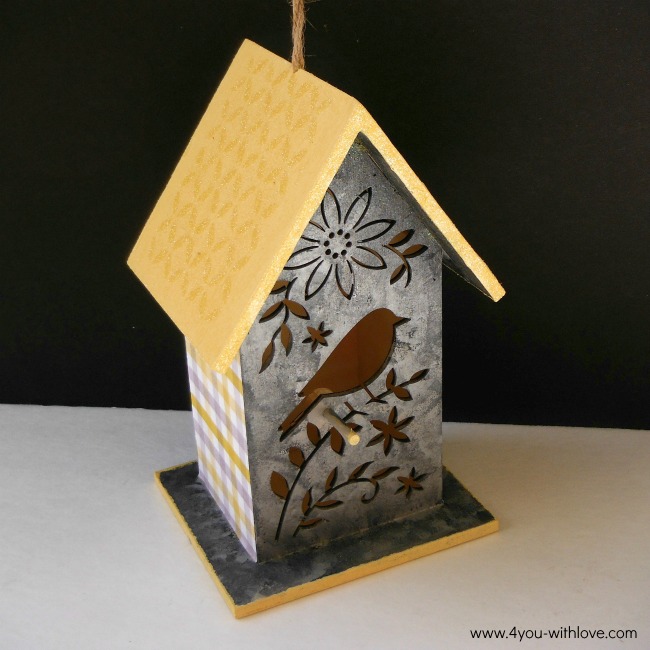
When you like the look of your gray paint, allow it to dry. Then paint the roof and the edge of the base yellow.
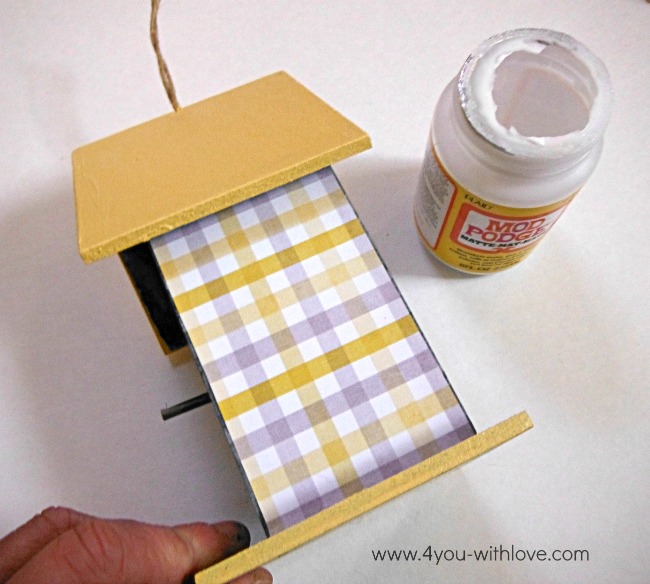
I loved this plaid scrap book paper and I felt it tied the gray and yellow colors together. So I cut out two rectangles and added them to the two sides of the birdhouse using Mod Podge. (Apply a thin coat of Modge Podge to the birdhouse and then attach your paper. Continue to press & smooth out to ensure a good bond with no air bubbles. Once dry, apply an additional thin coat of Mod Podge to seal.)
Now I felt that the yellow roof was a bit “flat” so I decided to add a glittered pattern using yellow glitter. First apply the stencil to your roof and using a pouncer, add Modge Podge (you are stenciling on a Modge Podge rather than paint). Remove the stencil. Then, working quickly, pour glitter onto the stenciled roof and then tap off. Repeat with the other side of your roof. I also pounced on some Modge Podge along the roof edge and added glitter.

And here’s my final birdhouse. Do you like it? See, it’s super easy!
For more inspiration and amazing crafting projects, check out these links:
Plaid Website / The Plaid Palette Blog / The Plaid Newsletter / Plaid Crafts on YouTube / Plaid Crafts on Pinterest / Plaid Crafts on Facebook / Plaid Crafts on Instagram / Plaid Crafts on Twitter / Plaid Crafts on Google+
Throughout the month of January, bloggers will be sharing their Spring Wood Surface tutorials! So check back to see other ways to craft away the winter blues!
Such a sweet piece to tide you over until warmer weather!