I must admit, I’ve been drooling over all the gorgeous crochet baskets on Pinterest. They are so sturdy and practical. I have also been crushing on ones that incorporate a stitch that adds some texture (like diamond trellis). Looking at the patterns it seems the majority require 2 things to make a firm sturdy basket: working on a much smaller hook and working 2 or more yarns at one time. Well, I find that working on a smaller hook while holding more than one yarn can be a bit cumbersome. So, I decided to design this basket where you only use one strand of yarn.
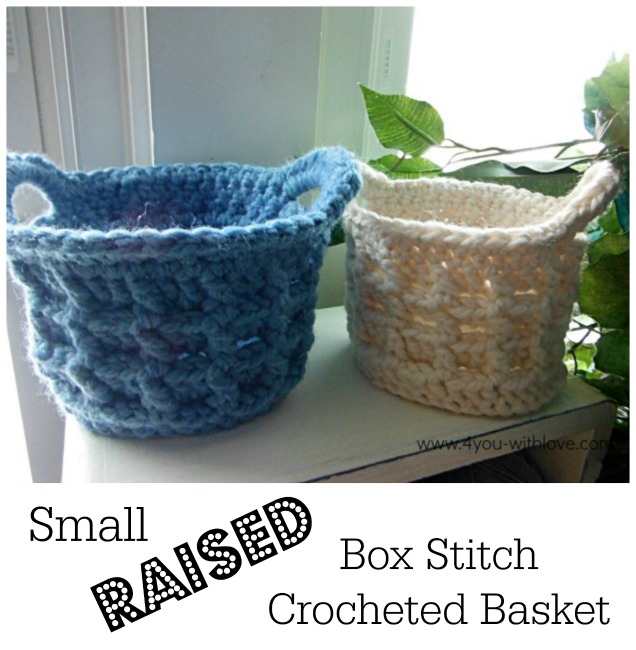
So what do you think? This is a smaller basket (4.5″ wide x 4″ high) that’s great to try a textured crocheted basket. You can complete it in an evening and you only need to purchase one skein of yarn. Let’s make one together!
Small Raised Box Stitch Crochet Basket
Supplies:
- 1 Skein bulky yarn (I used Lion Brand Wool Ease Thick & Quick)
- H (5.00 mm) crochet hook
- yarn needle & scissors
Abbreviations:
- ch chain stitch
- ss slip stitch
- sc single crochet
- hdc half double crochet
- dc double crochet
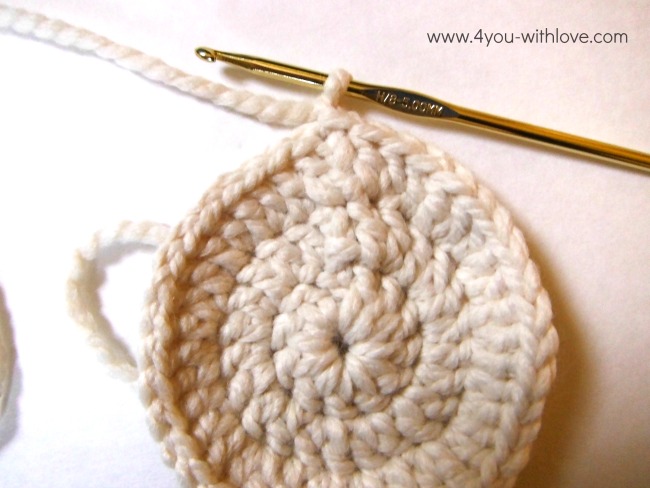
We will start off by making the base. You will be making a flat circle.
Make a slip not, ch4, join with a ss to form a ring
Round 1 Ch 3 (counts as first dc), 11 dc into the ring, join with ss (12 stitches)
Round 2 Ch 3 (counts as first dc), 1 dc into the base of your chain, *2 dc in each dc to the end of the round* join with ss (24 stitches)
Round 3 Ch 3 (counts as first dc), 1 dc into the base of your chain, *1 dc in the next dc, 2 dc in each of the next 2 dc, repeat from * to last 2 dc, 1 dc in next dc, 2 dc in last dc, join with ss (40 stitches)
This is what your project should look like at this point.
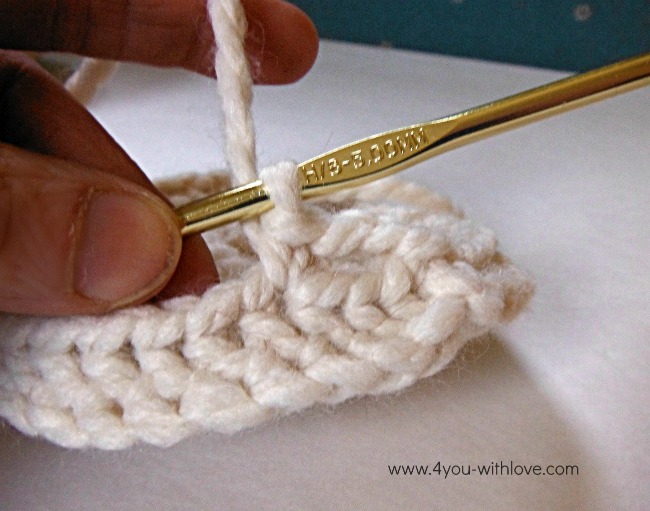
We are now going to transition from the base to the sides. This technique may feel a bit awkward but it makes a beautiful seam which also gives the base of your basket some stability. What you will be doing is stitching through the post of the double crochet from round 3. Here I’m showing you the leg that I am talking about.
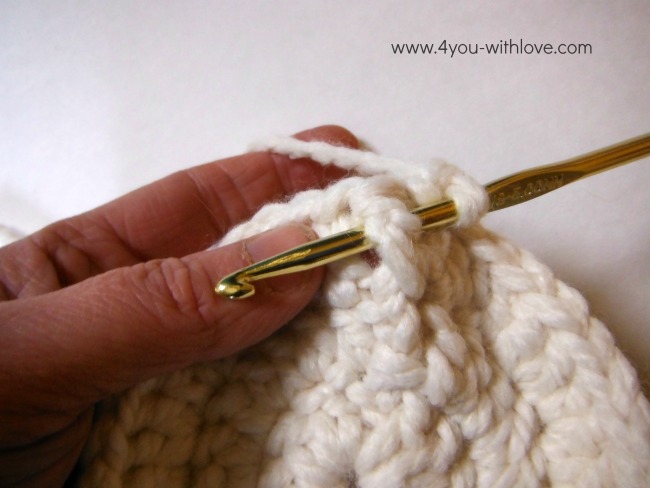
I’ve shown you this based on the “right wide” of our crochet because it’s easiest to see. However, if we crocheted around this way, we would now be crocheting on the inside of our basket. So, we will actually be working on the wrong side of our circle. So flip your circle over and pick up the post like I have in this photo.

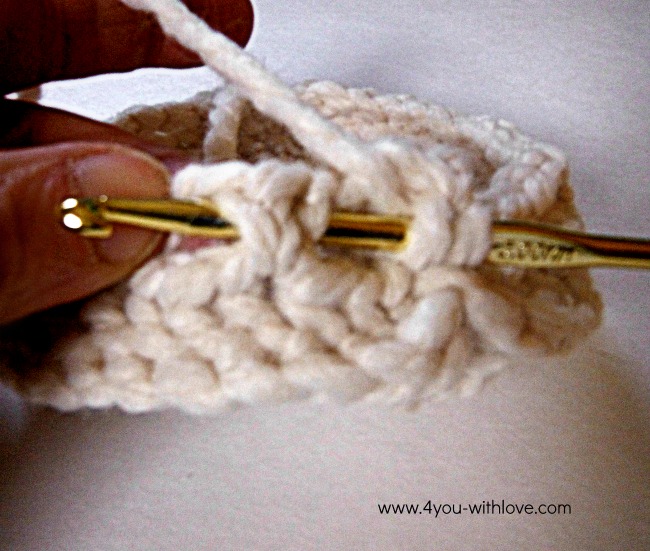
We will be working a single crochet so just pick up the yarn ….

and pull through and complete your single crochet like this….
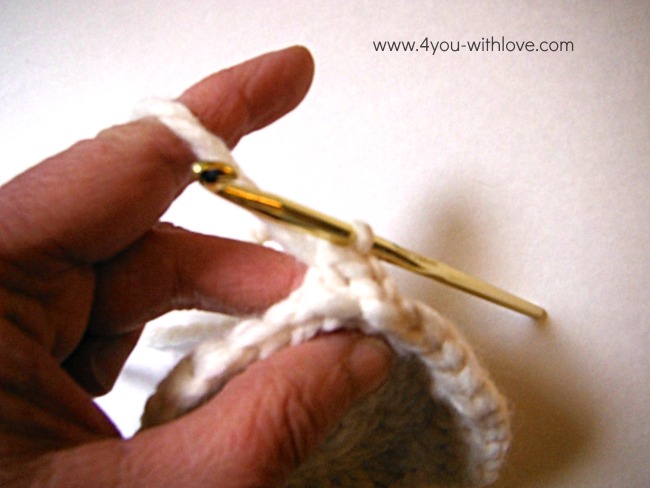
Okay, are you ready to continue? Back to the directions.
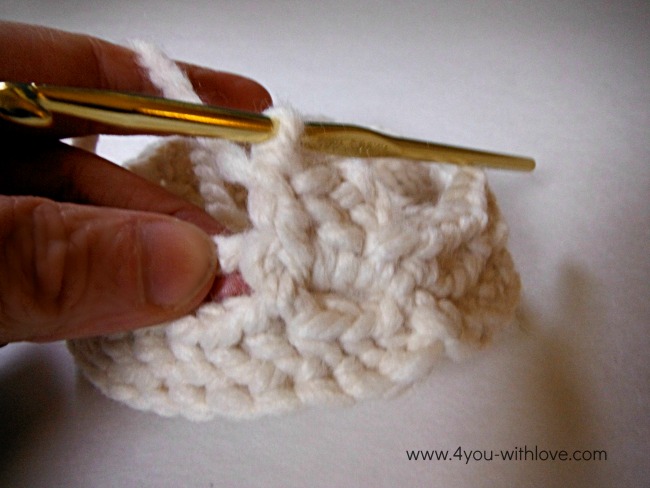
Round 4 Flip your crocheted circle over to begin work on the wrong side. Ch 1 (counts as first sc), 1 sc into the back post of each dc to the end of the round. Join with ss (40 stitches)
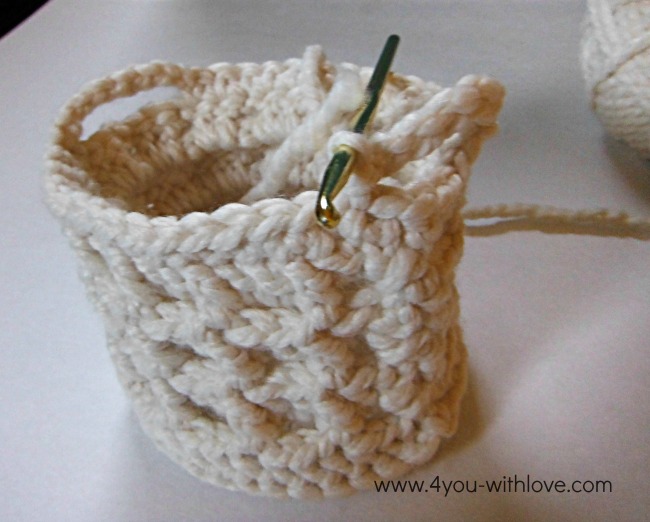
Now, we are going to crochet the sides of the basket using the raised box stitch. If you’ve never done this stitch before, it’s easy. Here’s a quick overview.
This stitch pattern consists of 2 rows. The first row is comprised of single crochets & chain stitches. You will do a single crochet into previous row’s double crochet. Then, you will chain two, sc into the third dc (creating a loop). See below.
The next round consists of double crochets: 3 double crochet stitch pattern. The first two double crochets will be done into the chain loop. The third double crochet you will work through the leg of the previous row’s single crochet. See below.
Here is what the 3 dc stitches look like.
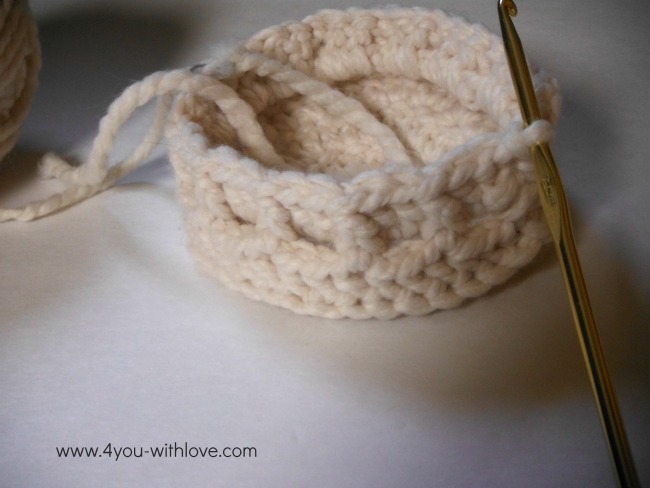
And here is how your basket will look like when you have completed the two rows that make up the raised box stitch pattern.
Okay, are you ready for to get back to the basket directions?
Round 5 Ch 3 (first ch counts as the 1st sc), skip 2 dc and sc into the third dc, *ch 2, skip 2 dc and sc into the third dc* repeat until 2 dc remain, chain 2 & ss to the first ch to join.
Round 6 Ss into the “2 chain space”, ch 3 (counts as 1st dc), 1 dc in the 2 chain space, 1 dc around the 1 sc post front to back , *2 dc into the 2 chain space, 1 dc around the 1 sc post front to back* repeat to the end of the round ending with the final dc behind Round 6’s initial ch1.
Round 7 Repeat round 5
Round 8 Repeat round 6
Round 9 Repeat round 5
Round 10 Repeat round 6
Now, it’s time to create the handles.
Round 11 *Ch 7, skip the first 5 dc and sc into the 6th dc, 14 sc (15 sc total), * repeat, ss to join.
Here is what you basket should look like.
Now, our last round will consist of hdc to give our handles a bit more “oomph” along with sc to finish off the edges. Here’s how.
Round 12 *12 Hdc in the chain 7 loop, 15 sc into next 15 sc* repeat, ss to join.
Fasten off and weave in ends.
Here’s a look at the final baskets.
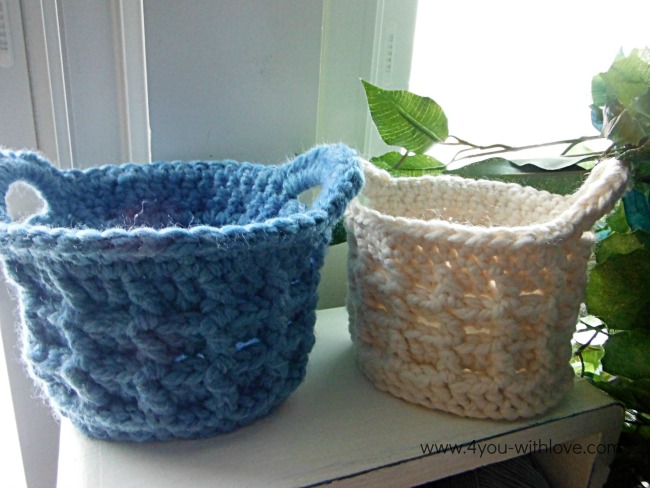
Here’s a view of the white basket so you can see the inside and also the (outside) bottom.

These baskets are the perfect size for a many of your organizational & storage needs. How about a skein of yarn, or some hot cocoa packets.

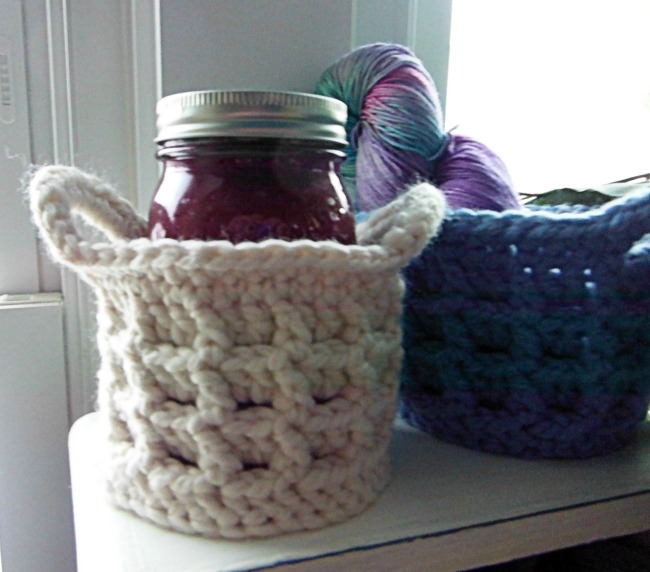
Or they are the perfect size to hold a mason jar!
So what do you think? I think I’ll make try making a larger version of this basket.
UPDATE: January 14, 2015 I did make a larger version of this basket and here’s the pattern: Large Raised Box Stitch Crochet Basket
Leave a Reply