Since it’s January, everyone seems to have organizing and storage on the brain. Well, I too am thinking of ways to have a more organized 2015. I also must admit, that I have a huge stash of yarn that has been saying, “knit & crochet with me”. So, I decided to kill 2 birds with one stone: use my stash to create some storage pieces. So, the other day I posted my first every crochet design: Small Raised Box Stitch Crochet Basket. It uses only one skein of yarn, worked with only one strand of yarn & takes an evening to complete. I must admit, I was so excited with how it turned out that I then adapted my design for a large crochet basket.
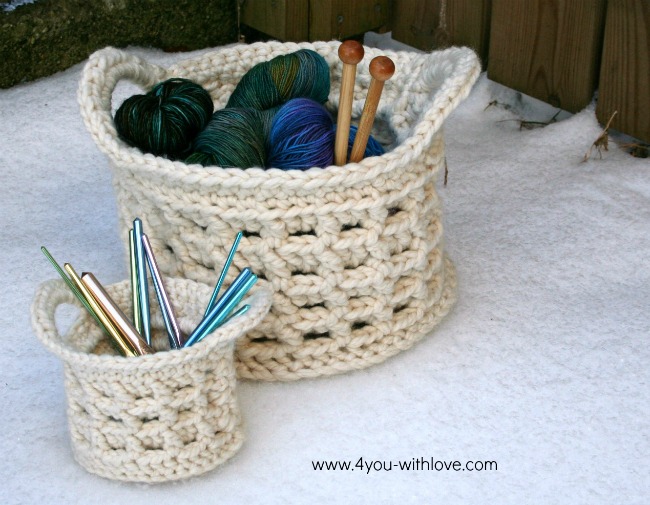
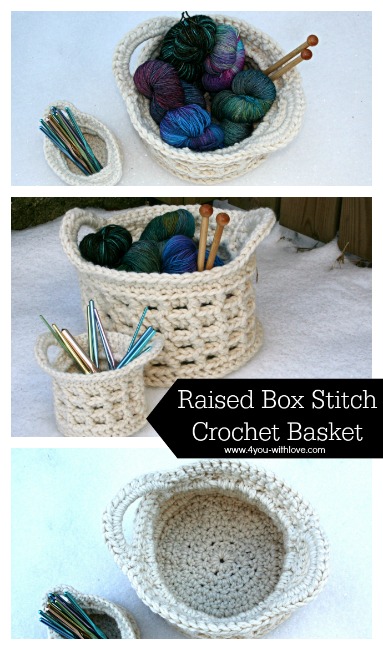 See, a small basket perfect for your crochet hooks, knitting needles, pens, pencils, etc, and a larger basket perfect for storing yarn, and works in progress. Both baskets are very similar in construction and are quick projects to complete. The pattern for the smaller version has photo tutorials for a few of the steps. If you find that you are confused, just click on the links to see the other post.
Large Raised Box Stitch Crochet Basket
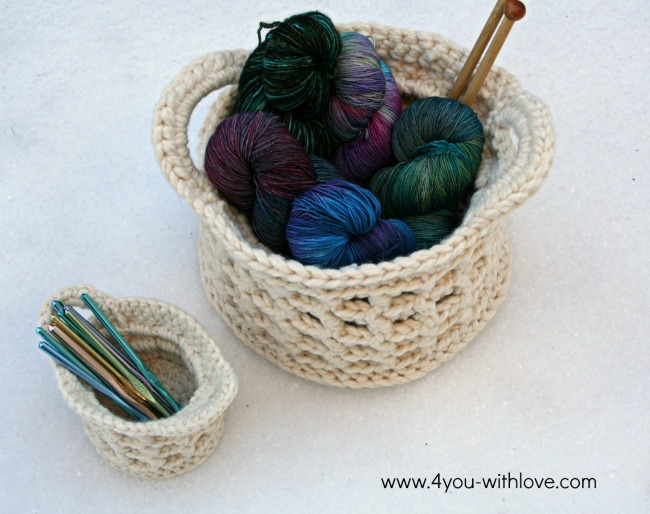
Finished size: Yours may vary depending on how tightly you can crochet your basket. My basket is 10.5″ wide at the base and 6.5″ high (not including the handles)
Supplies:
- 3 skeins Lion Brand Wool Ease Thick & Quick (106 yd/97 m per skein) or equivalent super bulky weight yarn
- Size N (9 mm) crochet hook
- Yarn needle & scissors
Abbreviations:
- ch chain stitch
- ss slip stitch
- sc single crochet
- hdc half double crochet
- dc double crochet
Gauge: Does not matter. However, the tighter you can crochet, the firmer (but smaller) your basket will be. You really want to crochet as tightly as you can to create a nice firm basket that doesn’t “Flop”.
Directions:
This basket is crocheted holding two strands of yarn throughout.
We will start off by making the base. You will be making a flat circle.
Holding 2 strands together, make a slip not, ch4, join with a ss to form a ring
Round 1 Ch 3 (counts as first dc), 11 dc into the ring, join with ss (12 stitches)
Round 2 Ch 3 (counts as first dc), 1 dc into the base of your chain, *2 dc in each dc to the end of the round* join with ss (24 stitches)
Round 3 Ch 3 (counts as first dc), 1 dc into the base of your chain, *1 dc in the next dc, 2 dc in each of the next 2 dc, repeat from * to last 2 dc, 1 dc in next dc, 2 dc in last dc, join with ss (40 stitches)
Round 4 Ch 3 (counts as first dc), 1 dc into the base of your chain, *1 1 dc in each of the next 3 dc, 2dc in the next dc, repeat from * to the last 3 dc, 1 dc in each of the last 3 dc, join with ss (50 stitches)
Round 5 Ch 3 (counts as first dc), 1 dc into the base of your chain, “1 dc in each of the next 4 dc, 2dc in the next dc, repeat from * to last 4 dc, 1 dc in each of the last 4 dc, join with ss (60 stitches)
Now we are going to transition to working the sides of the basket. To create a a nice clean edge, we will work the next round through the back post/leg of the previous round’s double crochets. You can see photos & a tutorial of how to do this HERE.
Round 6 Flip your crocheted circle over to begin work on the wrong side. Ch 1 (counts as first sc), 1 sc into the back post of each dc to the end of the round. Join with ss (40 stitches).
Here’s a birds eye view of the bottom of my basket (from the inside).

Now it’s time to work the sides of the basket. We will be working the raised box stitch and it consists of two rows: row one is a single crochet/chain stitch combo and row two is comprised of double crochets. To see a pictorial tutorial go HERE.
Round 7 Ch 3 (first ch counts as the 1st sc), skip 2 dc and sc into the third dc, *ch 2, skip 2 dc and sc into the third dc* repeat until 2 dc remain, chain 2 & ss to the first ch to join.
Round 8 Ss into the “2 chain space”, ch 3 (counts as 1st dc), 1 dc in the 2 chain space, 1 dc around the 1 sc post front to back , *2 dc into the 2 chain space, 1 dc around the 1 sc post front to back* repeat to the end of the round ending with the final dc behind Round 6’s initial ch1.
Round 9 Repeat round 5
Round 10 Repeat round 6
Round 11 Repeat round 5
Round 12 Repeat round 6
Round 13 Repeat round 5
Round 14 Repeat round 6
Now it’s time to work the handles. Before I write the directions here’s a quick overview of the next round.
- You will ss the next 10 stitches to create a nice edge to the bottom of your handle & break off your yarn
- You will then return to the first slipped stitch, join your yarn and chain 10 (for the handle).
- Then you create a nice top to the “box” on your box stitches, you will work 20 sc into the back loop of the next 20 dc
- Then repeat for the second handle: ss 10 stitches & break yarn, rejoin yarn, chain 10, 20 sc through back loop of next 20 dc and then you will be back at the start of the round.
Round 15 *Ss the next 10 stitches, break yarn. Join yarn at the first ss, ch 10, 20 sc through the back loop of the next 20 dc* repeat from * ss to join.
Round 16 Ch 1, *15 hdc into the chain 10 loop, 1 sc into each dc for the next 20 dc* repeat from *, ss to join
Weave in ends.
Now you have a crocheted basket to hold your yarn in!
 Here are my two crocheted baskets in my living room.
 If you are looking for additional DIY storage ideas, check out my DIY Wire Baskets and my DIY Chalkboard Yarn Bowl. Here’s to a creative, fiber filled day!
Very cute little baskets! I think these would also look great on the counter in the bathroom with some washcloths, soaps, cotton balls, etc in them!
Would love if you shared this at our Yarn Fanatic Linky Party – http://eyeloveknots.blogspot.com/2015/03/yarn-fanatic-linky-party-28.html