Today I’m going to share with you how to knit an I cord. Now, if you have no idea what I am talking about, an I cord is basically a knitted tube. It is used to make drawstrings for bags, embellishments, and much more. It’s super easy. All you need to know how to do is cast on, do the knit stitch and bind off. Are you ready?
How to Knit an I Cord
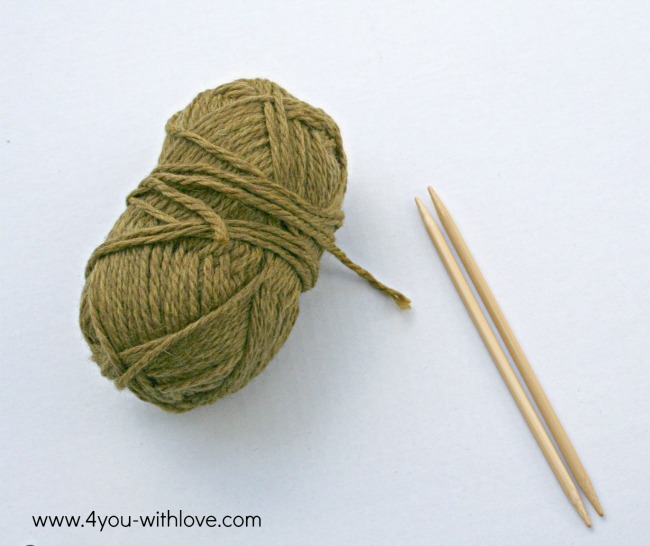
 Let’s gather our supplies. You will need yarn and 2 double point needles in the size appropriate for your yarn. I am using a chunky weight yarn along with US 10 (6.0 mm) double point needles.
Now, the trick is that you MUST use double point needles. This is because you are basically knitting in the round on a very small scale. This will be accomplished by sliding the work from one end of the needle to the other rather than turning your work.
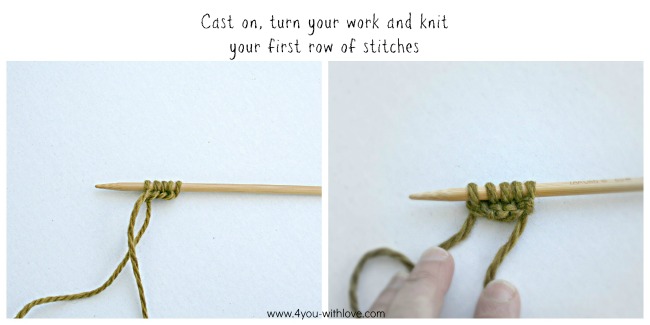
First, you will need to cast on. I chose to cast on 5 stitches however, you can do more or less based on the size of I cord you desire.
Now knit your first row as usual. Nothing difficult.
Now that you have knit your first row, rather than turning your work, slide the stitches to the other end of your needle. Wrap your working yarn behind your work and knit your second row. Note, you will want to pull your yarn snug for those first two stitches to ensure there are not gaps in the back of our I cord.
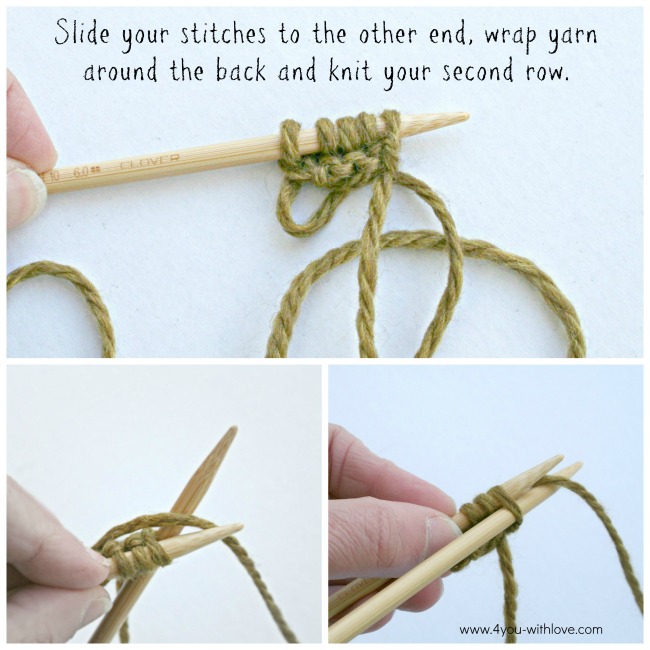
At the end of your second row, slide your stitches back to the other end of your needle (just like you previously did). Gently tug on your yarn tail….this will help your knitting form into a tube shape.

Knit the 3rd and additional rows just like you did the second row…
- knit to the end of the row
- slide work to the opposite end of the needle
- pass the working yarn around the back of your work and knit the next row, being sure to keep the yarn tight over the first two stitches
- repeat
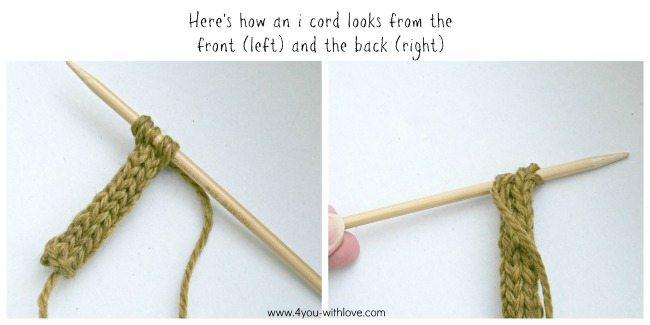
Let’s look at the front and back of the I cord I am knitting. See how the stitches just continuously work into a nice tube shape. You can’t tell where each row starts and ends!
Once your I cord is the length you desire, just bind off!
Leave a Reply