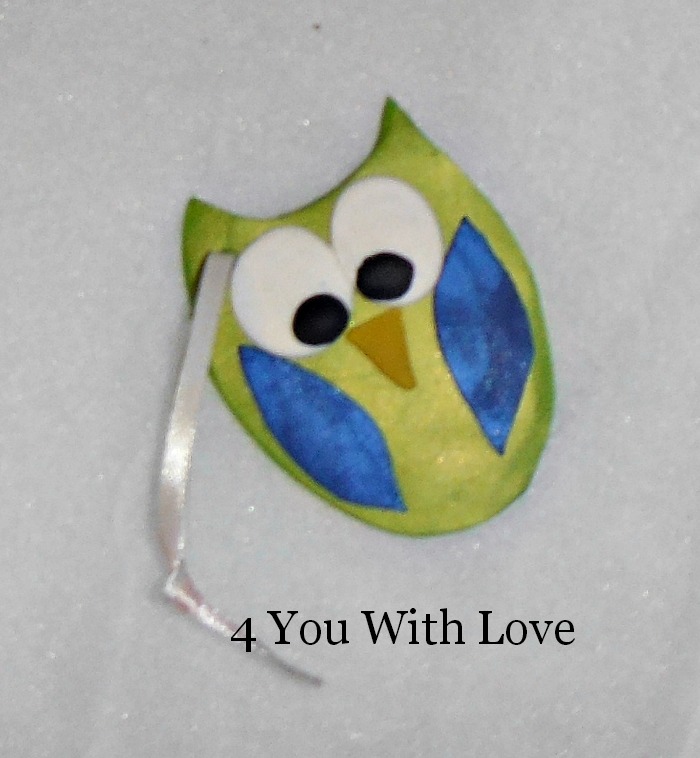
Have you noticed how there are owls everywhere? They are definitely the “in” animal this year. So for day 5, I decided to create an owl ornament using polymer clay. Here it is!

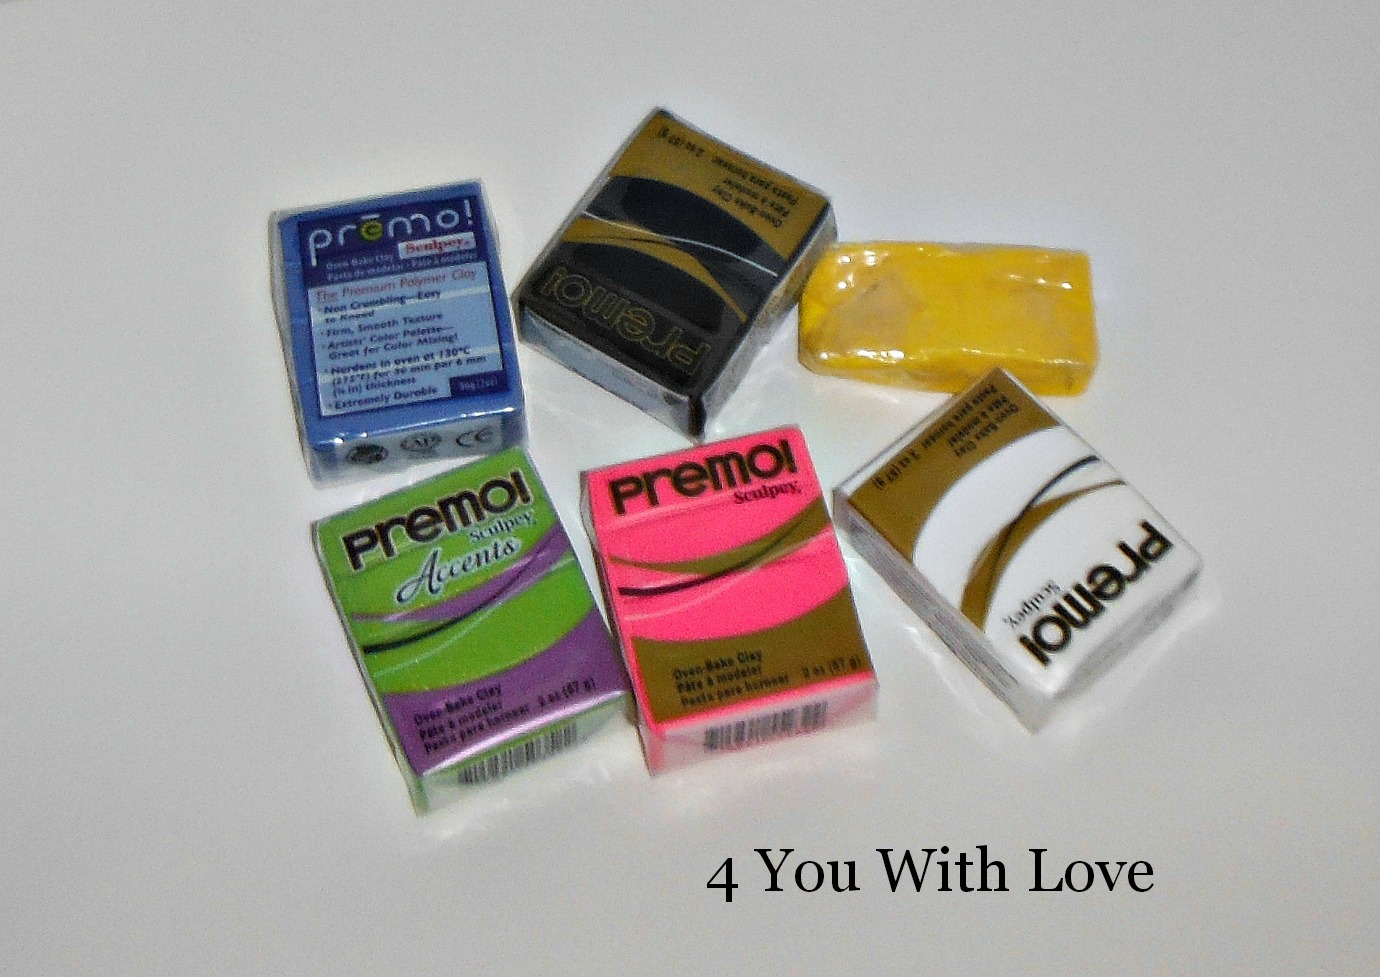
If you have never used a polymer clay before (i.e. sculpey, premo, fimo) they are really fun. This is a plastic clay that hardens when you bake it in a 275 degree F oven. They come in all sorts of beautiful colors. Here are the ones I pulled out when I started this project.
Before beginning any work with polymer clay, a couple of starting “rules”.
- Do not use tools that you will use with food. I have an old cutting board that I work on that is dedicated only to polymer clay projects. I also have an old paring knife and a small plastic “rolling pin”.
- Make sure that you wash you hands after completing your polymer clay project.
- Also, it works best to create pieces of lighter colored clay first and then do your darker clay pieces later. The dark colored clays have a lot of pigment that may stay on your fingers and ruin your lighter colored clays.
Okay, now onto the project.
Sculpey Clay Owl Ornament
First preheat your oven to 275 Degrees F.
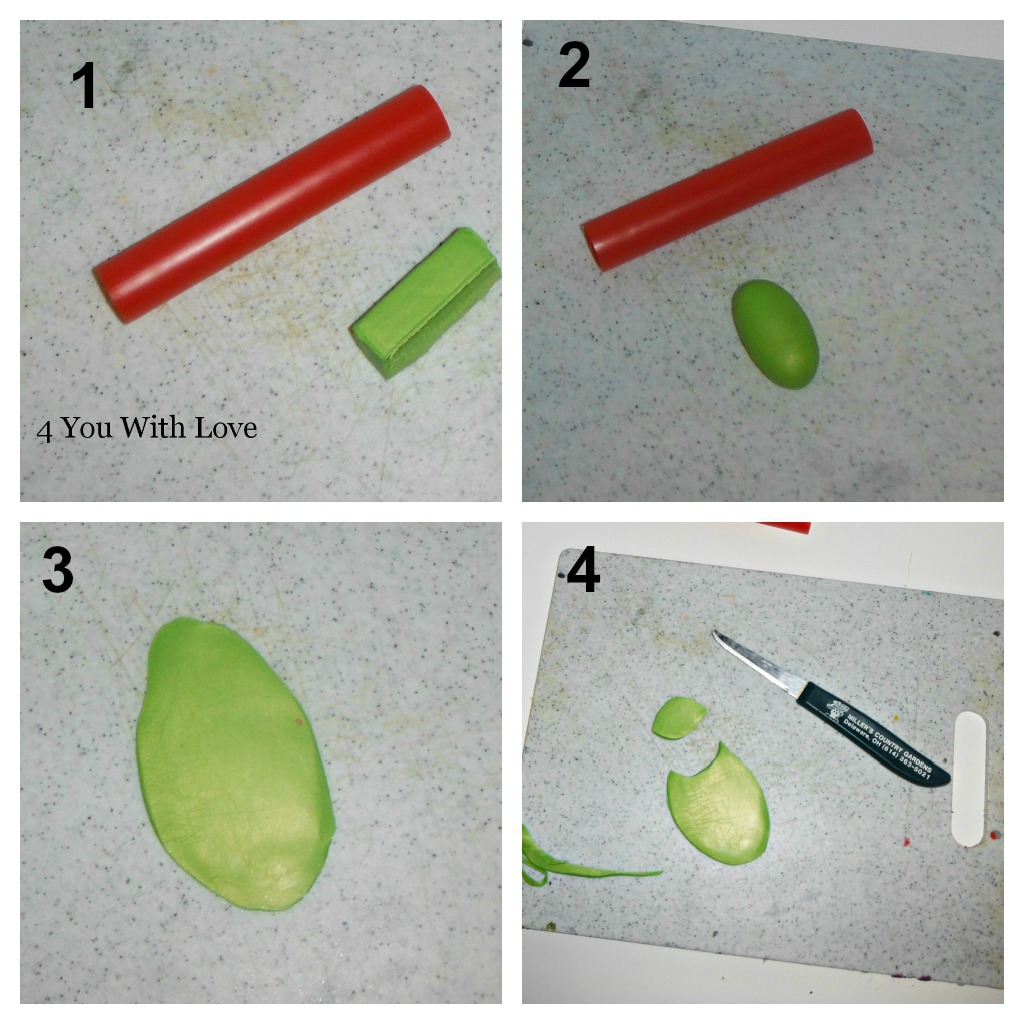
Step 1. Use 1/4 of the brick of clay that you have chosen to be the color of the owl’s body.
Step 2. Roll the clay around in your hands a few minutes to warm it up and soften it. Then roll it into an egg shape.
Step 3. Using a “rolling pin” (or your fingers) flatten so that it is approximately 1/4″ thick and still oval in shape.
Step 4. Using a small paring knife, even out the border of your owl body so that the edges are neat and your oval is fairly symmetrical. Then cut an oval piece out of one edge of the oval to create the owl’s ears.
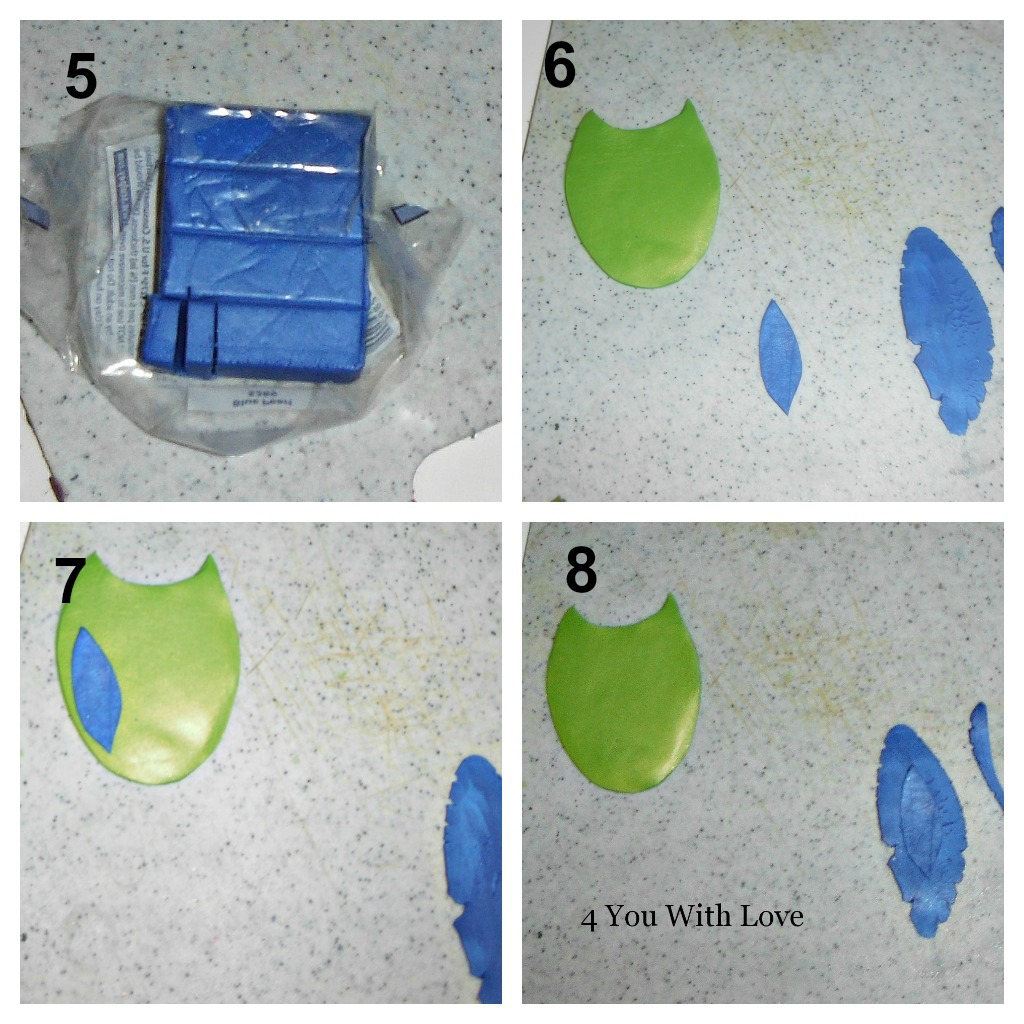
Step 5: Cut 2 pieces of your wing color clay. You can see that you will not need too much clay for the wings.
Step 6. Warm up each of the pieces of clay in your hands, roll each into an egg shape, and then flatten out to approximately 1/4 inch. With your paring knife, cut one of these flattened ovals into a wing shape.
Step 7. Place the first wing onto your owl body to see if you like the size and shape.
Step 8. Once you are sure you like your first owl wing, place it gently on top of the other flattened clay piece. You will use the first wing as as pattern for the second wing. Cut out the second wing.
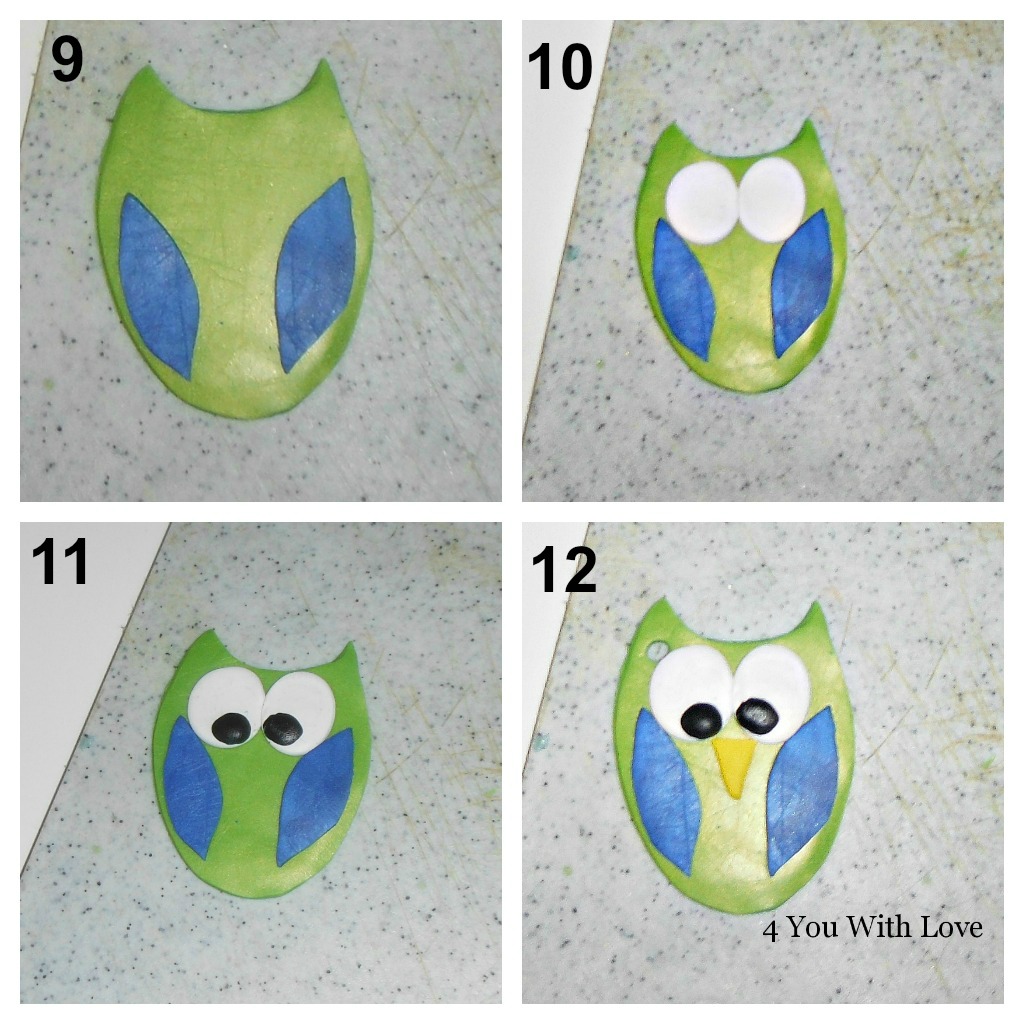
Step 9. Place both owl wings onto the owl body and press on (just hard enough to ensure it is attached.)
Step 10. Pinch off 2 pieces of white clay from the clay brick, roll into two balls and flatten out. Place above the wings where you would like the eyes to be.
Step 11. Pinch off 2 very small pieces of black clay from the clay brick. Roll into balls and flatten. Place them onto the “eye whites” where you would like the pupils to be.
Step 12. Take a small piece of yellow clay and flatten to about 1/8 in thick. Using your paring knife, cut this piece into a triangle shape and place on the owl for it’s beak. I also used a straw to make a hole in the left ear for an ornament string to go through.
Now, just move your owl onto a cookie sheet or piece of foil and bake in your preheated oven for approximately 1 hour.
I’m pretty psyched at how this ornament turned out. I think I’ll be making for this holiday season. Don’t forget to come back tomorrow for Day 6 of the Homemade Holiday Inspiration!
4 You
Just gorgeous Marilyn. I’ve been wanting to try some projects using that clay. I think I might start with this guy.
Anne xx
Love it. Thanks for linking to the Ornament Party, too. Happy Thanksgiving. Linda
Cute owl! I found this via the Pin Me link party,so I’m pinning it!
T’onna @ Navy Wifey Peters Aboard the USS Crafty
That is sooo adorable! Great colour choices!
This is a charming owl! I make them too, but as plushies rather than with clay, although I think yours has worked terribly well! Thanks for the tutorial. will be following you, after being a fellow guest on this blog hop, and hope that you’ll return the favour by dropping in at http://www.ColdhamCuddliescalling.blogspot.com and following us. I’m off to do it now – hope you’ll come around soon. Isobel
So cute! I would love to have you come share this or any of your great ideas at the link party on ‘Or so she says…’ There’s one going on right now (and every Saturday – Tuesday). Hope to see you there! http://www.oneshetwoshe.com
My daughter will love this too! CUTE!!!
Really fun. As you know, I’m right into owls. I published an ENTIRE owl week, and made owl crochet pattern as well. Your clay version, which I haven’t tried to make yet, looks fun also. Thank you for sharing and participating in the party at http://www.finecraftguild.com