It’s day 3 of my blogiversary celebration and I’m psyched. Jill of Two Yellow Birds Decor has a great tutorial to share with you. This would be great to make for your Thanksgiving mantel.
Hi Everyone! Happy Bloggiversary to 4 You With Love!!
I am so excited to be guest posting here today and be apart of the celebrations! Thank you so much Marilyn for having me!
Before we get started, I wanted to introduce myself.

I am Jill and my home is at Two Yellow Birds Decor. You will find plenty of crafts, homemade decor, and recipes. I love to make cute decor for my house for cheap. Luckily my husband is my super handy man and helps me out with a lot of the things I do. I love being able to share my crafts with all of you!
Now let’s get started…..
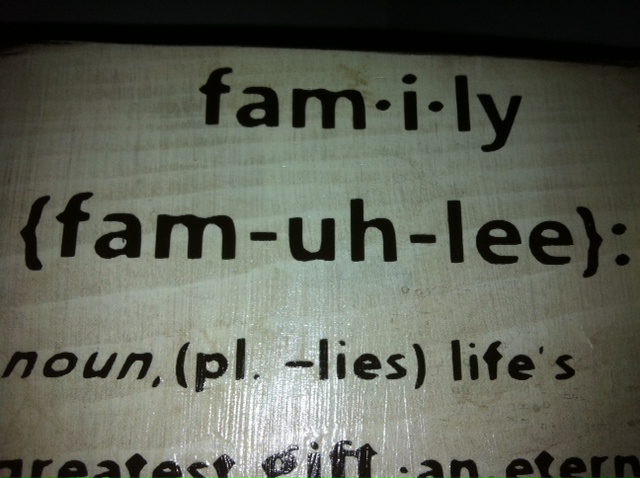
I have seen the idea of doing definitions a lot of places lately. I really wanted to do a definition on family. I thought it would be cute to do it on a wood board so I could put it on my nightstand.
What you will need:
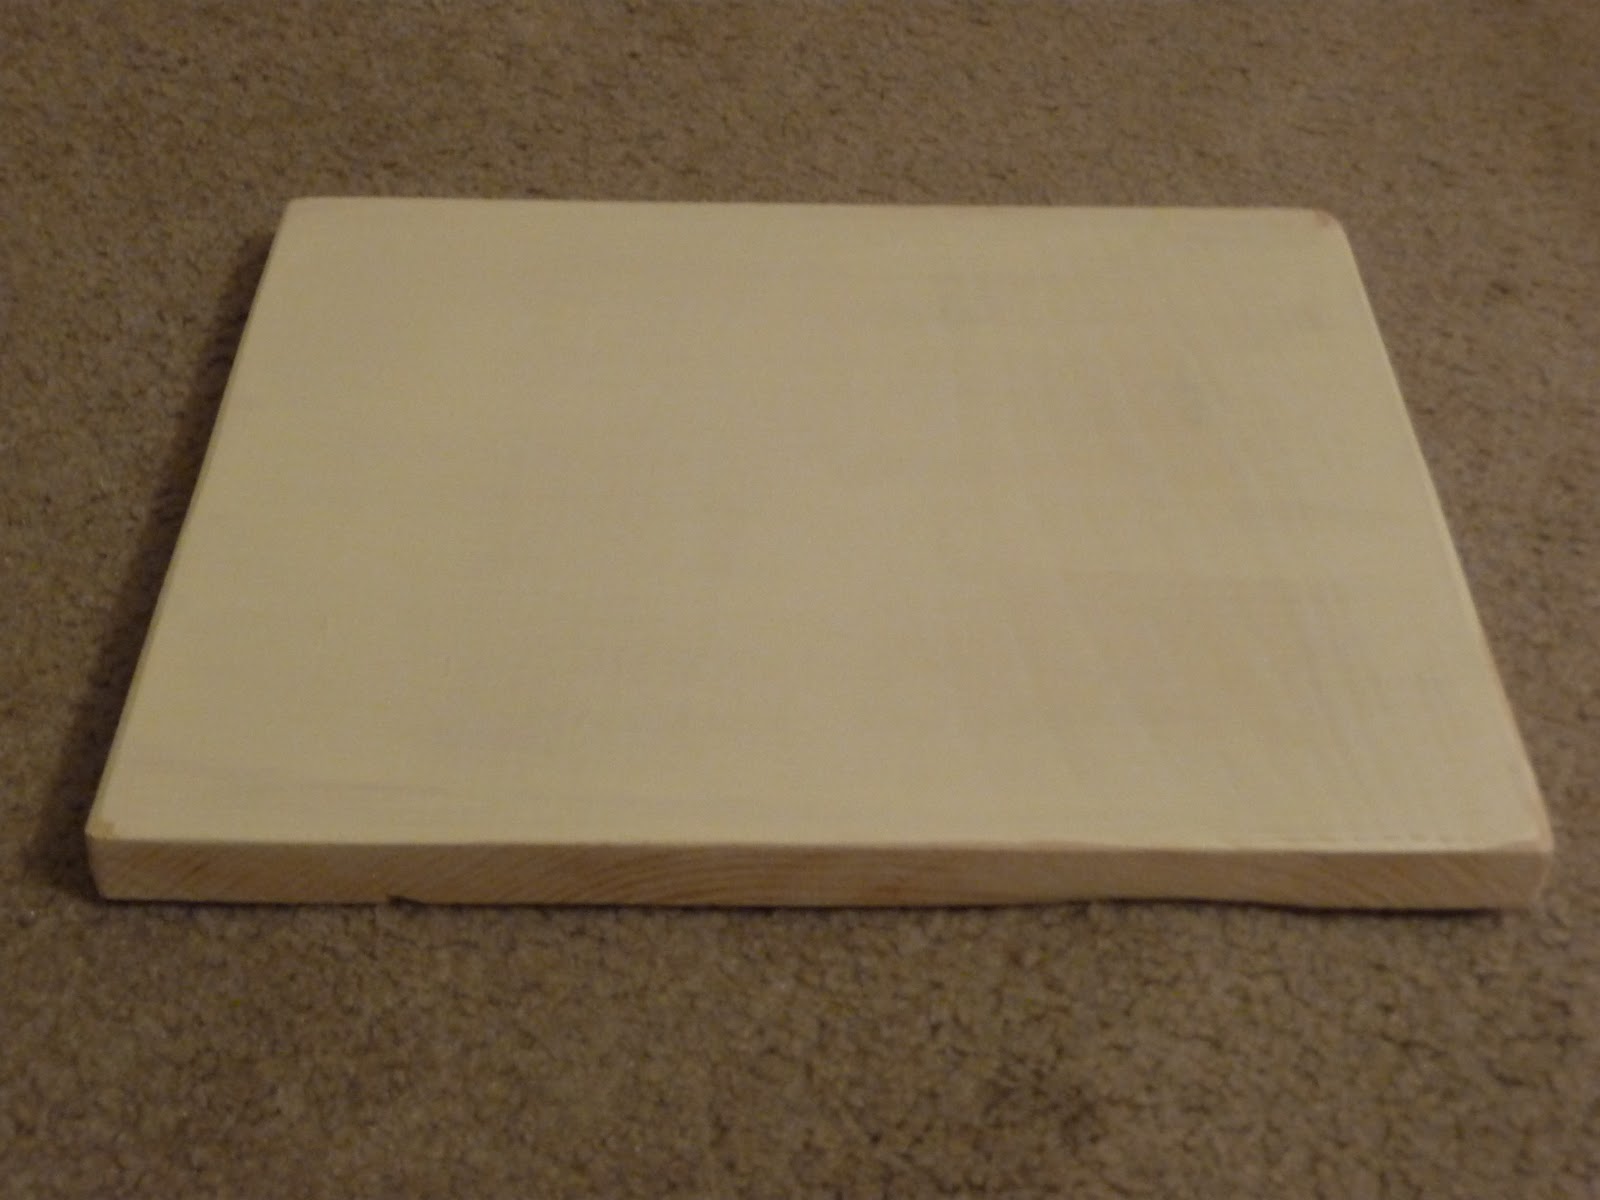
-9″x11″ wood board
-Sand Paper
-Paint of any color (I used Buttermilk Cream)
-Stain (I used Early American)
-Vinyl (I used Brown)
-Mod Podge
-Flet & Burlap for the flowers
-Hot Glue Gun
How You Make It:
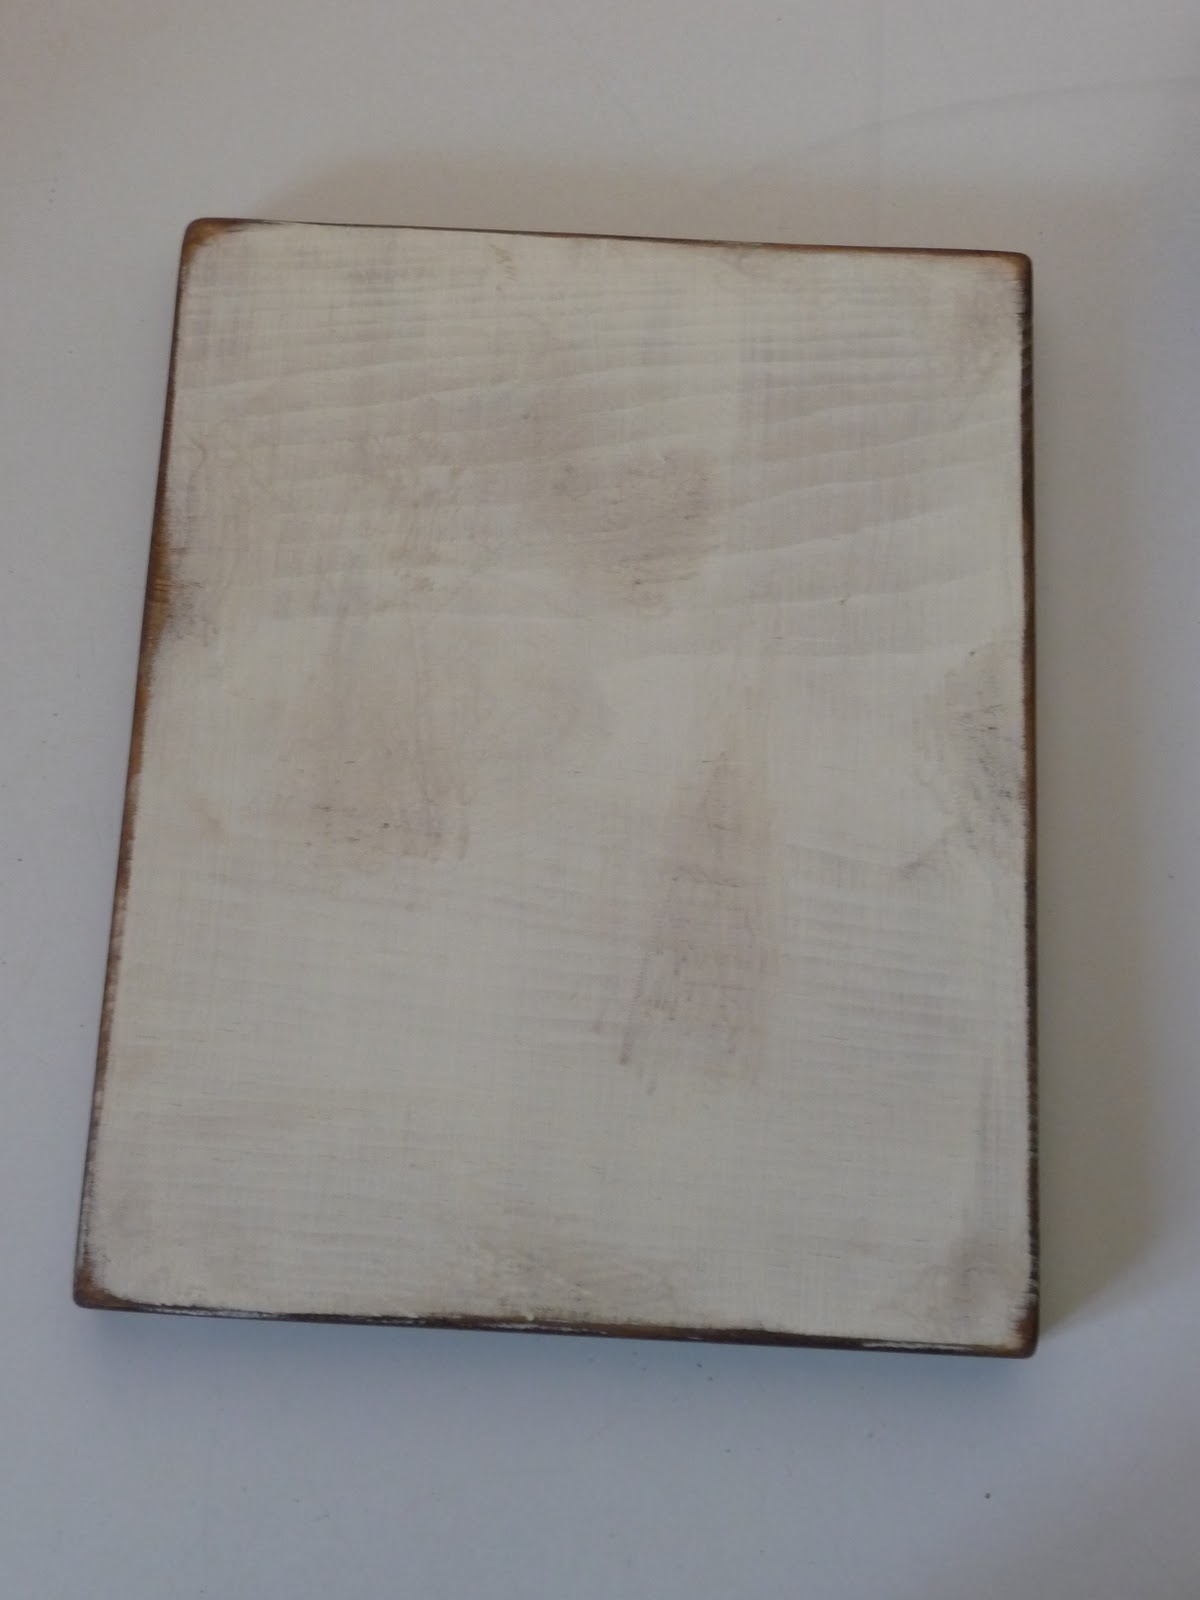
Paint the wood the color you have chosen. I only painted the top of it because I wanted to stain the rest. I did 2 coats on mine.
Then I sanded the edges a little bit so I could see wood around it on the front side. I like being able to see the stain color around the paint.
Next, I stained the whole thing. I put it over the paint on the front. Some spots I did heavier then others because I wanted an old fashioned look to it.
Then I got the definition about family that I wanted and put it in the font I wanted. In Microsoft Word I found a book type of font that I liked. I can’t remember the name of it. Sorry! Then I cut that out in vinyl and put it on the board.
Next, I put a coat of mod podge over the vinyl because I didn’t want any of the letters or dots to have a chance to fall off!

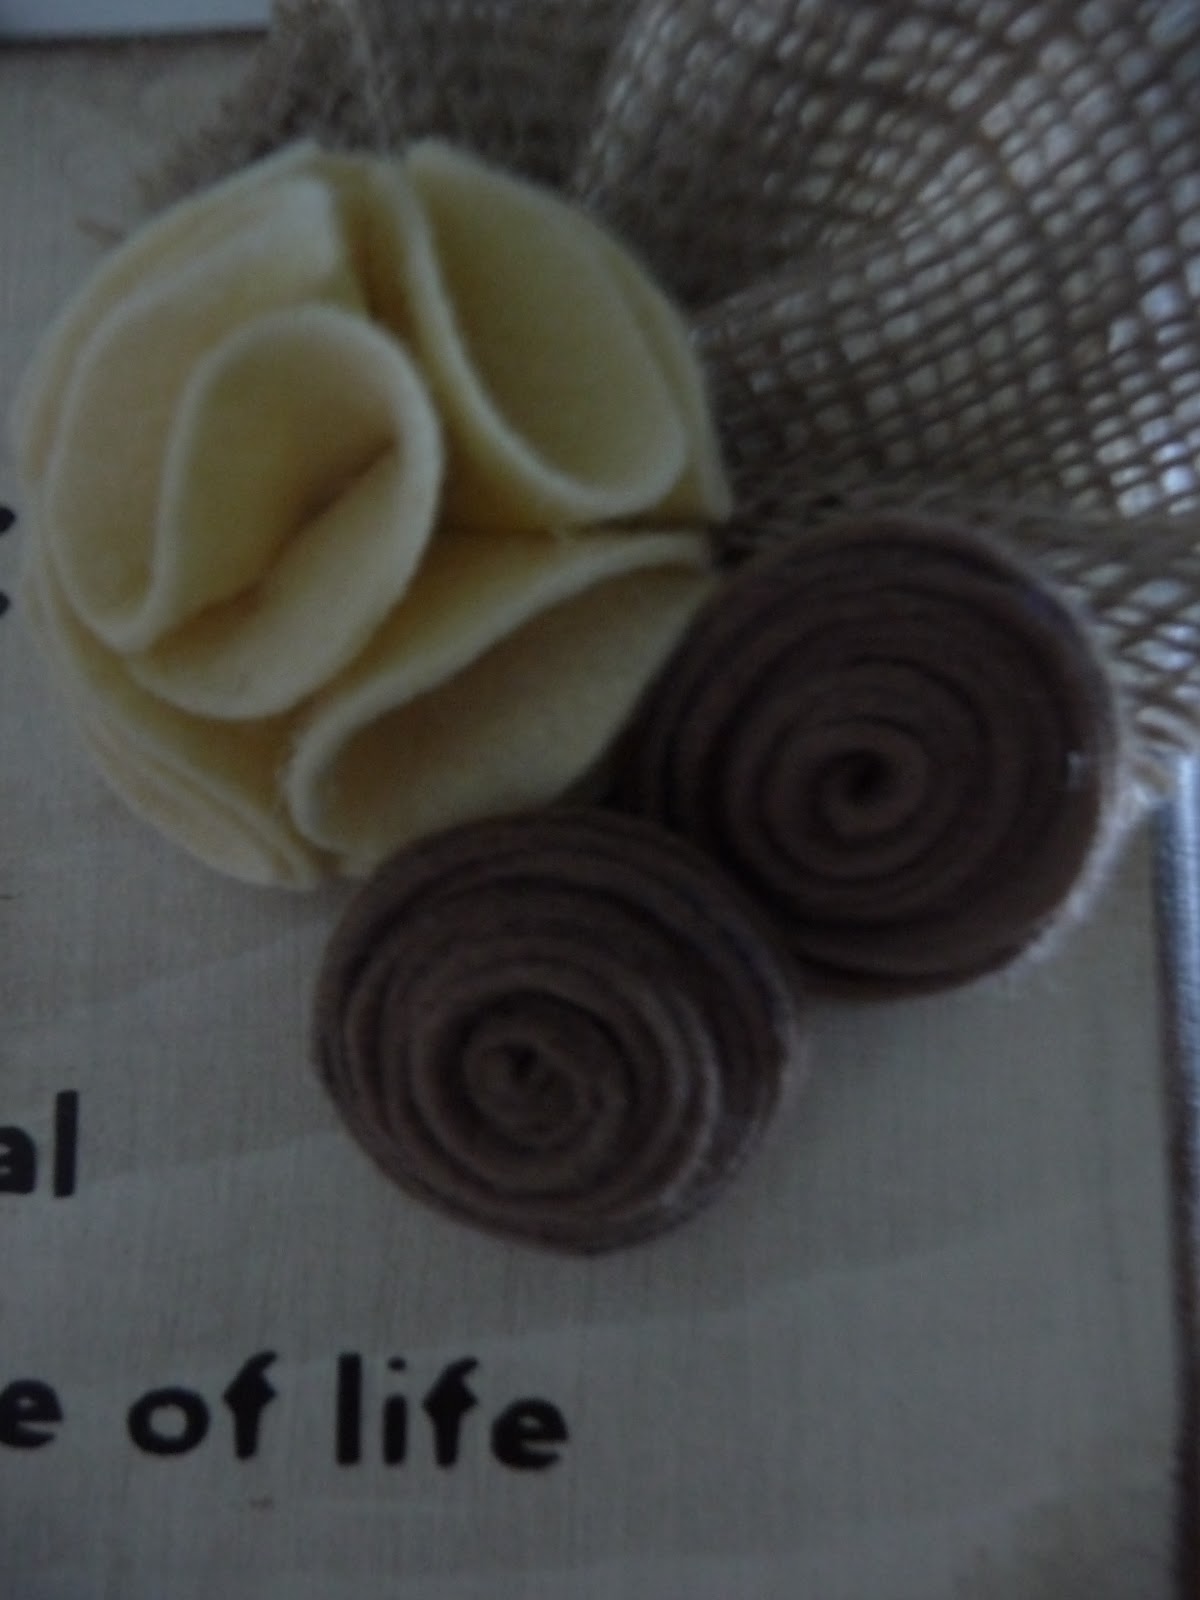
While that was drying I made some felt flowers to put in the corner of the plaque.
For the tutorials on how to make the Rosette and the Burlap Fan go here.
Here is the tutorial on how to make the ring flowers:
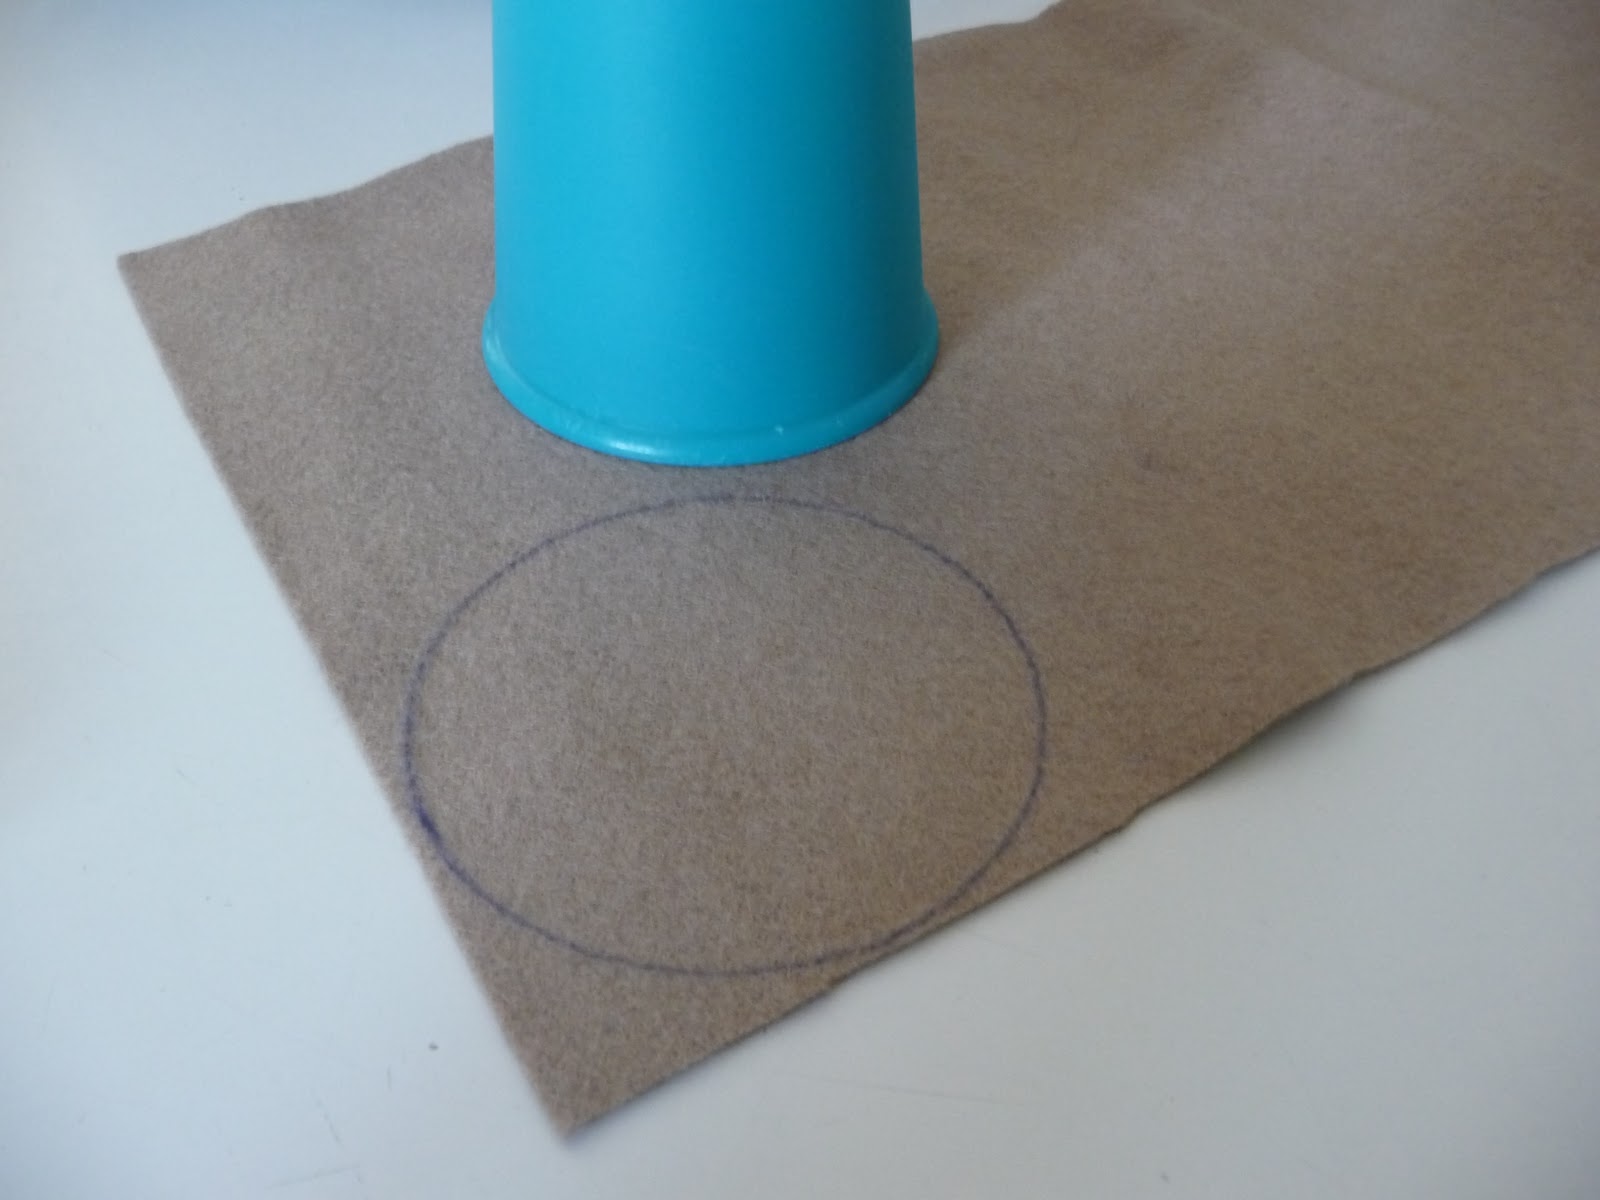
Cut a circle out of felt. I used a small cup to trace my circle because I wanted them smaller.
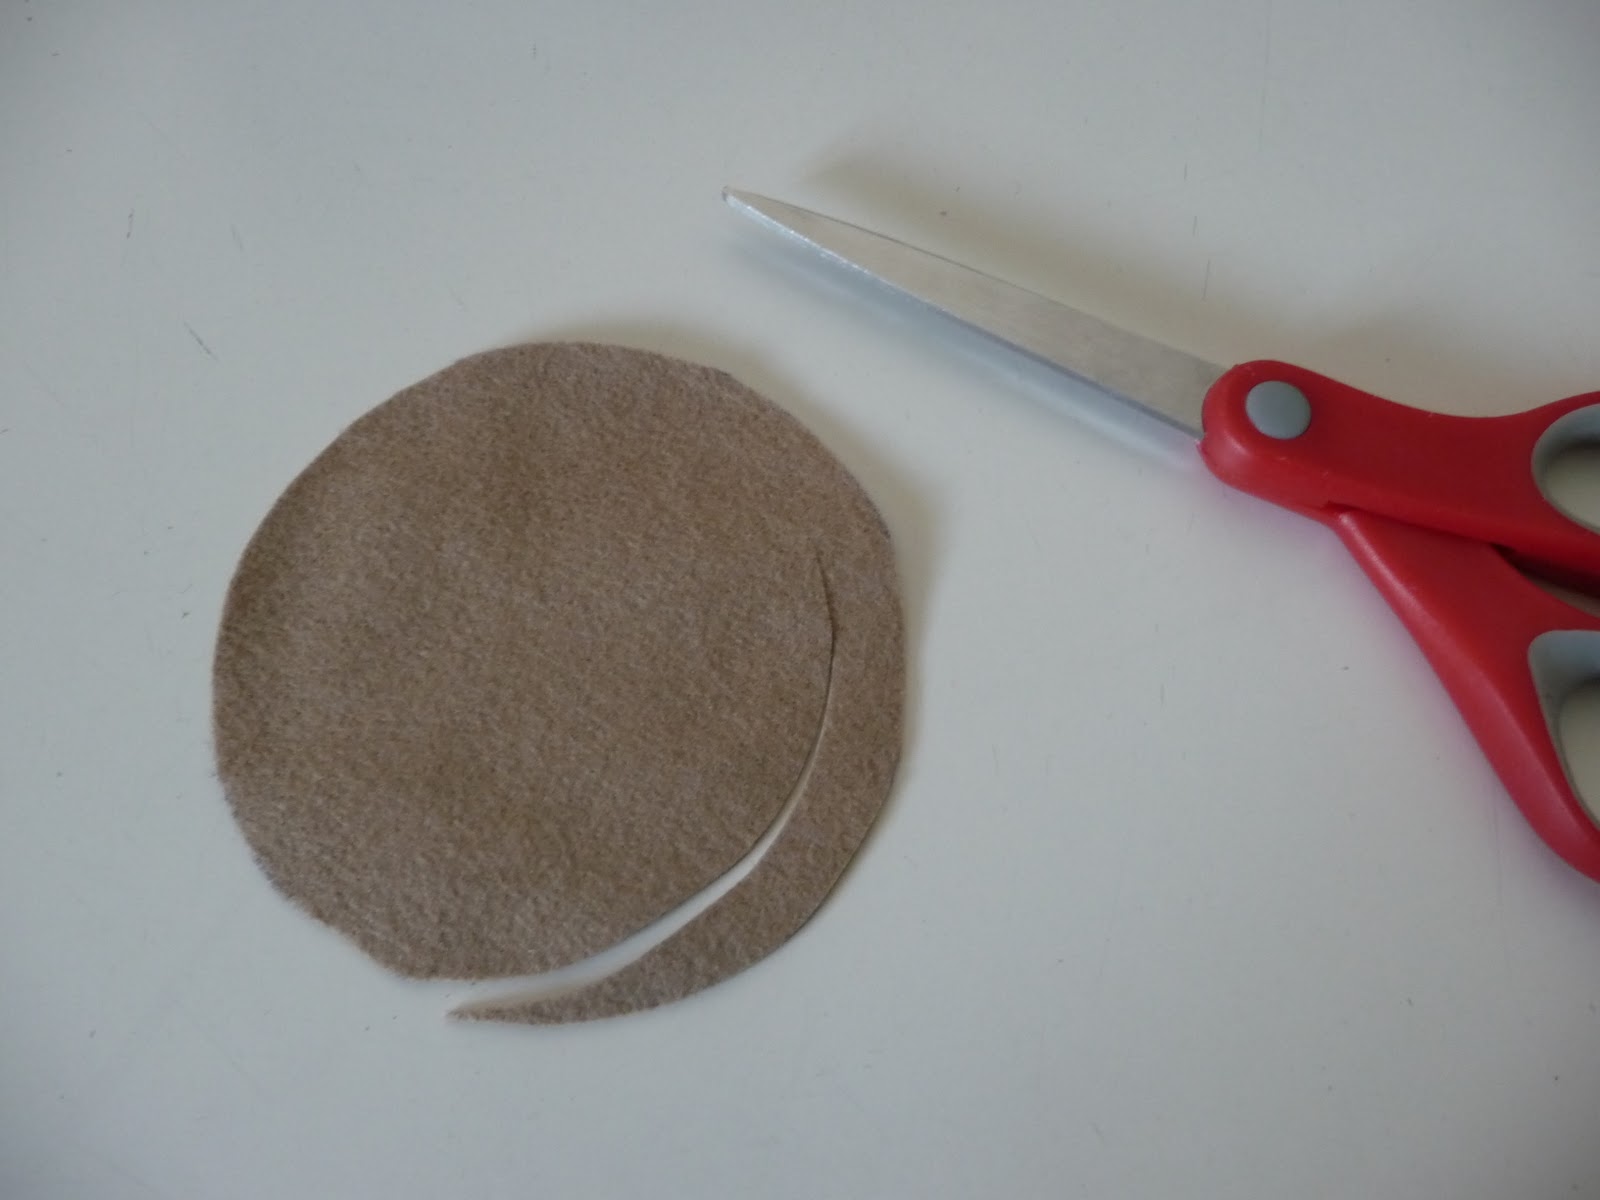
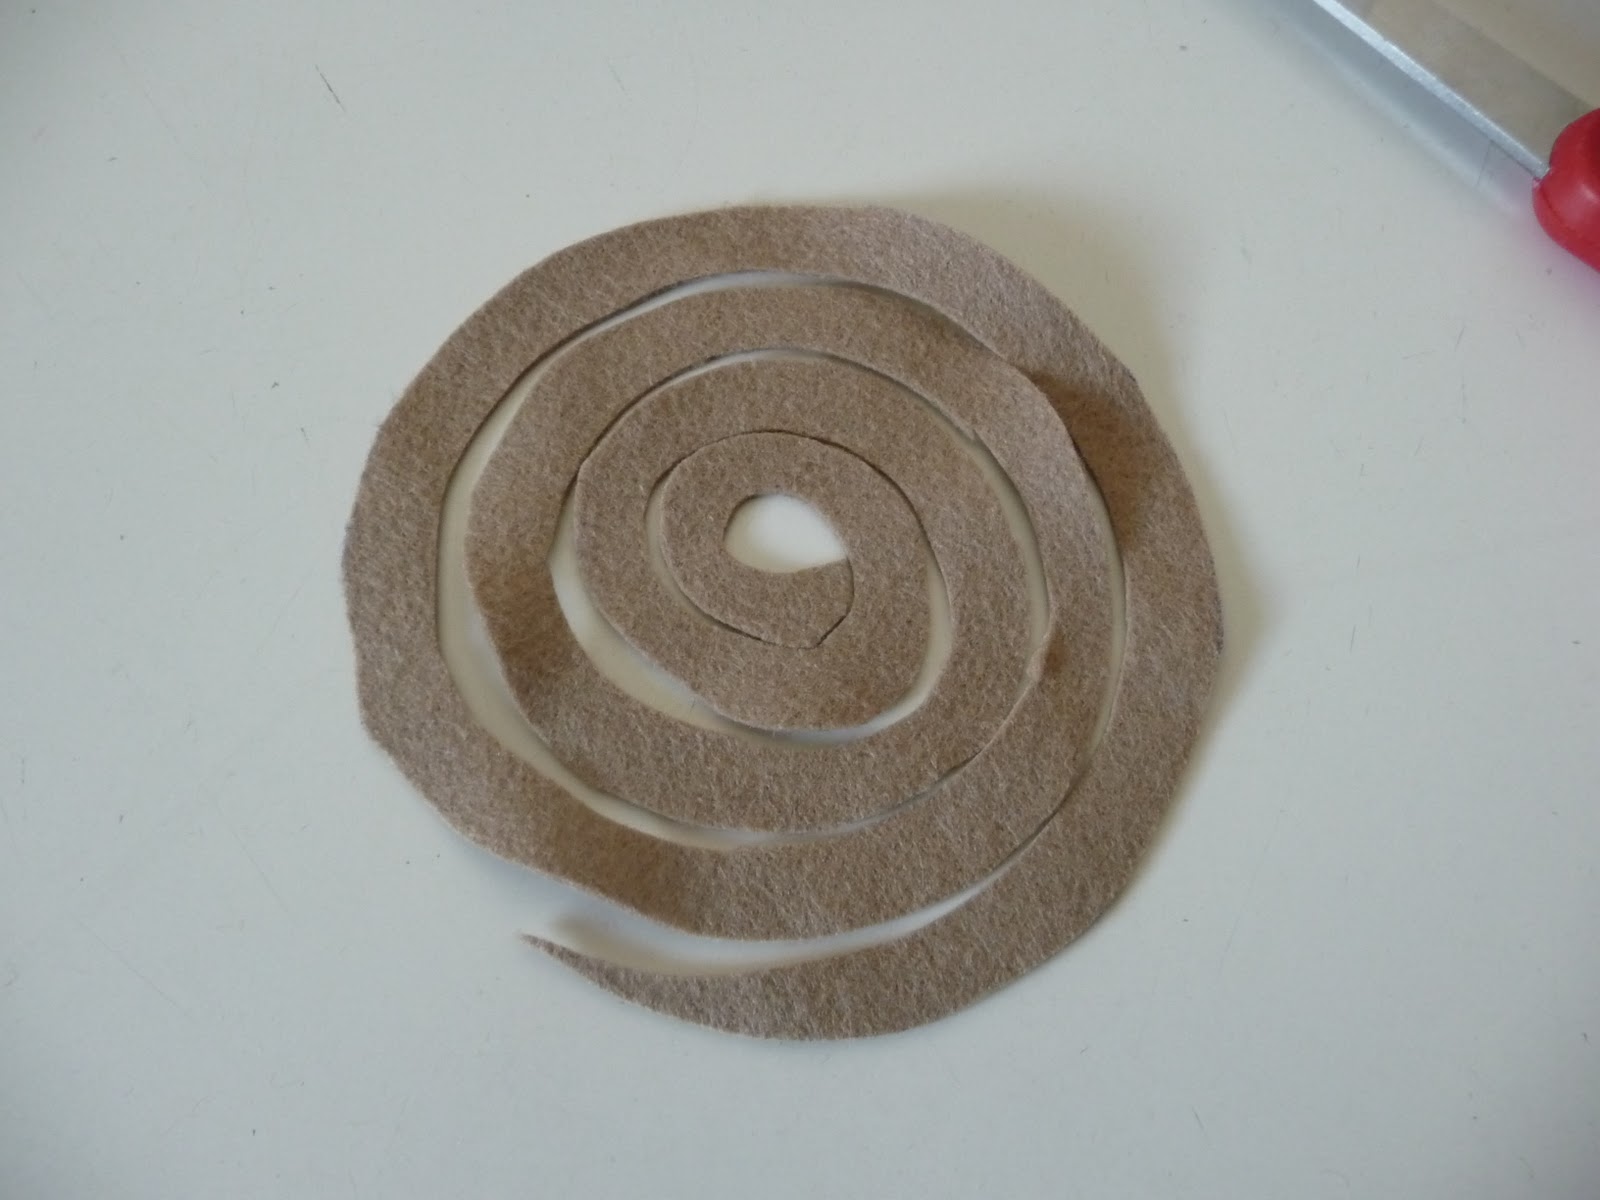
Then you are going to cut in a spiral motion to the center of the flower. It will look like this
Starting in the center of the flower you will start rolling it.
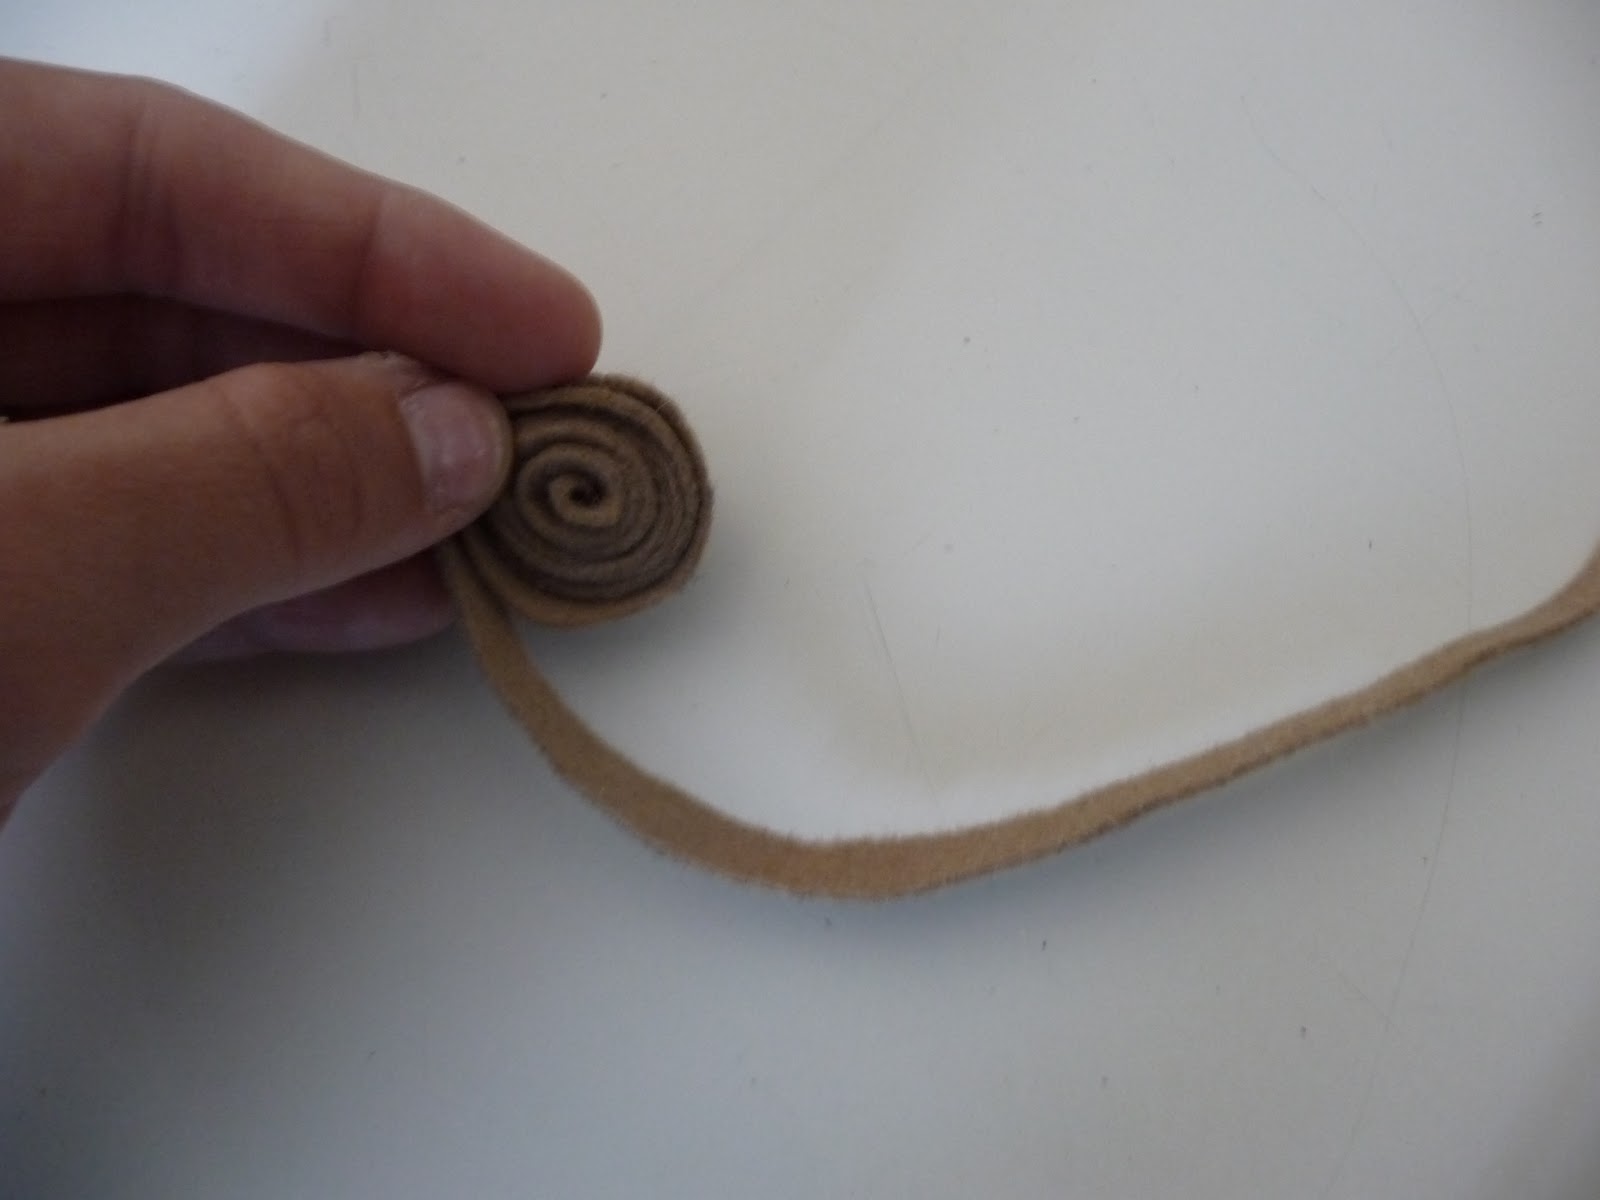
When you get to the end put hot glue on the felt to secure it.
When you are all done making the flowers you will hot glue them on to the board.
Here is the finished product:
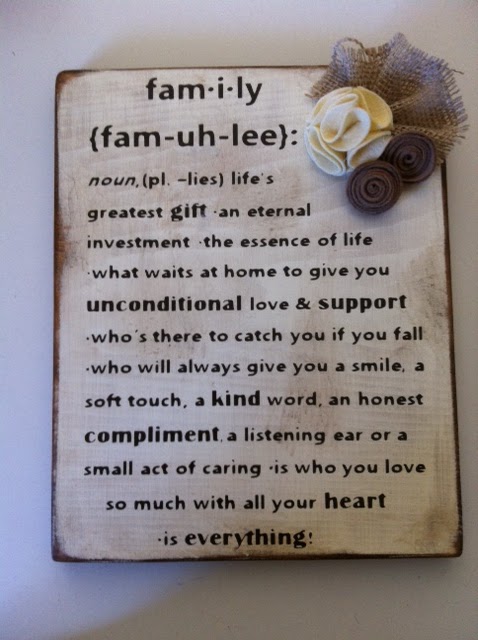
I love how it turned out!
Thanks again Marilyn for letting me be apart of your bloggiversary!

Jill, thanks so much for sharing this great tutorial. This is definitely on my “to do” list. Come back tomorrow to see what Amy of One Artsy Mama and little crafter are doing to prepare for Halloween!
4 You
Jill this is really really cute! What a great tutorial thank you so much for sharing!
Thank you!! You are so kind!
Thanks again for letting me apart of your bloggiversary!!! YAY!
That’s gorgeous Jill. I’m doing that.
Anne xx
I was inspired after reading your Article. I will try my best to apply what I have learned in your topic.
writing service
I was expecting a post like this! More than anything else, I want to thanks you for sharing this post.
uk college