The other day, I received some happy mail: a crafting challenge mystery box. One of the items was a t-shirt that if I used it, I was to upcycle it for another use. Well, I love a fun upcycle craft, so I thought, “Game on!” After putting my thinking cap on, this is what I came up with.
Upcycle Craft: A No Sew T-Shirt Bag

This bag is so easy to make. I was thinking that it would make a fabulous day camp craft for older elementary school aged girls. Are you ready to see how you can make one yourself? First, let’s gather our supplies
- T-Shirt (mine was an adult L)
- Tulip Fabric Markers
- Scissors
- Optional Items
- Stencil
- Pony Beads

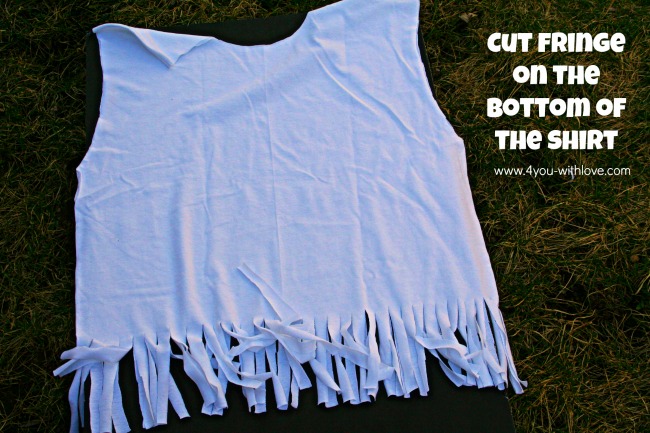
Now, let’s get started. First, you need to grab your scissors and remove both sleeves, the hem, and the collar from your t-shirt.

Next, you will need to create the fringe on the bottom of your shirt. Just cut strips that are approximately 0.5″ wide and 5-6″ long. (NOTE: be sure to cut through both layers of the shirt when cutting your fringe…you want to have matching strips for tying together).
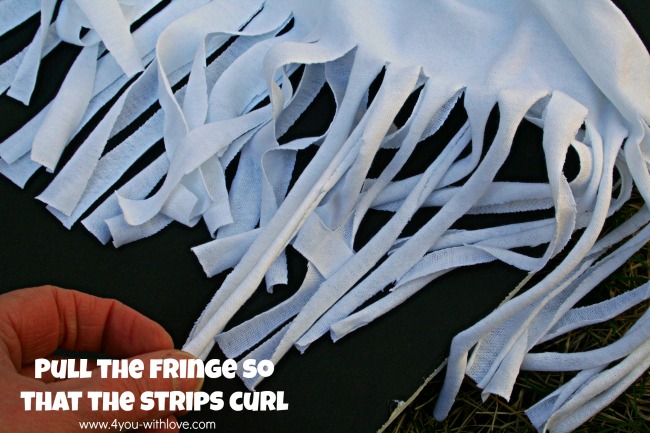
To help with tying (and later adding pony beads if you elect to do so) you want to have your fringe curl. This is easy to do…just gently pull each strip and it will curl all on its own.
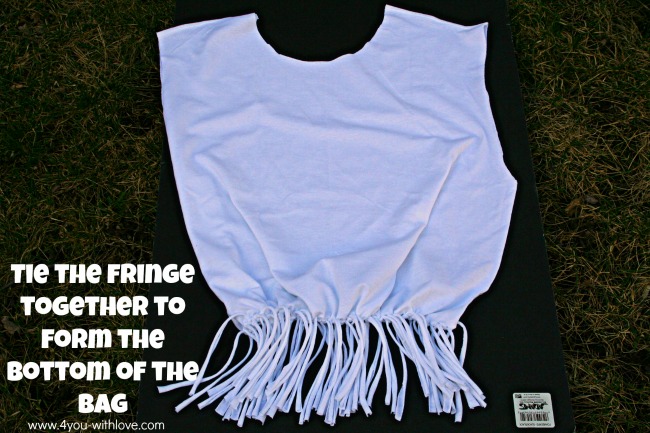
To create the bottom of your bag, you will tie each fringe (with it’s partner) together. Be sure to do this tightly so that there are no holes in the bottom of your bag.
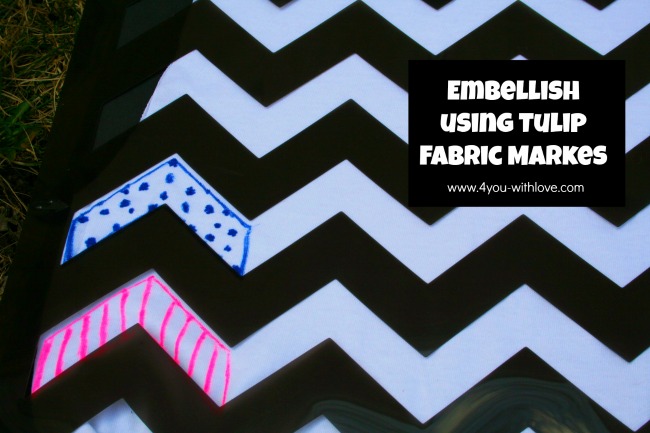
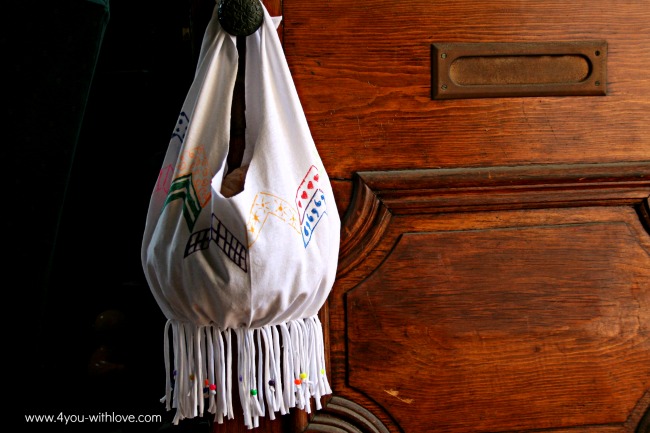
Now it’s time to grab your markers and have some fun decorating your bag. You can use stencils if you’d like..or just free hand it! The choice is yours! Note: the t-shirt fabric is stretchy so you will want be gentle when you draw on your bag. If you press down (with your marker) too firmly, you will stretch and pull the fabric. Also, you could draw onto your bag before you tie the fringe pieces together if you find that easier.
Grab your scissors and you want to cut your neckline deeper. Also, you will remove the top two shoulder seams. (The two shoulder strips will become the straps of your bag.)

Finally, you will tie the two shoulder strips together, creating the straps of your bag.

I felt like my bag needed just a bit more bling, so strung a few pony beads onto a few of the fringe pieces. The beads were secured with an overhand knot.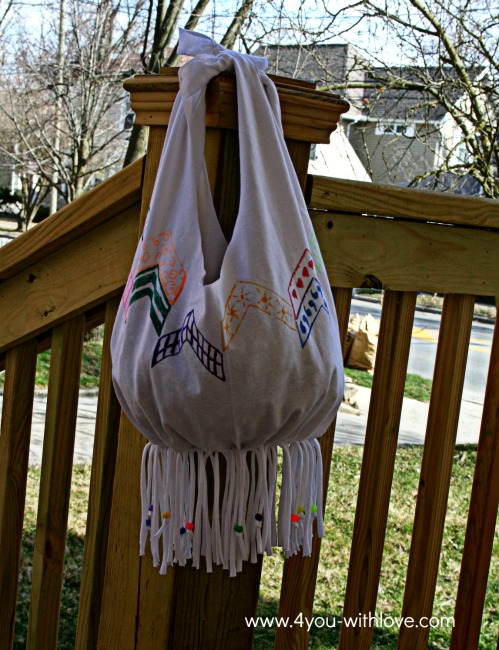
So what do you think? No glue! No drying time! No mess! I think this means win-win-win! This would also make great shopping bags!
 So, how many bags will you make?
Leave a Reply