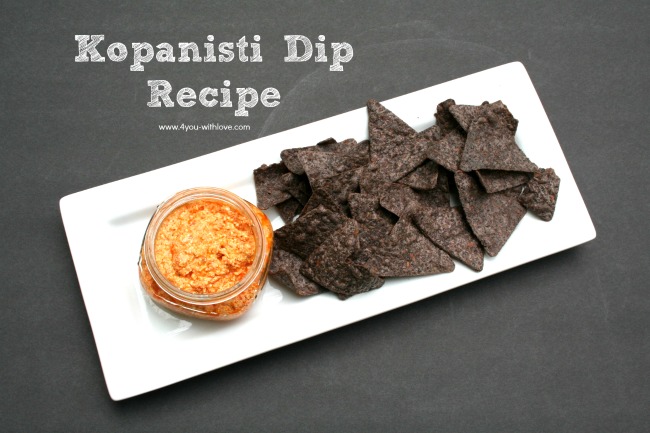
Kopanisti: It’s a fun word to say for a flavorable dip. What? have you never had Kopanisti before? Oh, if you haven’t you are definitely missing out! There is a Greek restaurant in town, Opa, that has “Gyro Day” every Monday. This means that on Mondays, you can get any gyro of your choice along…
Knitted Collegiate Scarf Pattern

One of my blogging buddies, Lauren from The Thinking Closet, has a wicked sense of humor, just like my boys do. So, when I heard she was hosting “Scarf Week” as a fun way to play along with “Shark Week” I HAD to participate. Today’s scarves are all about crocheting and knitting, including my knitted collegiate…
KitchenAid Giveaway – Mixer & Ice Cream Attachment

How does a KitchenAid Giveaway sound? How does making your own homemade ice cream sound? If both of these sound good to you, I’ve got an offer you can’t refuse! To celebrate that summer is now in full swing, I have teamed up with 14 other amazing bloggers to bring you a KitchenAid giveaway in the…
DIY Minion Composition book
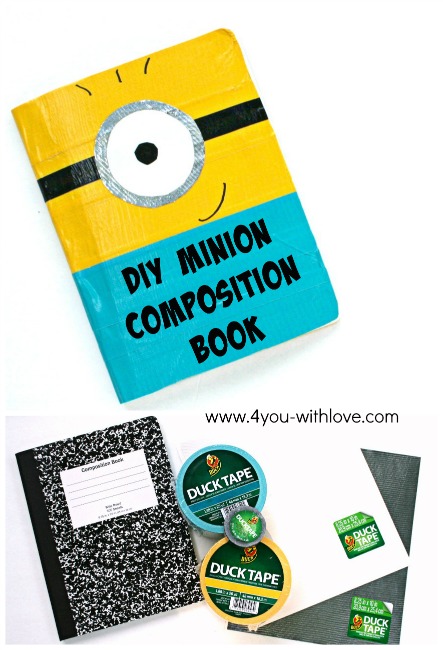
I’m super excited to share with you my DIY Minion Composition Book. Why? Because it combines three of my favorite things: school supplies, crafting & Craft Lightning. What is “Craft Lightning?” you ask? Every couple of months, a few of us bloggers join together to share crafts you can do in 15 minutes or less…
5 Frozen Desserts

I absolutely LOVE link parties. They are a great way to share your latest projects and hence giving you some exposure. That’s why we started The Project Stash. We wanted a way to help support fellow bloggers. And I must say, I’ve been psyched at how many projects we have link up each week. On the…
5 Memorial Day Ideas + The Project Stash
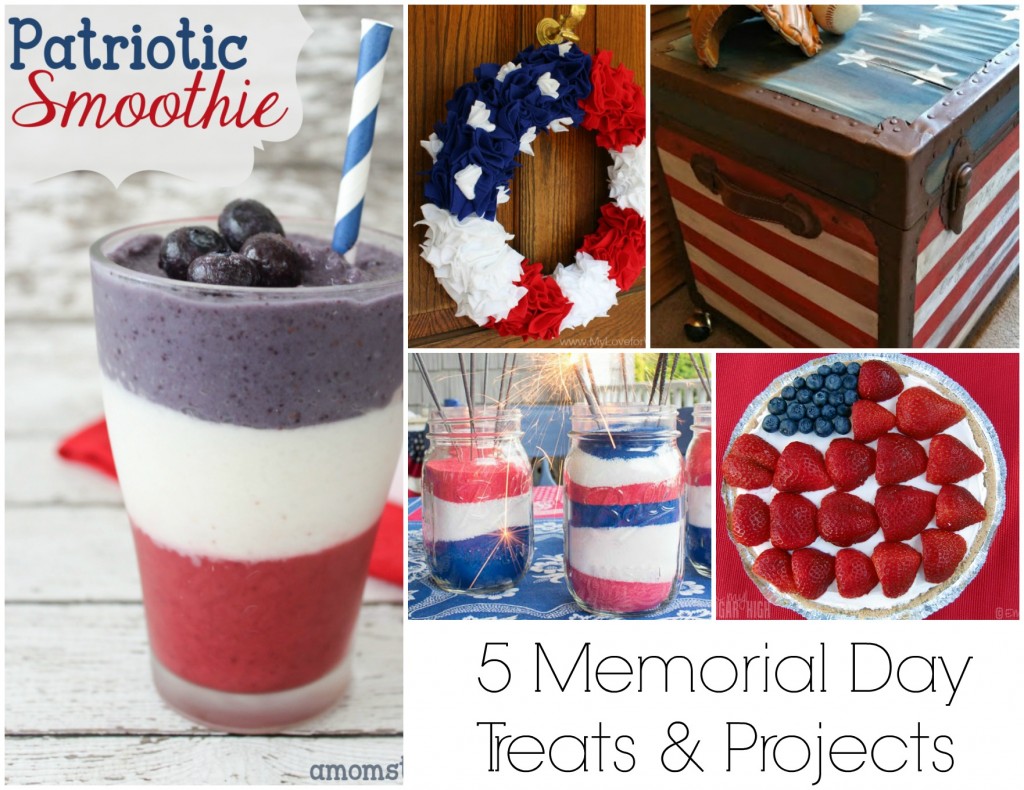
Can you say crazy busy? If so, that’s how my weekend is going to be. Why? Well, Saturday, my youngest graduates from high school which means there will be tons of graduation parties. Then, on Monday, it’s Memorial Day! See, crazy busy. Is your weekend going to be like this too? If so, our features from…
DIY Piano Memo Board (A Craft Tutorial)
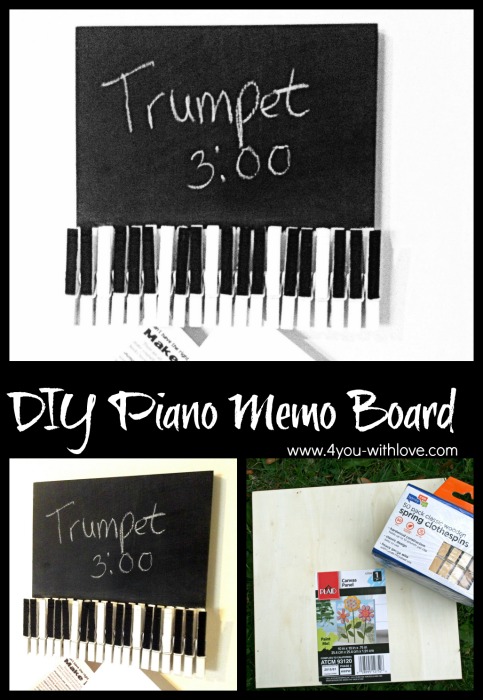
Don’t you love it when you can marry crafting with organization? I know I do. These types of projects move crafting from the “I’d like to do this” list to the “To Do” list. Pretty sneaky, huh? Now, today’s crafting organization project, DIY Piano Memo Board, was created as a birthday gift for my music…
5 Springtime DIY Life Hacks + The Project Stash
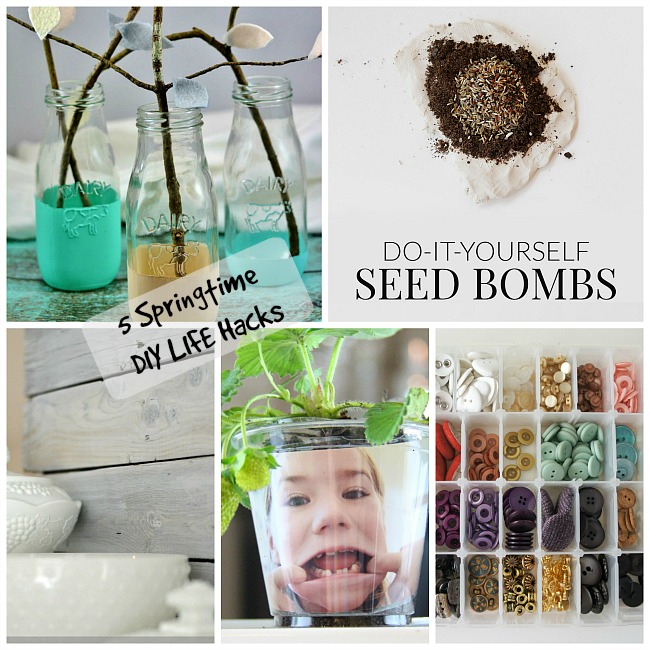
April showers do bring May flowers but for me, the rains of April turn into the sunny days of May. That means I get totally revved up with Vitamin D and I’m ready to clean, garden, organize, and craft. It’s like I become a DIY fiend. You too? Then you’ll love our features from last week’s party…
5 Colorful Crafts for May
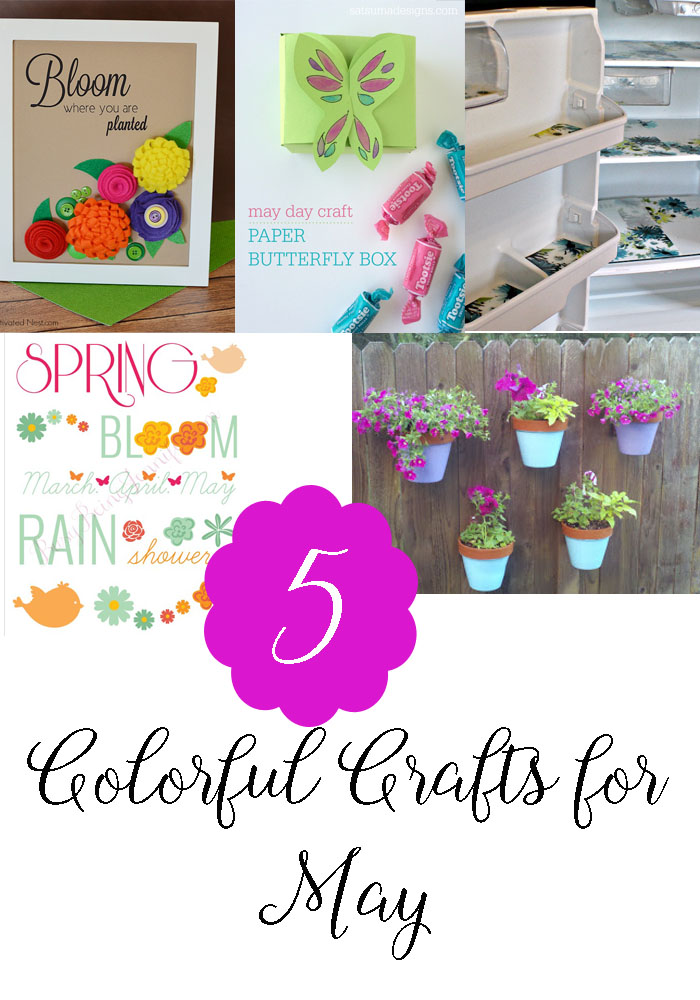
I am so excited about our features from last week’s party: 5 Colorful Crafts for May! Why? Well, I’m just super excited that spring is here with all the beautiful weather and pretty colors. Although, I must make one confession: I’m not a big fan of mowing the lawn. These ideas are whimsical and fun….
Remove Glue Residue Without Chemicals
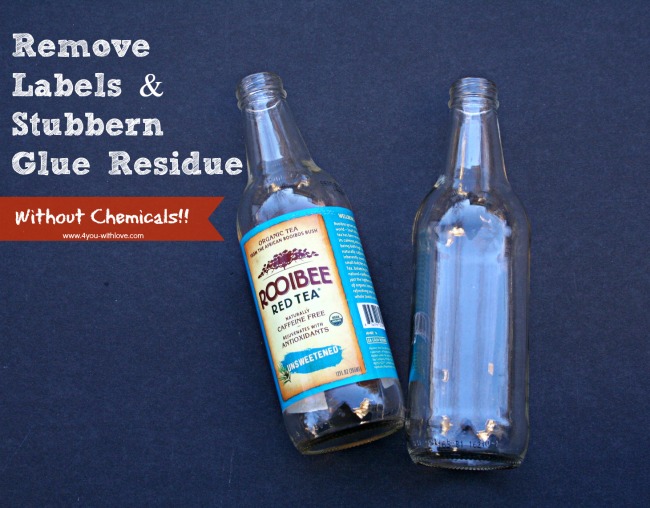
I think I need to start a support group called CA: Crafters Anonymous. Yup, as 12 step plan to keep my “stuff” under control. Now, for me, it’s not just the craft supplies, it’s all the “upcycle” projects which causes me to not throw anything away. Do you suffer from this too? Well, I don’t…