• Skip to primary navigation
  • Skip to content
  • Skip to primary sidebar
  • Home
  • Recipes
  • Knitting Patterns
  • Organizing Ideas
  • Green Home
  • Tutorials
  • DIY Spa
  • For Kids

Day 5 of the Blogiversary Celebration – Guest Post from Adrianne of Happy Hour Projects

September 20, 2012 by MarilynClark 11 Comments

It’s day 5 of the Blogiversary celebration and I’m so excited.  I hope you enjoy this amazing post from Adrianne!  I know I’ll be making some of these this holiday season!  Take a look!

Hello to my new friends here at 4 You With Love!  I’m Adrianne from Happy Hour Projects, and I’m so happy to be part of Marilyn’s Blog-o-Versary celebration.

Over at Happy Hour, I blog about quick crafts and recipes you can make in an hour or less.  I’m a mom and a wife with a full-time job, and as much as I love to exercise my creativity, by the end of the day, there’s just not a lot of time left for big projects.  So, I work on small things and I share them with my readers.

Today, I’ve got something to share with the readers here at 4 You With Love – a downloadable template for a paper treat box.  It’s the perfect size to sneak into a lunch box, or onto the desk of a favorite co-worker.  You can put this together in 10 minutes or less!

What you will need:

  • 8.5″x11″ cardstock or paper
  • Scissors
  • Template (you can either cut out a master template and trace it, or print this template and cut it out)
  • Tape or glue
  • Utility knife (optional, just makes cutting slits easier)
  • Ribbon closure (optional, just makes it pretty)
  • Small treat to go inside
First of all, you can download the template here:

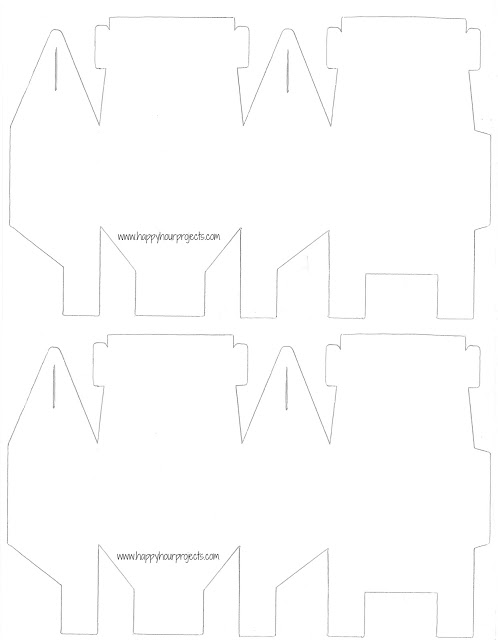
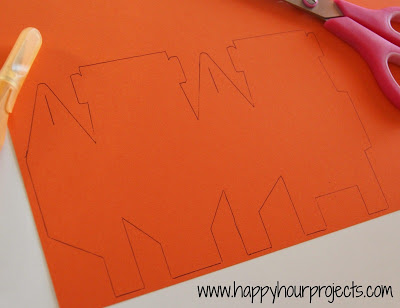
You can save a step by printing it directly on your paper, or you can cut out a master template and trace out however many you need with a light pencil to avoid ink lines.

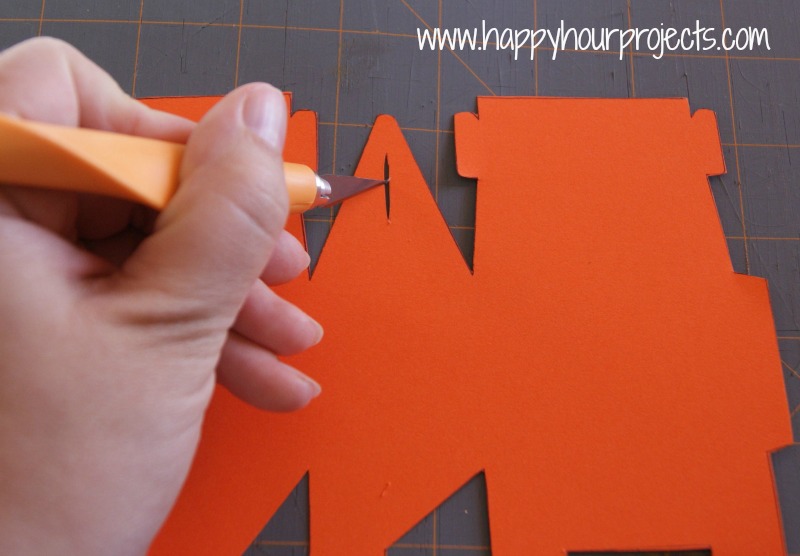
Once you have your pattern cut, cut slits for the closure.  A utility knife will make this job much easier, but if you don’t have one handy – small scissors will also do the job.

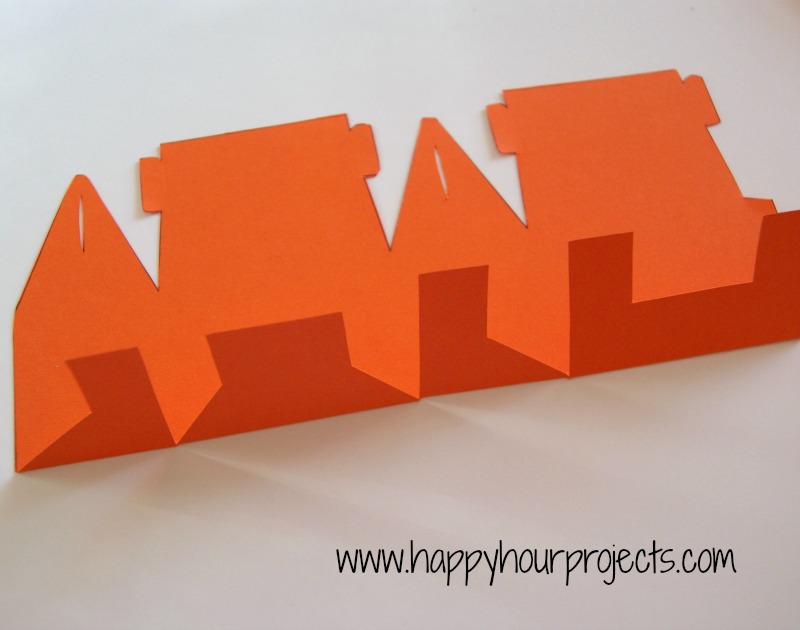
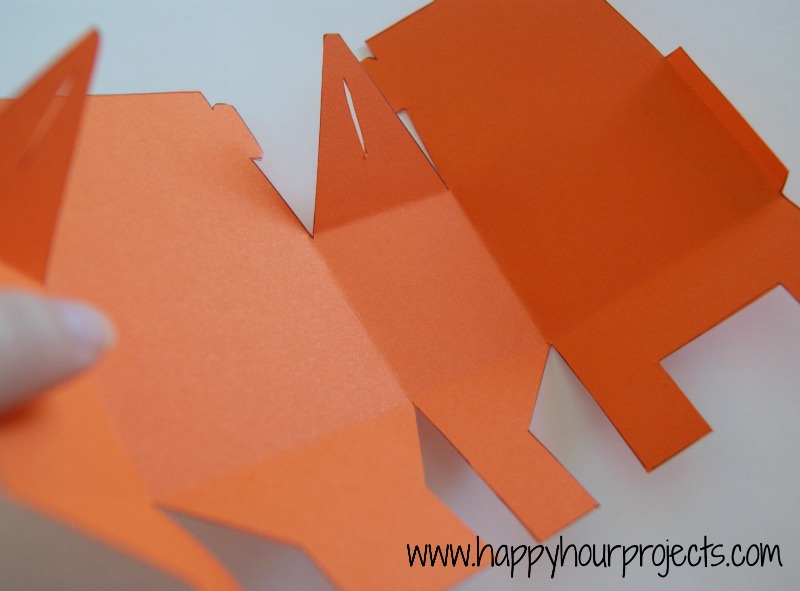
Fold the bottom flaps up, and the triangular flaps down.

Then, fold vertically along each section of the box.

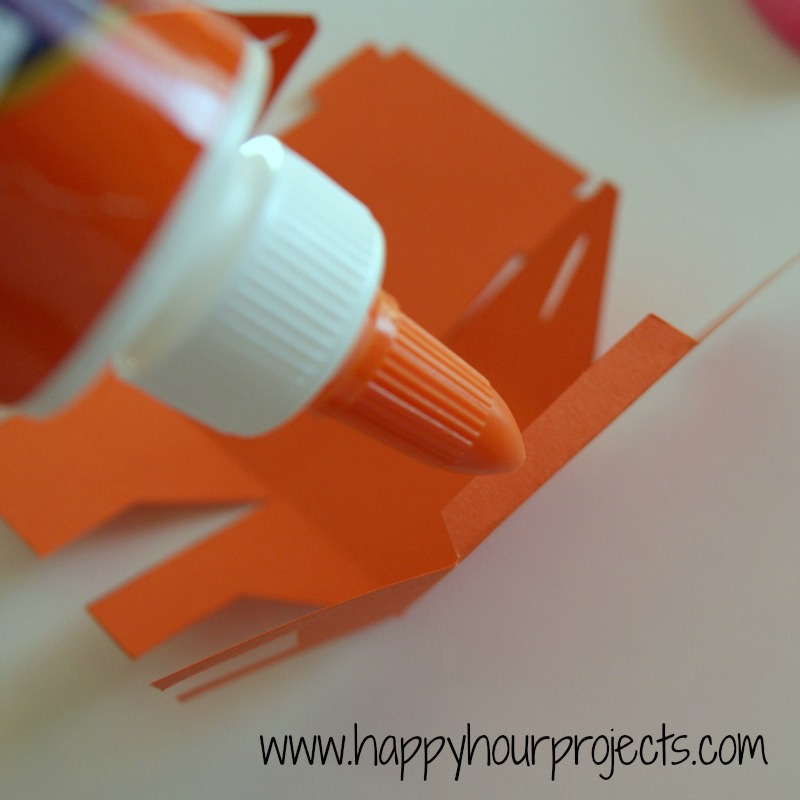
When you get to the end tab, add a couple dots of glue, or a piece of tape to the inside of the box.

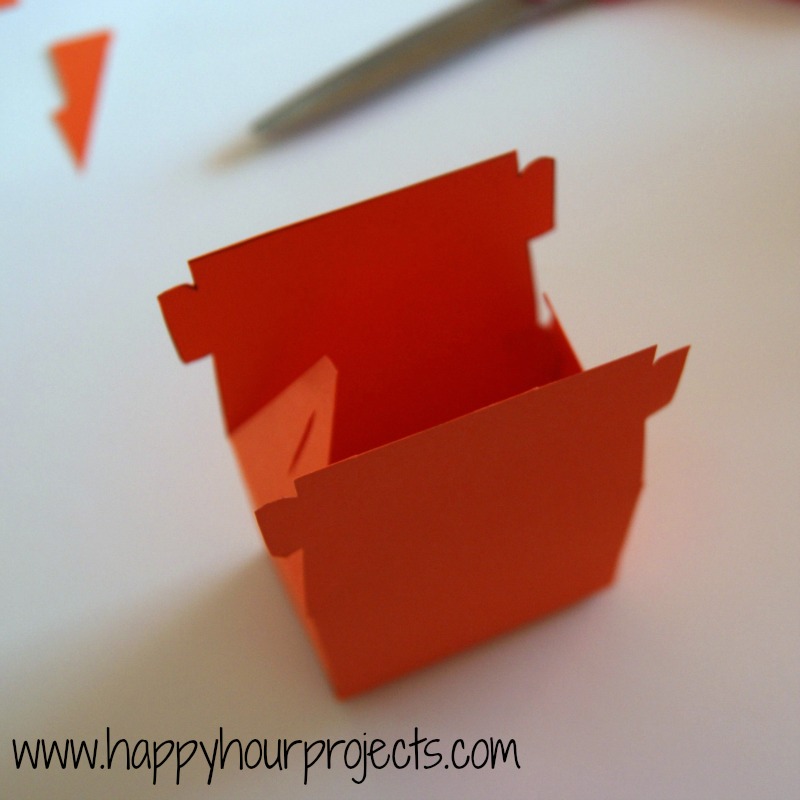
Now, fold the shorter side flaps inward.

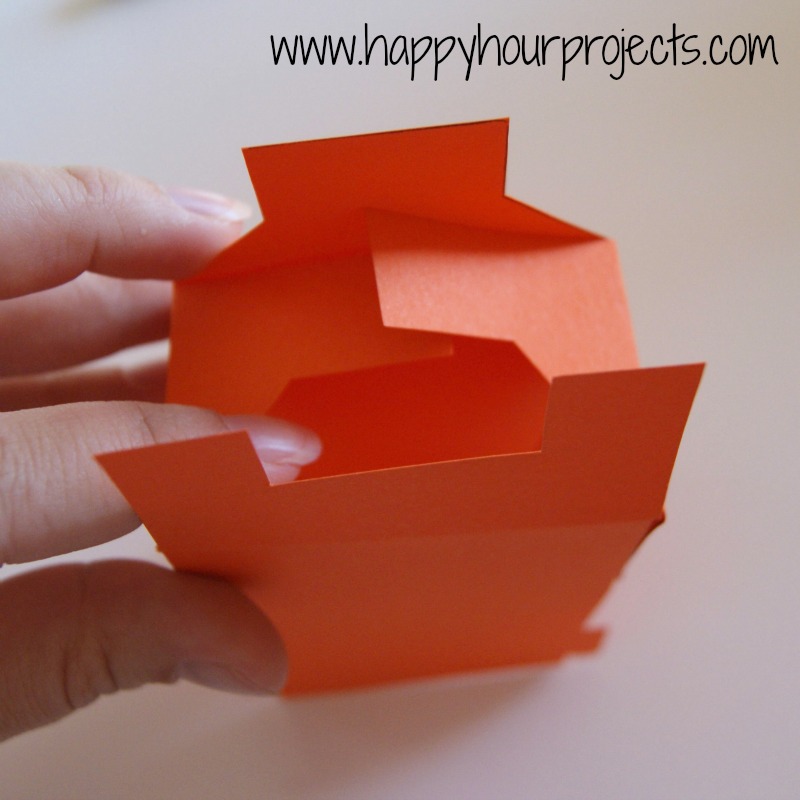
Then, fold the U-shaped tab on top of the side flaps.

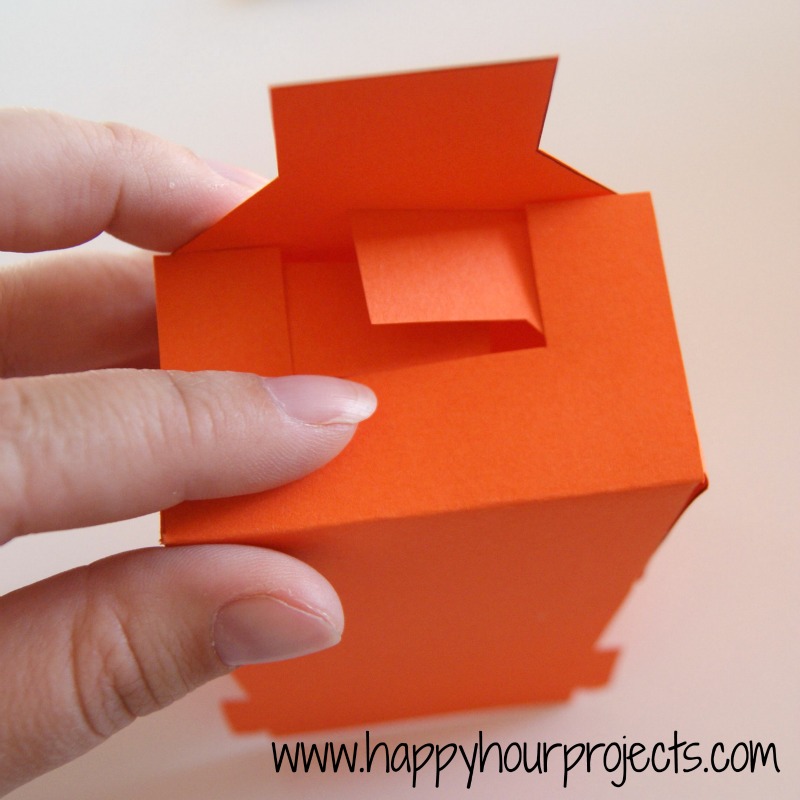
Now, insert the tab on the last flap into the slot from the U-shaped tab.  You should now have a secure bottom to your pouch.

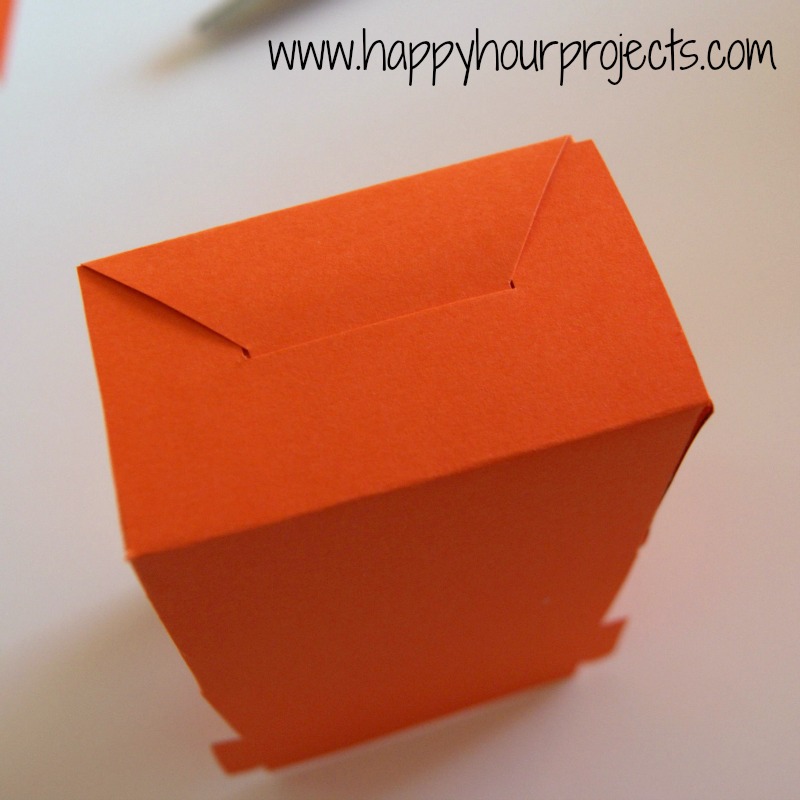
Add a little treat inside, then loop the triangular flaps over the tabs at the top of your pouch.

Yes, mine is empty.  I’ve been very, very good about not buying any Halloween candy yet. ????

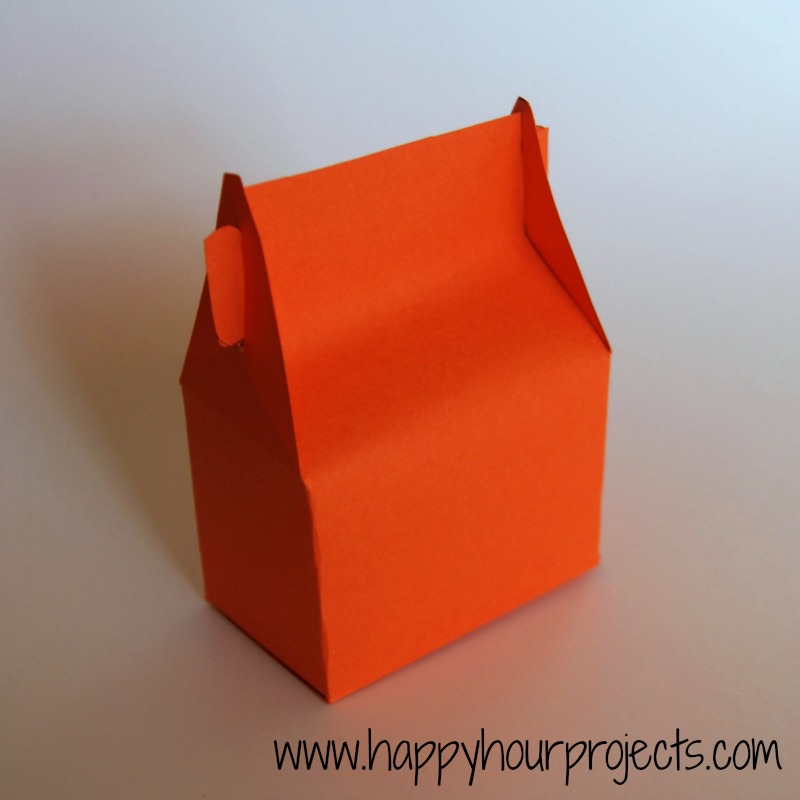
At this point, I decided it needed a little something more, so I used my utility knife to cut two slits in the top tab to run a ribbon through.  A hole punch would probably work even better, but I didn’t have one handy.  I didn’t include this on the template because it’s not necessary to be functional – it’s just for looks and totally optional.  A cute little tag or label would also make a nice touch!

Who are you going to leave a little treat for?

Thanks for having me today, Marilyn – and I hope to see you all over at Happy Hour Projects!

Happy Hour Projects // Facebook // Pinterest // Twitter // Etsy


Thanks Adrainne for this great tutorial!  Check back tomorrow to see what Jen from 4 Marrs One Venus has in store for you!


4 You

Related posts:

DIY Wildberry Vodka & Wildberry Liqueur Made With Frozen Berries
Wednesday Wisdom - How to Make Good Heart Surgery Decisions
Pumpkin Spice Rice Krispy Treats
Shaker Lemon Mini Cheesecakes

Filed Under: uncategorized Tagged With: blogiversary, guest post

« Day 4 of the Blogiversary Celebrataion – Guest Post frin Amy of One Artsy Mama
Day 6 of the Blogiversary Celebration – Guest Post from Jen of Four Marrs One Venus »

Reader Interactions

Comments

  1. Camille @ Growing Up Gabel

    September 20, 2012 at 1:53 pm

    Fun! Totally using this for the kids birthday parties!

    Reply
  2. Anne @ Domesblissity

    September 20, 2012 at 2:16 pm

    I love those printable templates. Thanks Adrianne. I’ve pinned it to use for Christmas gifts. (Although I love it in the orange. Would be great for Halloween.)
    Anne @ Domesblissity

    Reply
  3. BizyStitches

    September 20, 2012 at 2:18 pm

    so darn cute

    Reply
  4. Alilily

    September 20, 2012 at 2:45 pm

    This is so cute!! I downloaded the template and I discovered you can change the size, which means you can make itty bitty cute treat boxes too!!! Thanks for sharing, Adrianne!!

    Reply
  5. April

    September 20, 2012 at 2:53 pm

    That is super cute! Love it!

    Reply
  6. Kadie

    September 20, 2012 at 5:39 pm

    Such a great idea!! My kids would love to see this sitting on their bed!:)

    Reply
  7. Kelley @ TheGrantLife.com

    September 20, 2012 at 7:23 pm

    Oh thats awesome! Im going to save it and use for a special occasion

    Reply
  8. Kristin G

    September 21, 2012 at 2:16 am

    Such a cute little box, thanks for sharing:)

    Reply
  9. Holly Lefevre

    September 21, 2012 at 5:40 am

    Such a great box – I have so many ideas for using a cutie like this!

    Reply
  10. Balijo Sandana

    January 4, 2013 at 7:59 am

    Thanks for the FANTASTIC post! This information is really good and thanks a ton for sharing it. I m looking forward desperately for the next post of yours.
    Cheap Assignments

    Reply
  11. Jones Volkoba

    January 6, 2013 at 6:09 am

    I’m very thankful to the author for posting such an amazing post..!
    uk essays

    Reply

Leave a Reply Cancel reply

Your email address will not be published. Required fields are marked *

Recent Recipes

  • Kopanisti Dip Recipe (Roasted Red Pepper Feta Dip)
  • Knitted Collegiate Scarf Pattern
  • KitchenAid Giveaway – Mixer & Ice Cream Attachment
  • DIY Minion Composition book
  • 5 Frozen Desserts

Popular Recipes

  • Drunken Chicken - J Gumbo Inspired Drunken Chicken – J Gumbo Inspired
  • Homemade Fabric Softener for Use in Your Washer
  • Crocheted Green Egg & Ham eos lip balm Crocheted Green Egg & Ham eos lip balm
  • Craft Lightning Camp Crafts - Make a Sleeping Bag Potlatch (Girl Scout Swap) Craft Lightning Camp Crafts – Make a Sleeping Bag Potlatch (Girl Scout Swap)
  • Salted Caramel Vodka (#HomemadeHolidays) Salted Caramel Vodka (#HomemadeHolidays)
  • We Are Thankful for the #SilhouetteChallenge (Thanksgiving Place Cards) We Are Thankful for the #SilhouetteChallenge (Thanksgiving Place Cards)
  • Simple Toe Up Knit Footies Simple Toe Up Knit Footies
  • Large Raised Box Stitch Crochet Basket Large Raised Box Stitch Crochet Basket
  • Hop on Pop Mug (#CraftLightning #FathersDay) Hop on Pop Mug (#CraftLightning #FathersDay)
  • Party Thyme - Get Your Grill On Link Party AND Spice Giveaway! Party Thyme – Get Your Grill On Link Party AND Spice Giveaway!

Copyright © 2019 4 You With Love on the Foodie Pro Theme