It’s day 2 of my blogiversary celebration. Today we have Mel from the Crafty Scientist. She’s sharing with you one of the most clever crafting ideas I’ve seen. Check it out!
Hi guys! I’m SOOOO excited to be here today and helping Marilyn celebrate her blogiversary (congrats – wohoooooo)! Marilyn is super-sweet and I’m so excited to be here!

That’s me, Mel. I blog over at The Crafty Scientist and I like to share lots of my crafty/DIY projects as well as pictures of my super-cute puppies (they’re both 5 years old, but will always be puppies to me)! (That’s Max on the left and Bella on the right.)

I just moved to Maryland and so I was scrambling to try to figure out something I could share with you and Marilyn was awesome enough to suggest that I show you my interchangeable wreath. I’m pretty insanely proud of this “invention” and so I jumped at the chance and I’m so excited to show you how to make your own so that you don’t have to store or buy more wreath forms or wrap another yarn wreath (how awesome is that? Seriously, I love making wreaths, but I hated those parts of the process… and now they’re gone)!
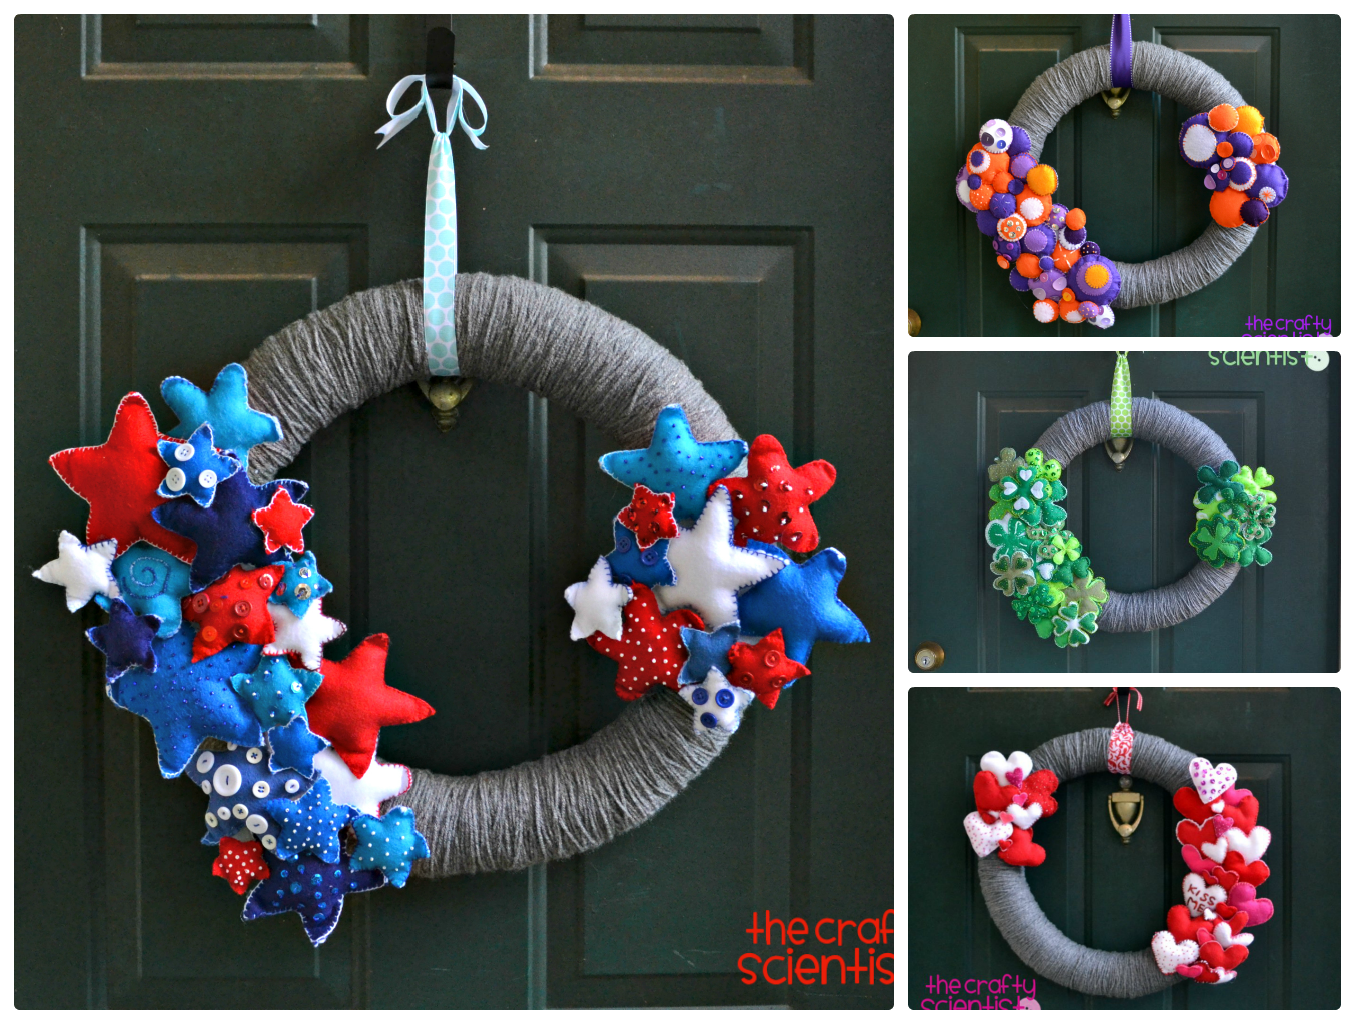
These are several versions of the interchangeable wreath that I’ve put together already (in case you weren’t already ready to make one)…
Ready to make your own? Here’s how…
Supplies
- Wreath form
- Yarn
- Velcro
- Hot glue gun and glue
- Felt
- Different colored felt, thread, embroidery floss, needles, sequins, beads, and buttons (as desired!)
- Batting/stuffing for embellishments
- Ribbon/material to hang up the wreath
Instructions
Grab your wreath form and wrap it with yarn. Grab a movie or some TiVo’d TV or something to entertain yourself because this takes awhile. But remind yourself that you only have to do it once!
Determine what kind of attachments you want – if they’re for football season and team colors or Thanksgiving and fall, etc. Grab the felt, thread, embroidery floss, buttons, sequins, beads, etc. in the colors you want to make your embellishments and then start sewing and stuffing those shapes. I made embellishments for the left and right sides of the wreath, but you can do this for only one if you want.
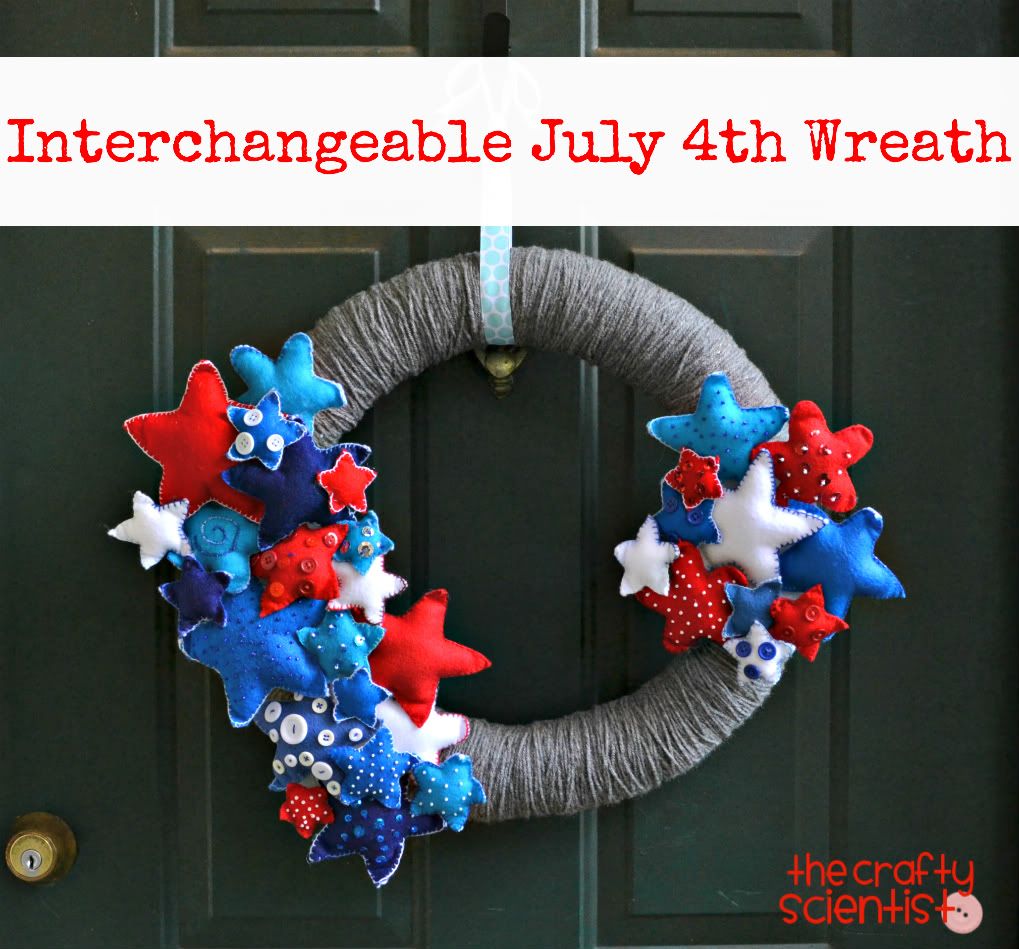
For St. Patrick’s Day, I made some shamrocks. For Valentine’s Day, there were hearts; July 4th had stars; and my Clemson-y wreath had polka dots. Make a whole bunch of whatever you want. These are what I’ve made…


Then, cut out some felt and glue your embellishments (hearts, stars, whatever) to the piece of felt that’s shaped like a part of your wreath.

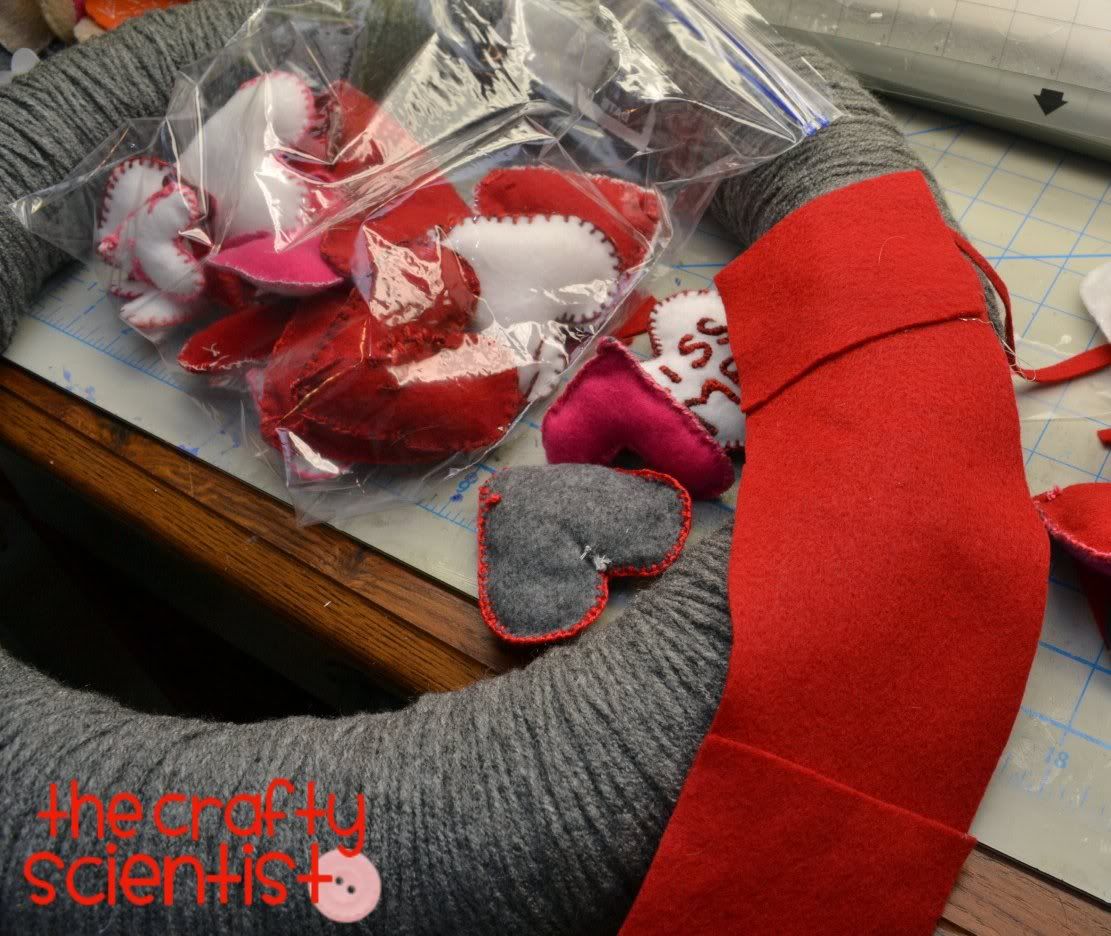
Glue some Velcro pieces to the back of those felt pieces. Then cut up some Velcro pieces (the opposite of the ones on your felt embellishments) and hot glue them to your wreath form. My biggest tip here is to alternate the pieces so you have one soft one and then one rougher piece, one softer, etc. and then you use relatively equal amounts of the two types for your embellishments and don’t end up needing only one type of Velcro. So basically, do NOT do what I did in the pictures.

Attach your embellishments using the velcro and then add a ribbon to hang up your wreath and voila! You can change it out for all kinds of events and seasons and there’s no more buying and storing wreath forms or yarn wrapping them! Ta da!
Just in case you needed some more inspiration, here are the wreath attachments I’ve made so far…

All dressed up for the 4th of July…. You can see more details about how I made the star attachments here.
This is the wreath set up with fun orange and polka dots – a little Clemson spirit (read more here)!

And here’s the wreath set up for St. Paddy’s Day! (Read more about these attachments here.)

And the Valentine’s Day version (read more here)….

There you have it – the interchangeable wreath! A HUGE thank you to Marilyn for having me here today and I hope you’ll come visit me at The Crafty Scientist!

I love this idea – very clever indeed!
I love that it’s ONE wreath! And all the changeable parts– Perfect and so Clever!!!
Very clever! So glad I discovered your blog, too! Thanks for stopping by mine!
What a great tutorial. How wonderful to meet a new blogger, hi Mel, nice to meet you :)…and celebrate another day in your blogiversary celebration.
That’s terrific! What a great idea. Great way to celebrate another day of the blogiversary!
Anne xx
That is wonderful!
This comment has been removed by the author.
Yahooo! finally I get much points for my thesis writing project from this blog it is awesome and fully informative for me…
avoide plagiarism