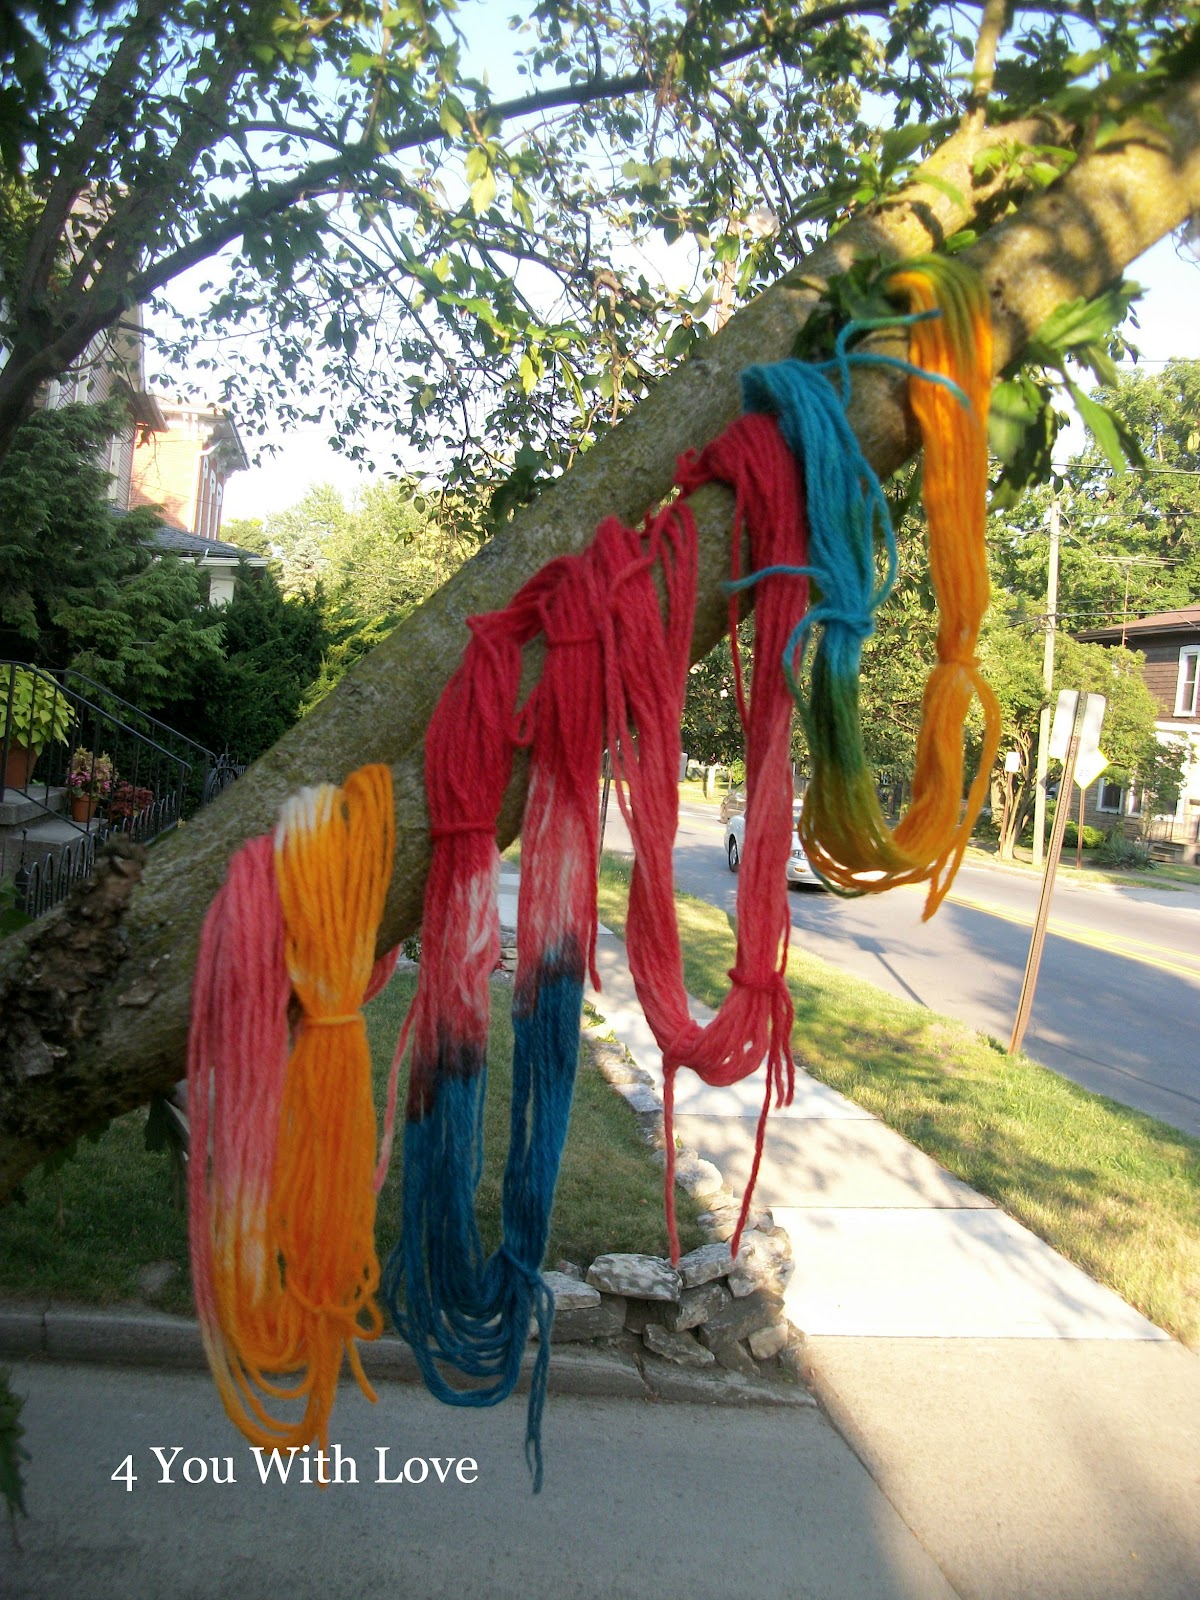
Okay, I’m sure my neighbors think I’m crazy. I’ve been outside with bowls of Kool Aid and yarn all over the porch, yard and walkway. Then there’s been yarn hanging from the tree to dry…..and don’t forget me and my camera! Here’s the results of this week’s experiments to create multi-colored sun dyed yarn using kool aid, water, and vinegar.
Last week, I posted how to sun dye wool yarn with Kool Aid. If you missed that post, you can find it here. It’s easy, fun, inexpensive and doesn’t require any fancy or special tools or supplies.
Okay, back on topic: sun dying yarn so you produce a multi-colored yarn. Let’s take a look at the different methods I tried (my hanks of yarn were about 20 yards each):
Method 1:
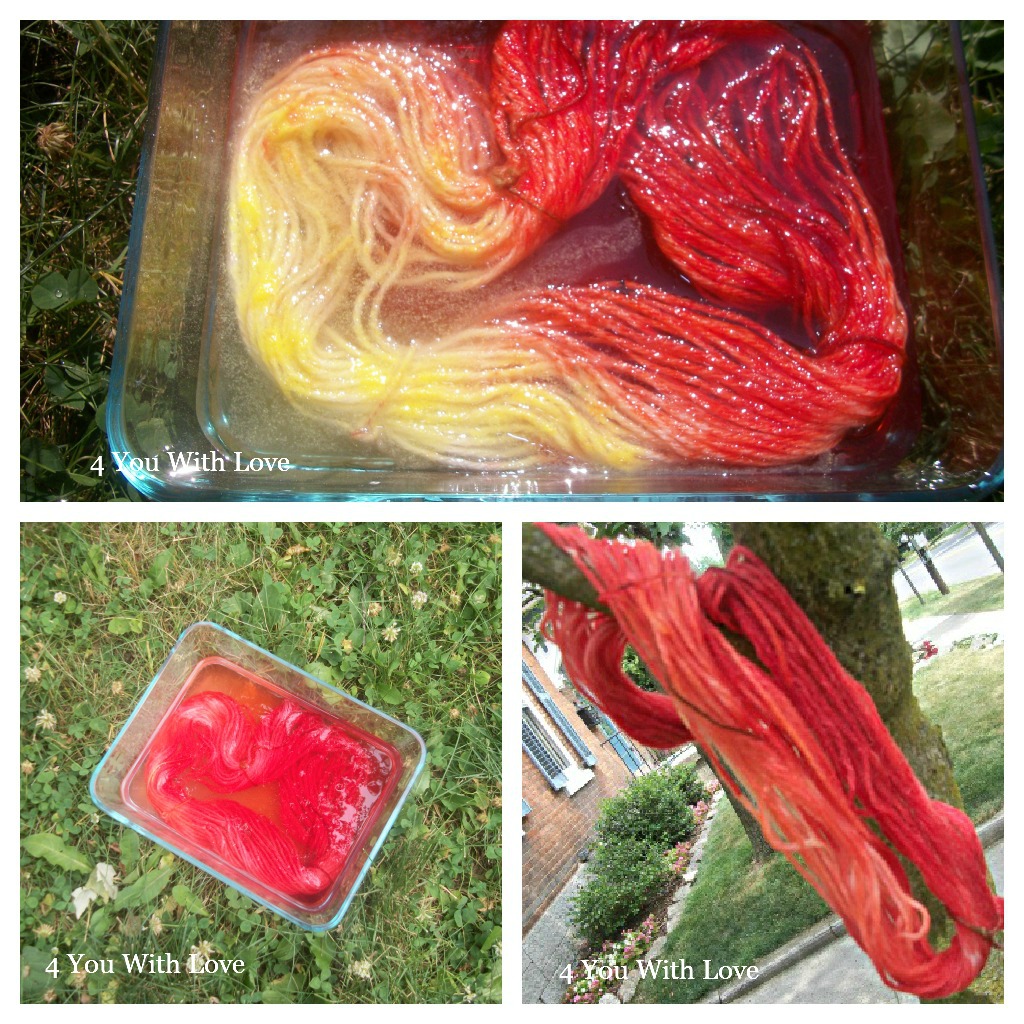
I placed my soaked yarn in a pyrex bowl with 2 cups water and 1 tbsp of white vinegar. I then sprinkled lemonade Kool Aid on one side and cherry on the other. It started out great but if you look at the bottom left photo, you will see that after 2 hours, the cherry Kool Aid had taken over. The final yarn did not come out as half yellow and half red, and I had planned, but rather a subtle half red/half orangy yarn. Still pretty, just not what I expected.
Method 2:
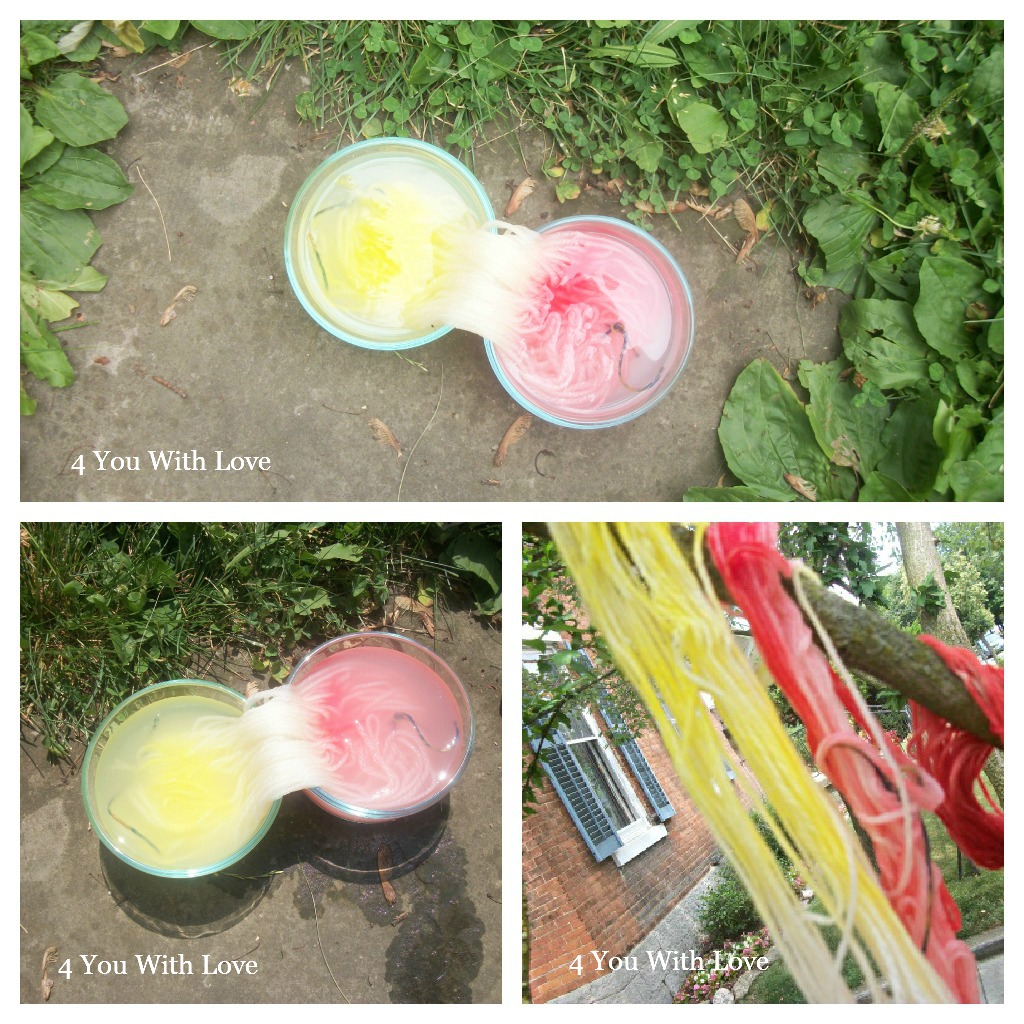
In this method, I used a superwash 100% wool that I had leftover from another project. Anyway, I placed two bowls with 1 cup water and 1 Tbsp white vinegar in each side by side. I then draped my yarn so that it would be both bowls. I then sprinkled 1 packet of lemonade in one bowl and 1 packet of pink lemonade in the other. The color did not blend well (see top photo) so I used a spoon to gently stir each bowl (the lower left photo is the result of this stirring). I had thought that the colors would wick up the center and I would have a yellow/orange/pink yarn. The superwash wool does not seem to wick as well and the colors were somewhat spotty. I believe this is a result of using superwash wool.
Method 3:
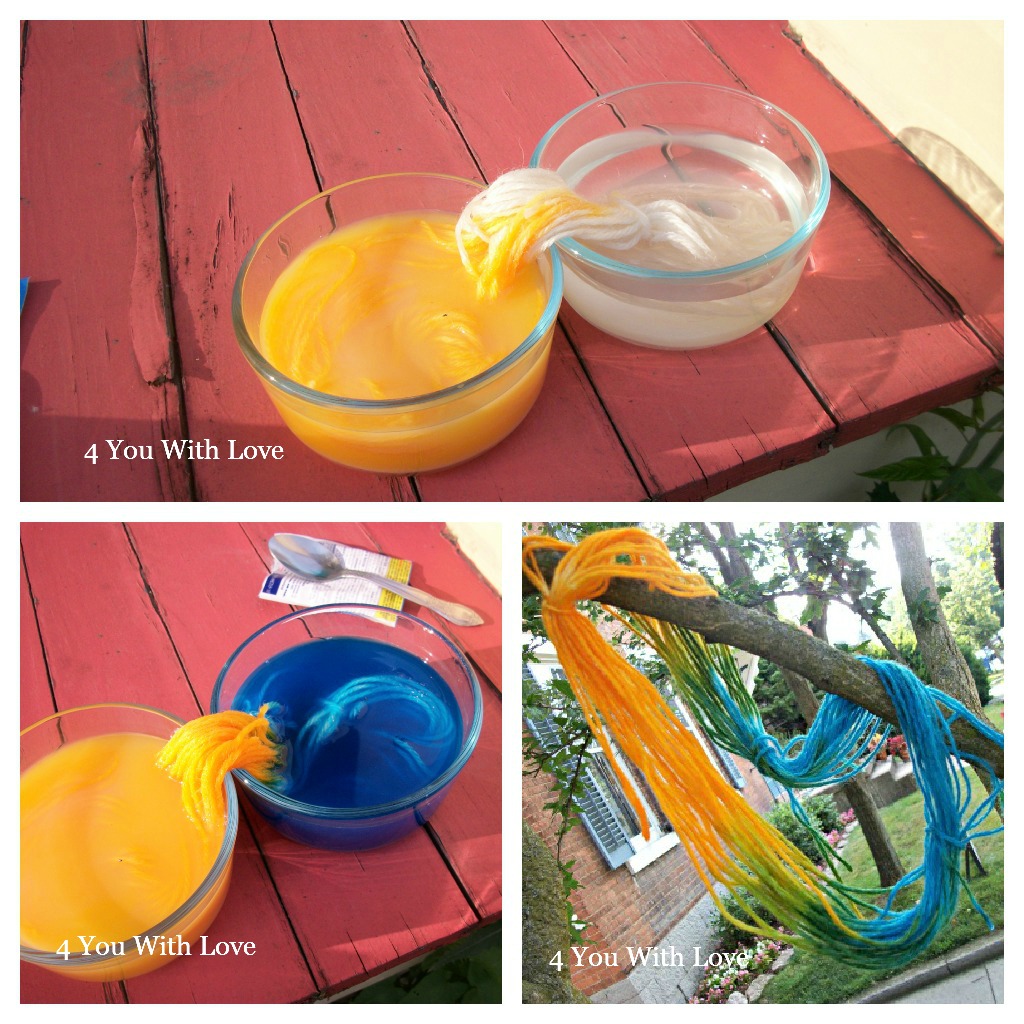
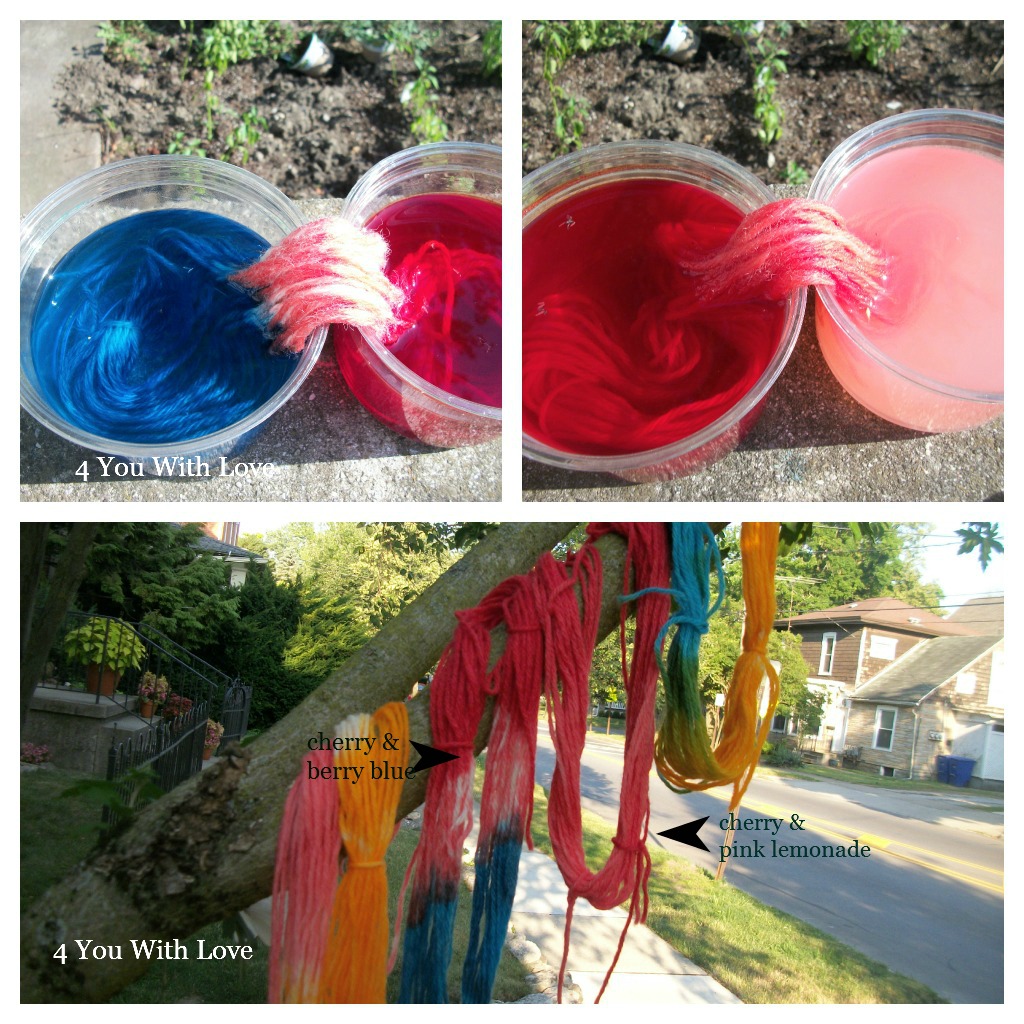
I started with two bowls that each had 1 cup of water and 1 Tbsp white vinegar. Before adding the yarn, I mixed mango/peach Kool Aid in one bowl. I then placed my yarn in both bowls: half in each one. I kept the one half in the water/vinegar mix so that the yarn would stay wet. If you look at the top photo, you can see how the yellow is wicking up. After 1 hour, I lifted the non-dyed half out of the water and stirred in berry blue Kool Aid in the second bowl. I then placed the yarn in the second color. This yarn worked out as I had envisioned: yellow/green/blue.
Method 4:
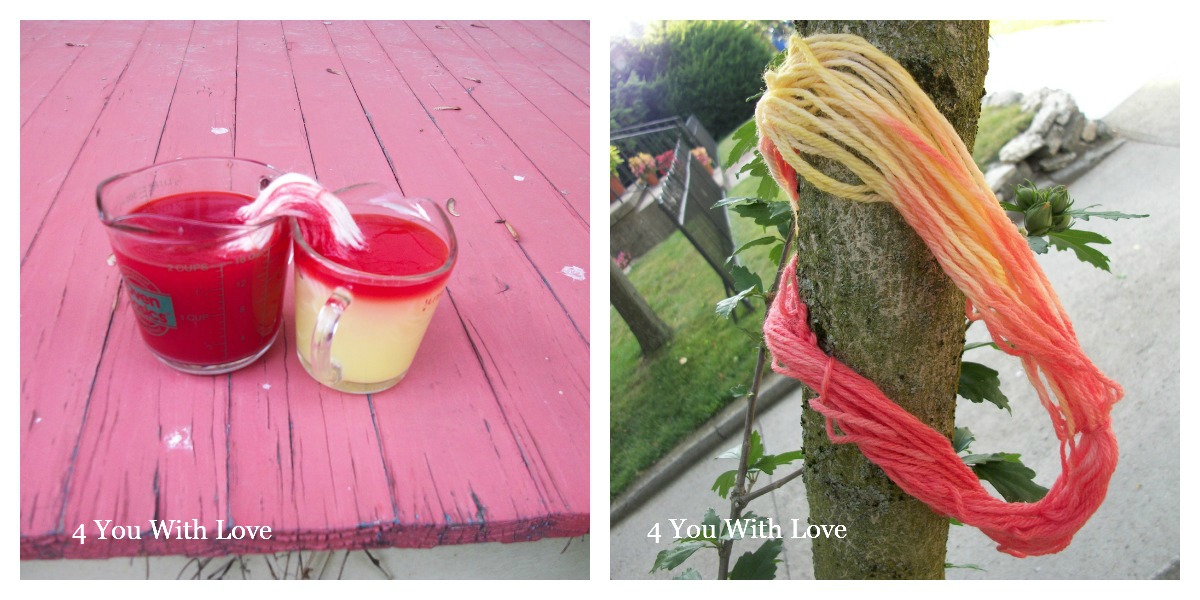
With this method, I had two measuring cups prepared with 1 packet Kool Aid (fruit punch in one and lemonade in the other), 1 Tbsp vinegar, and 1-2 cups of water. I then placed my soaked yarn half into each cup. Look how the red jumped over from one cup to the other. Because of this transfer, I removed the yarn before the remaining color was clear (I didn’t want a yarn that turned out the same as method 1). This resulted in a yellow/orange/pink yarn.
Method 4 – More Results
You can’t tell by the picture but the top left was my attempt to create a red, white and blue yarn. The bowls were not filled and there was a fair amount of “white” yarn. Well, as you can see, the red bled over again. The right picture was my attempt to make a pink/white/red yarn. As with the other experiments, the red bled over and created a very subtle red/pink yarn.
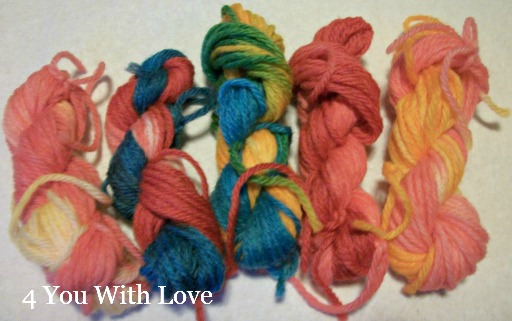
Here are some of my experiments all wound into skeins. Pretty cool…huh?
This is definitely a fun activity. Some take-aways for you.
- Superwash 100% wool does work…but it seems to work best if the Kool Aid/water/vinegar mixture is prepared ahead of time. Also, it seems that superwash wool does not wick up the color much so you will probably get a white streak.
- Dark red Kool Aid mixes (cherry, fruit punch) tend to wick up the most. They probably have the highest concentration of dye in the mix and so you may want to have a ratio of 2 packets of a lighter colored Kool Aid to 1 packet of a red Kool Aid….and use more yarn.
- I find the best method is method 3. If you would like to have a larger “mix” area you can have say 2/3 of the yarn soaking in the lighter color for the 1st hour. Then, when you stir up the darker colored Kool Aid, place 2/3 of the yarn in that bowl (1/3 is un-dyed and 1/3 is dyed with the lighter color).
Have fun!
4 You
Wow I had no idea Kool Aid could dye things! So clever!
Your colors look so bright and beautiful, who knew Kool aid? Please stop by my blog I have an award for you if you would like to participate.
What an amazing idea! it looks so great, beautiful colors!!!
LOVE IT!!!! My daughter wants a Macaw themed birthday party… this might just come in handy for decorations!
Thanks so much for sharing this at The DIY Dreamer.. From Dream To Reality! I can’t wait to see what you link up this evening!
This looks like a lot of fun! I’ve used Kool-Aid with my slow cooker to dye yarn, but since I’m in Texas, it only makes sense to use the sun that’s going to be beating down on us for the next few months. Love the mixing of the colors with the 1/3s particularly.
I had hoped you would post something on how to do 2 colors in the same skein. This is too cool! Thanks so much for sharing on Tout It Tuesday! Hope to see you next week.
They make think you are crazy but they will probably want a little of that crazy too. Rachel x
This is beautiful yarn. I have a natural yarn that I bought years ago to do this with and never did. I will have to try it now. you make it look so easy. Does the dye bleed, or is it colorfast.
I have a Blog Hop, and I would love it if you would link this post. You can find it at
http://www.adornedfromabove.com/2012/06/natural-hair-gel-and-wednesdays-adorned.html
It is called Wednesdays Adorned From Above Blog Hop.
I hope to see you there. Have a great Day.
Debi Bolocofsky
Adorned From Above
Thank you for telling me how to turn on my email reply stuff. I really appreciate it. I did not realize until you sent me the message that people could not reply to me. Thank you so much for linking with “Wednesdays Adorned From Above Blog Hop”. I love your yarn. Hope you link again this Wednesday.
Debi Bolocofsky
http://www.adornedfromabove.com
Clever idea. Thanks for sharing at the All Star Block Party.
Holly
This is such a KOOL idea… lol
I love it!!!
Thank you for linking up to the ALL STARS BLOCK PARTY!!!
Carri
simplydonewright.blogspot.com
I saw this project earlier this week and wanted to tell you how cool it is!
That’s why you never want to spill Kool Aid But seriously, those are beautiful colors.
What a neat and clever idea…thanks for sharing and linking up with us @ Toot Your Horn Tuesday!
Erin
Love the colors!! Using Kook-aid – what a great idea! Thanks for sharing this at Romance on a dime!!
What a brilliant idea – I love the fact you showed all the different ways to do this!
This is AWESOME! Thanks for linking up to “Strut Your Stuff Saturday!” Hopefully we’ll see you tomorrow at 8pm MDT for this week’s party! -The Sisters